Add Test Devices to Validate Notification Delivery
You can add internal Test Devices to validate notification delivery for your website before the iZooto implementation is made LIVE for the entire user base. This helps to test different features of the notification delivery like where exactly the delivered notifications show up on different devices, how the UI/UX of the notifications look on different browsers & different devices, etc.
This document talks about how you can add your test devices to the iZooto panel and then use them to validate iZooto web push implementation and notification delivery.
Prerequisites
- The iZooto web push setup is done for the website - either by adding the codes manually or by using the WordPress plugin.
- Ensure you are subscribed to receive notifications on the test device.
Once the above are met, follow the steps below to add test device(s) on the iZooto panel.
Step 1: Getting your Unique Browser Token
Access the Browser Developer Tools Console
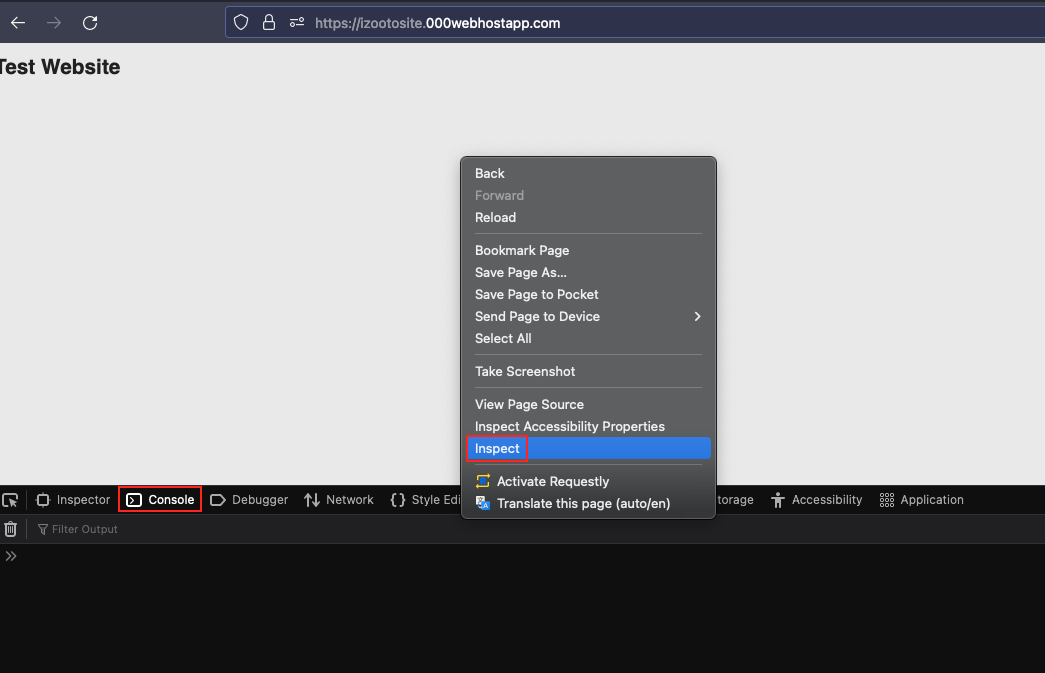
Accessing the Console in the Browser Developer Tools
Desktop Debugging
Chrome - Right-click on the page, click Inspect, and then click the Console tab on the popup window that opens up.
Firefox - Right-click on the page, click Inspect Element, and then click Console tab on the popup window that opens up.
Safari - Go to Safari > Preferences > Advanced and make sure Show Develop Menu in Menu Bar is checked. Then, on your website, right-click, click Inspect Element, and then click the Console tab on the popup window that opens up.
Note!
Push Notifications on Safari on MacOS only work if the Safari Web Push Certificate is configured for the website.
Android Debugging
Chrome on Android - Enable USB Debugging, connect your device to your computer and access the Dev Tools with chrome://inspect#devices in your Desktop Chrome browser.
Firefox on Android - Enable USB Debugging, connect your device to your computer and access the Dev Tools with about:debugging in your Desktop Firefox browser.
Get the Browser Token
Run the below in the console:
_izooto.UUID
If you are subscribed, you should see an alphanumeric response, which is the browser token:

If you see blank quotes ("") or any other error after running the above script, it means there is an issue with the iZooto implementation on the website. Check our Troubleshooting guide for resolving the issues.
Step 2: Adding the Browser Token to the iZooto Panel
Once you have the browser token with you, follow the below steps to add it to the iZooto panel:
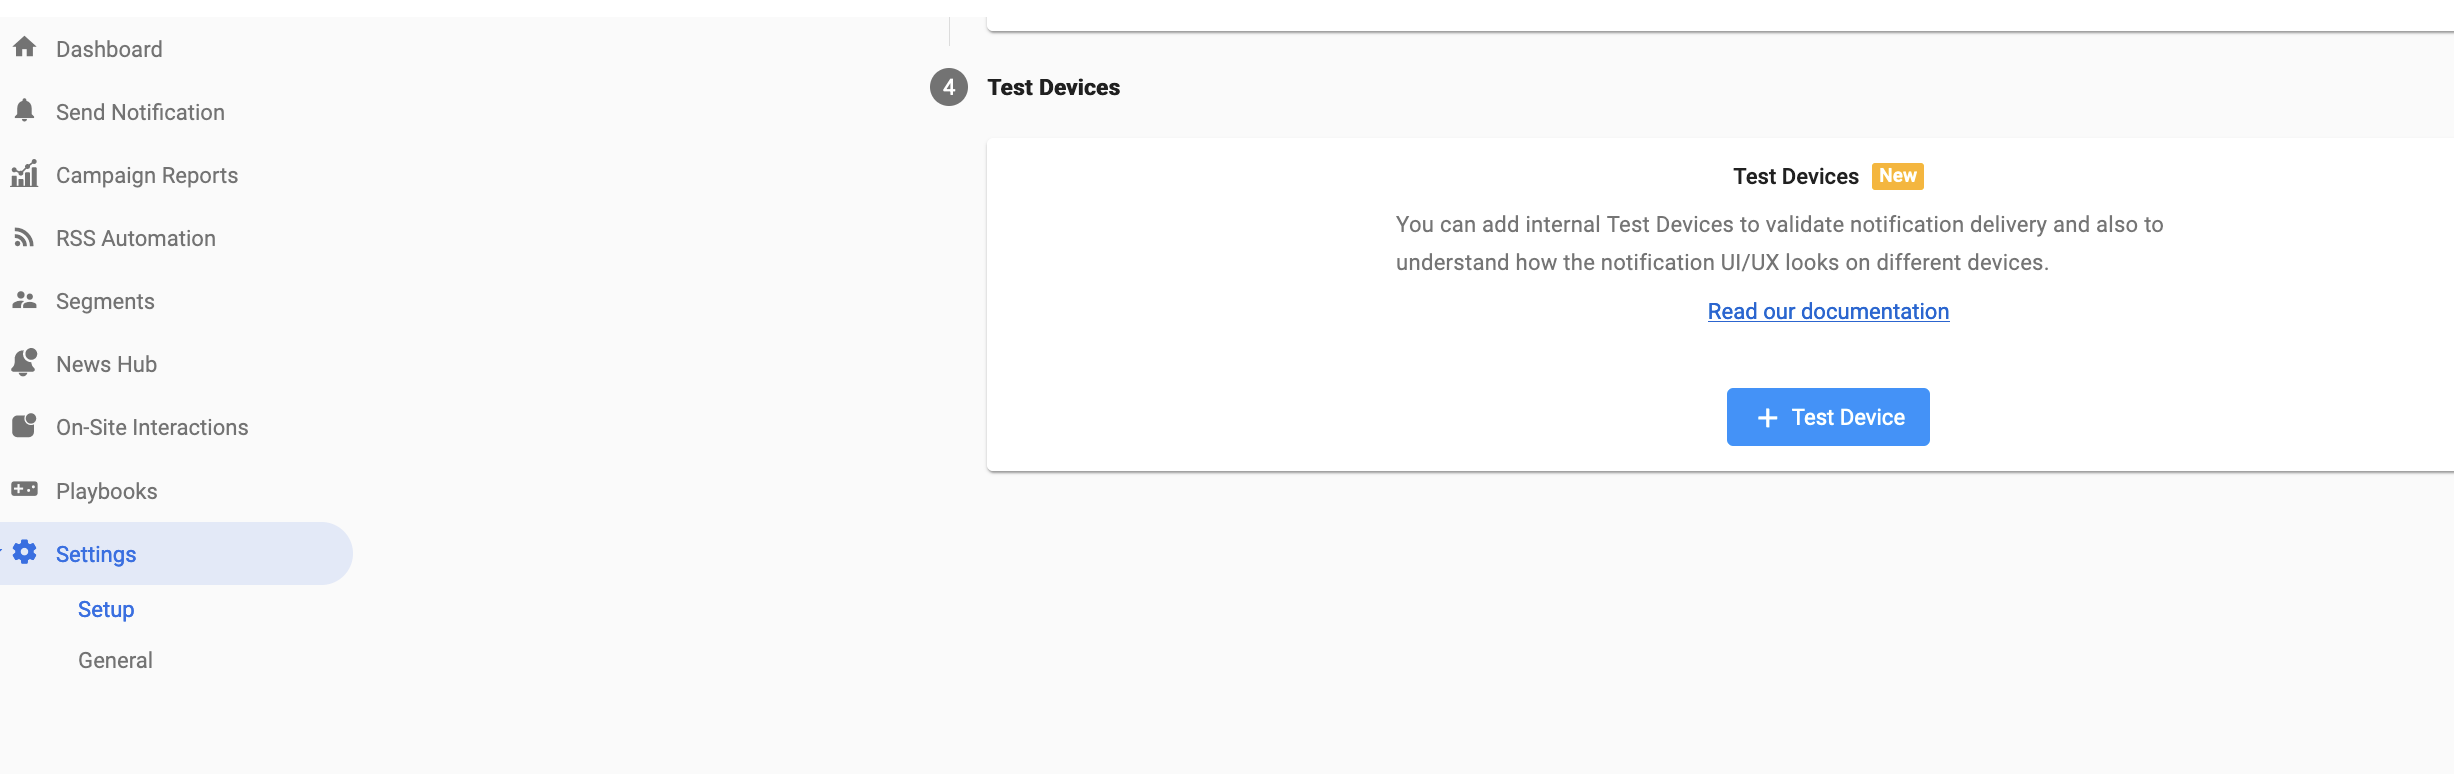
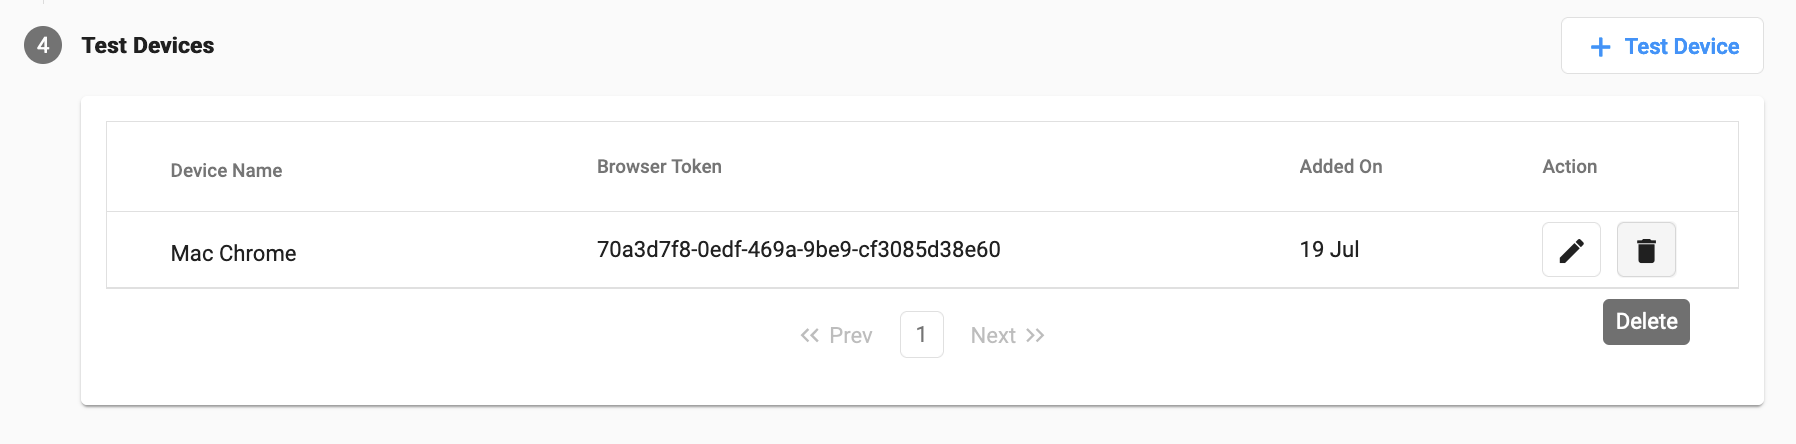
2.1 Navigate to Settings > Setup > Test Devices on the iZooto panel.
2.2 Click on + Test Device.
2.3 Add a unique Device Name that is easier for you to differentiate & identify and the Browser Token that you got in Step 1.
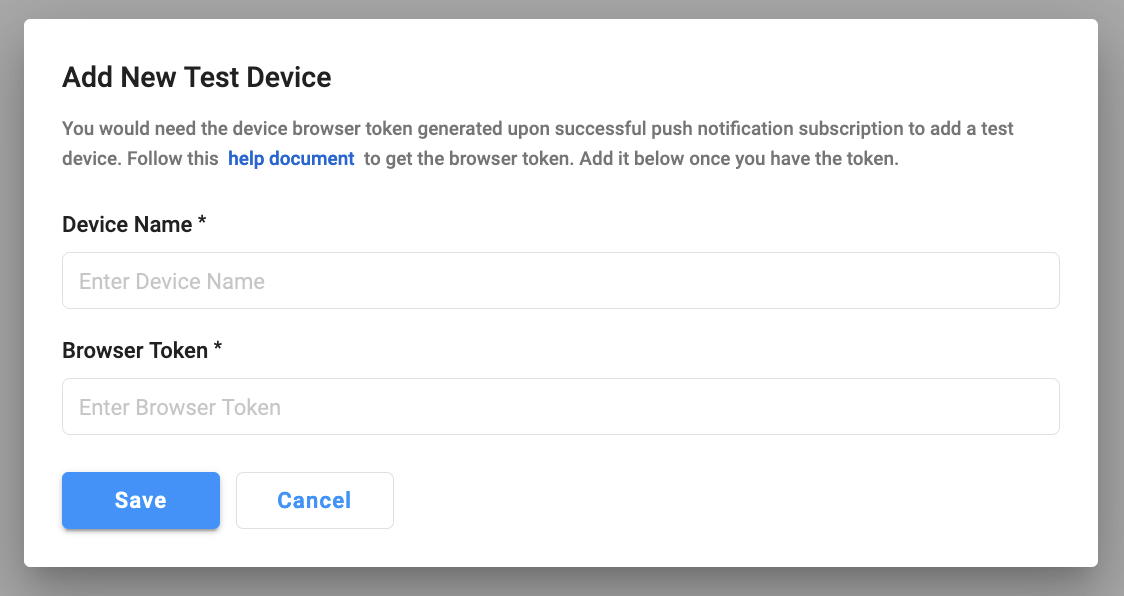
2.4 Click on Save.
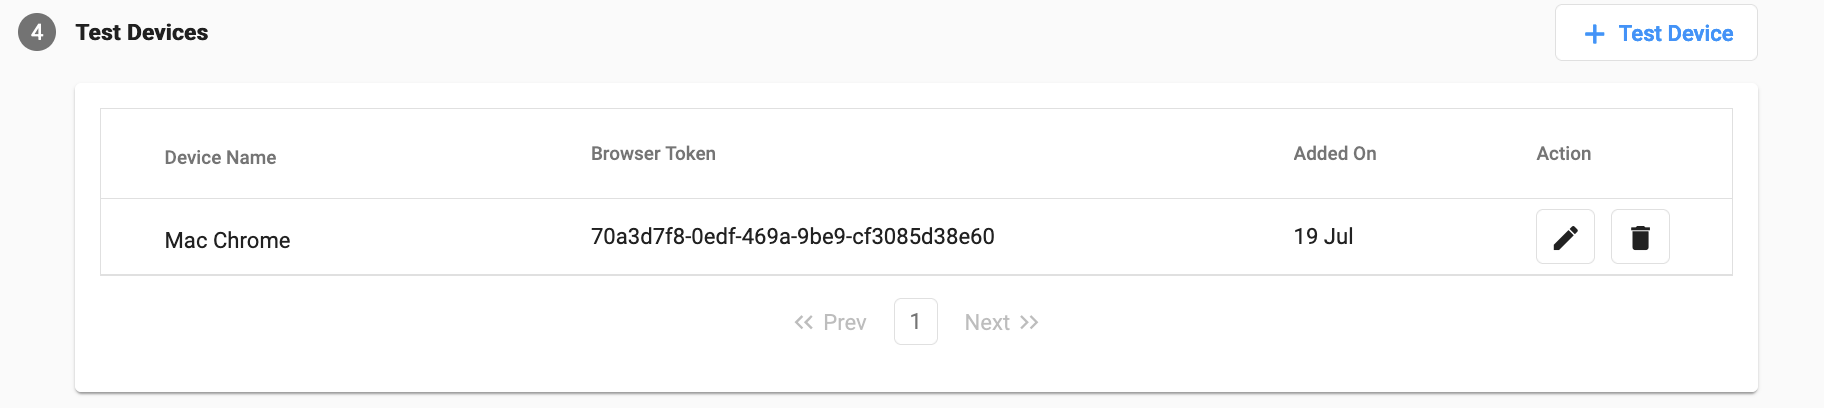
Once the device(s) is added successfully, you will be able to see them under the Test Devices section on the Settings > Setup page.
Note!
You can only add a maximum of 10 test devices for a website.
Step 3: Sending a Notification to the Test Devices
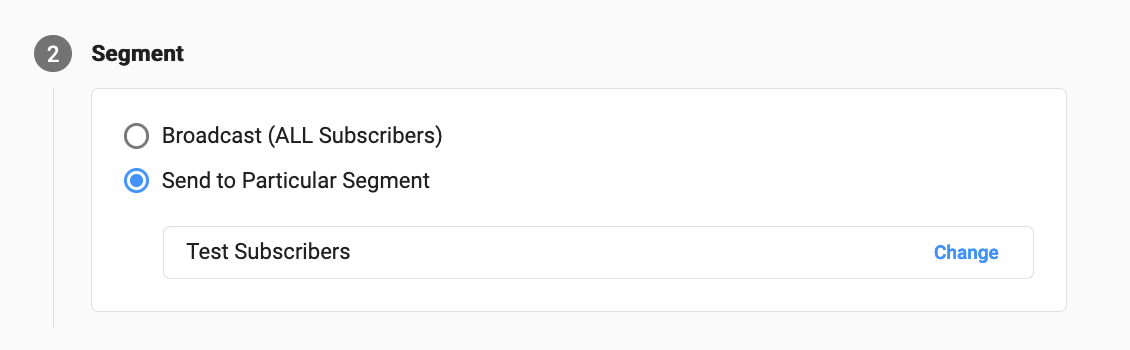
Once the test device(s) is added, a new Segment will be created containing this test device(s). The name of the segment will be Test Subscribers and can be found on the Segments page on the iZooto panel.
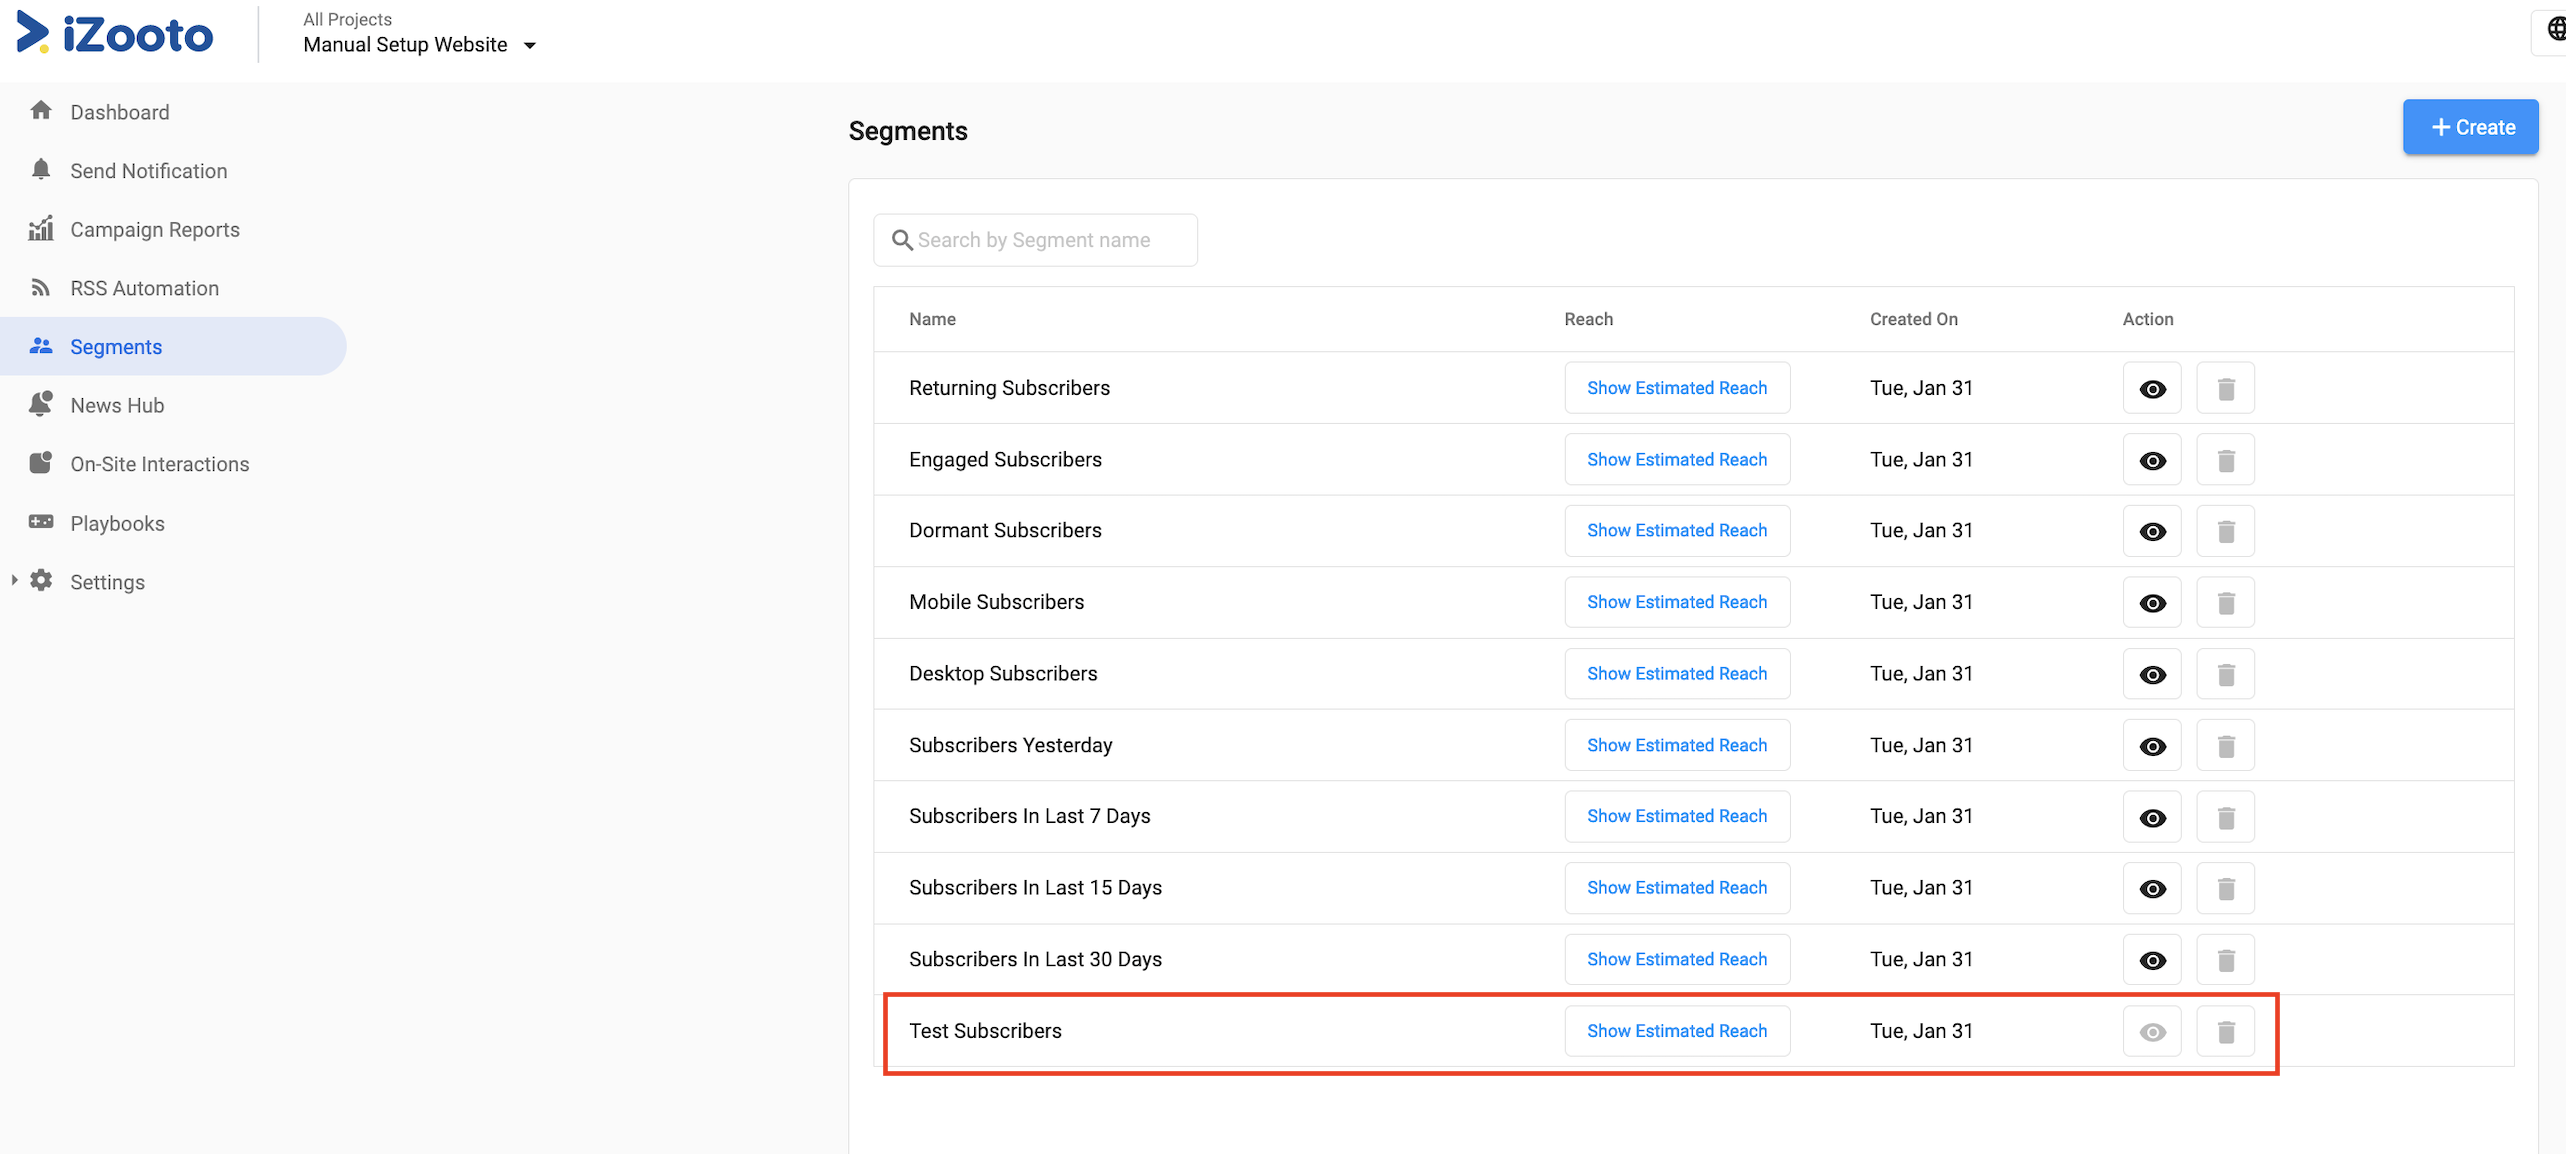
The only thing that needs to be done, to send a notification to the added test device(s), is to select this Test Subscribers segment while sending out a notification from the Send Notification page on the iZooto panel or using Rest APIs.
Done!
You have successfully added a test device(s) to the iZooto panel and sent a test notification.
Modifying Test Devices
You can either Edit or Delete the Test Device(s) added to the panel.
Click on the Edit icon to edit an existing Test Device. Note that you will only be able to edit the Device Name.
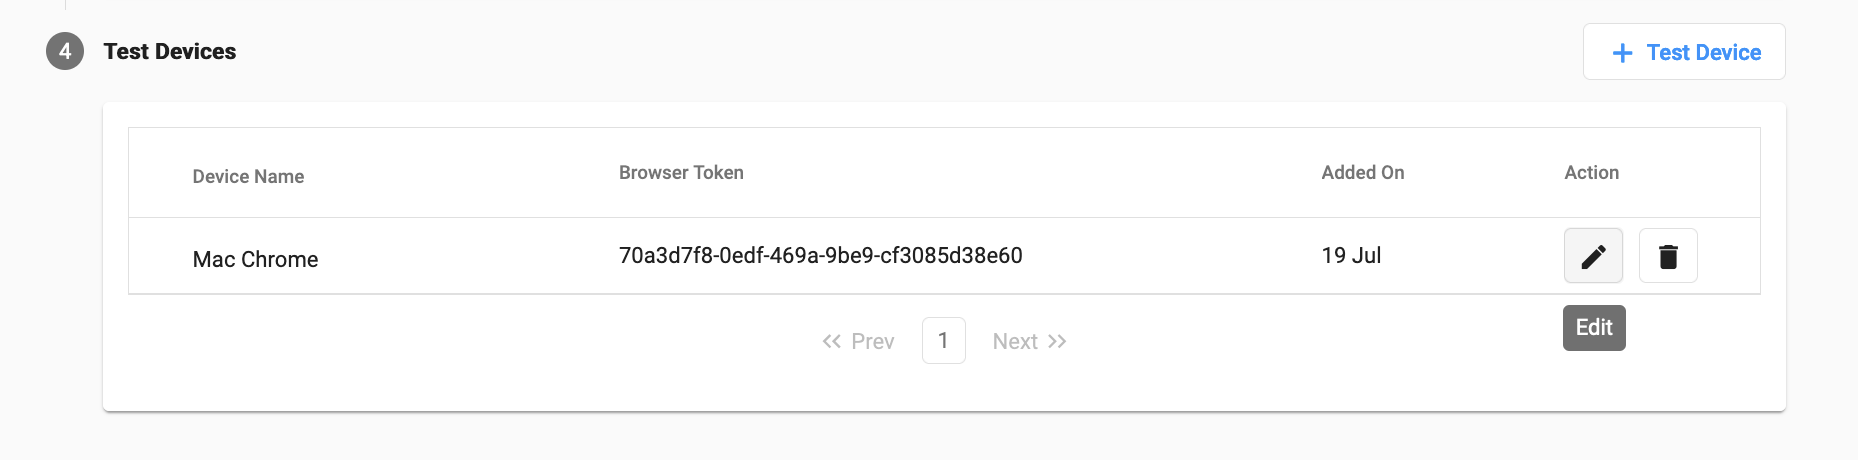
Click on the Delete icon to delete an existing Test Device.
Updated about 3 years ago