Exit Intent Recommendations
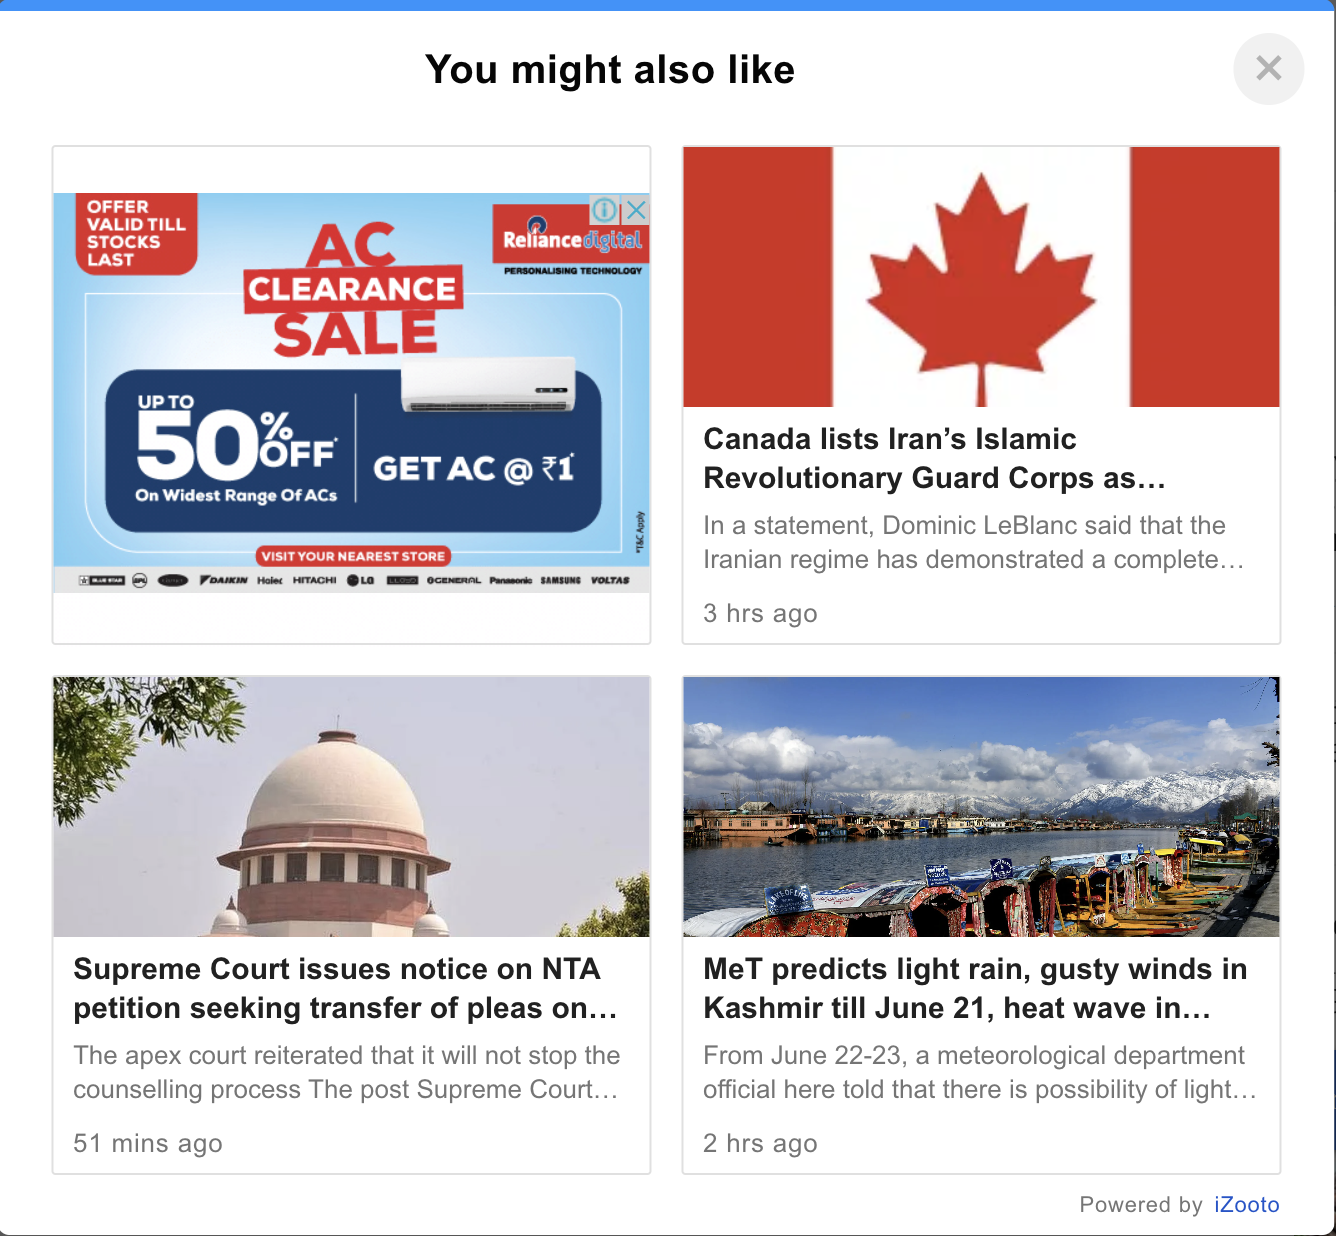
Recommend recently published articles to end-users in a modal on the web page.
Exit Intent Recommendations is an On-Site Interactions template that can keep the end-users engaged on the website by showing them recommended articles and preventing drop-offs.
Setup
Once the prerequisities are completed, reach out to our Solutions team or your dedicated Account Manager to start the configuration process.
Once you receive confirmation that this has been configured, follow the below steps for setup and publish to the website.
Step 1
Click on the On-Site Interactions button in your dashboard -

Step 2
Click on Get Started -

Step 3
Click on the Continue button in the template for Exit Intent Recommendations -

Step 4
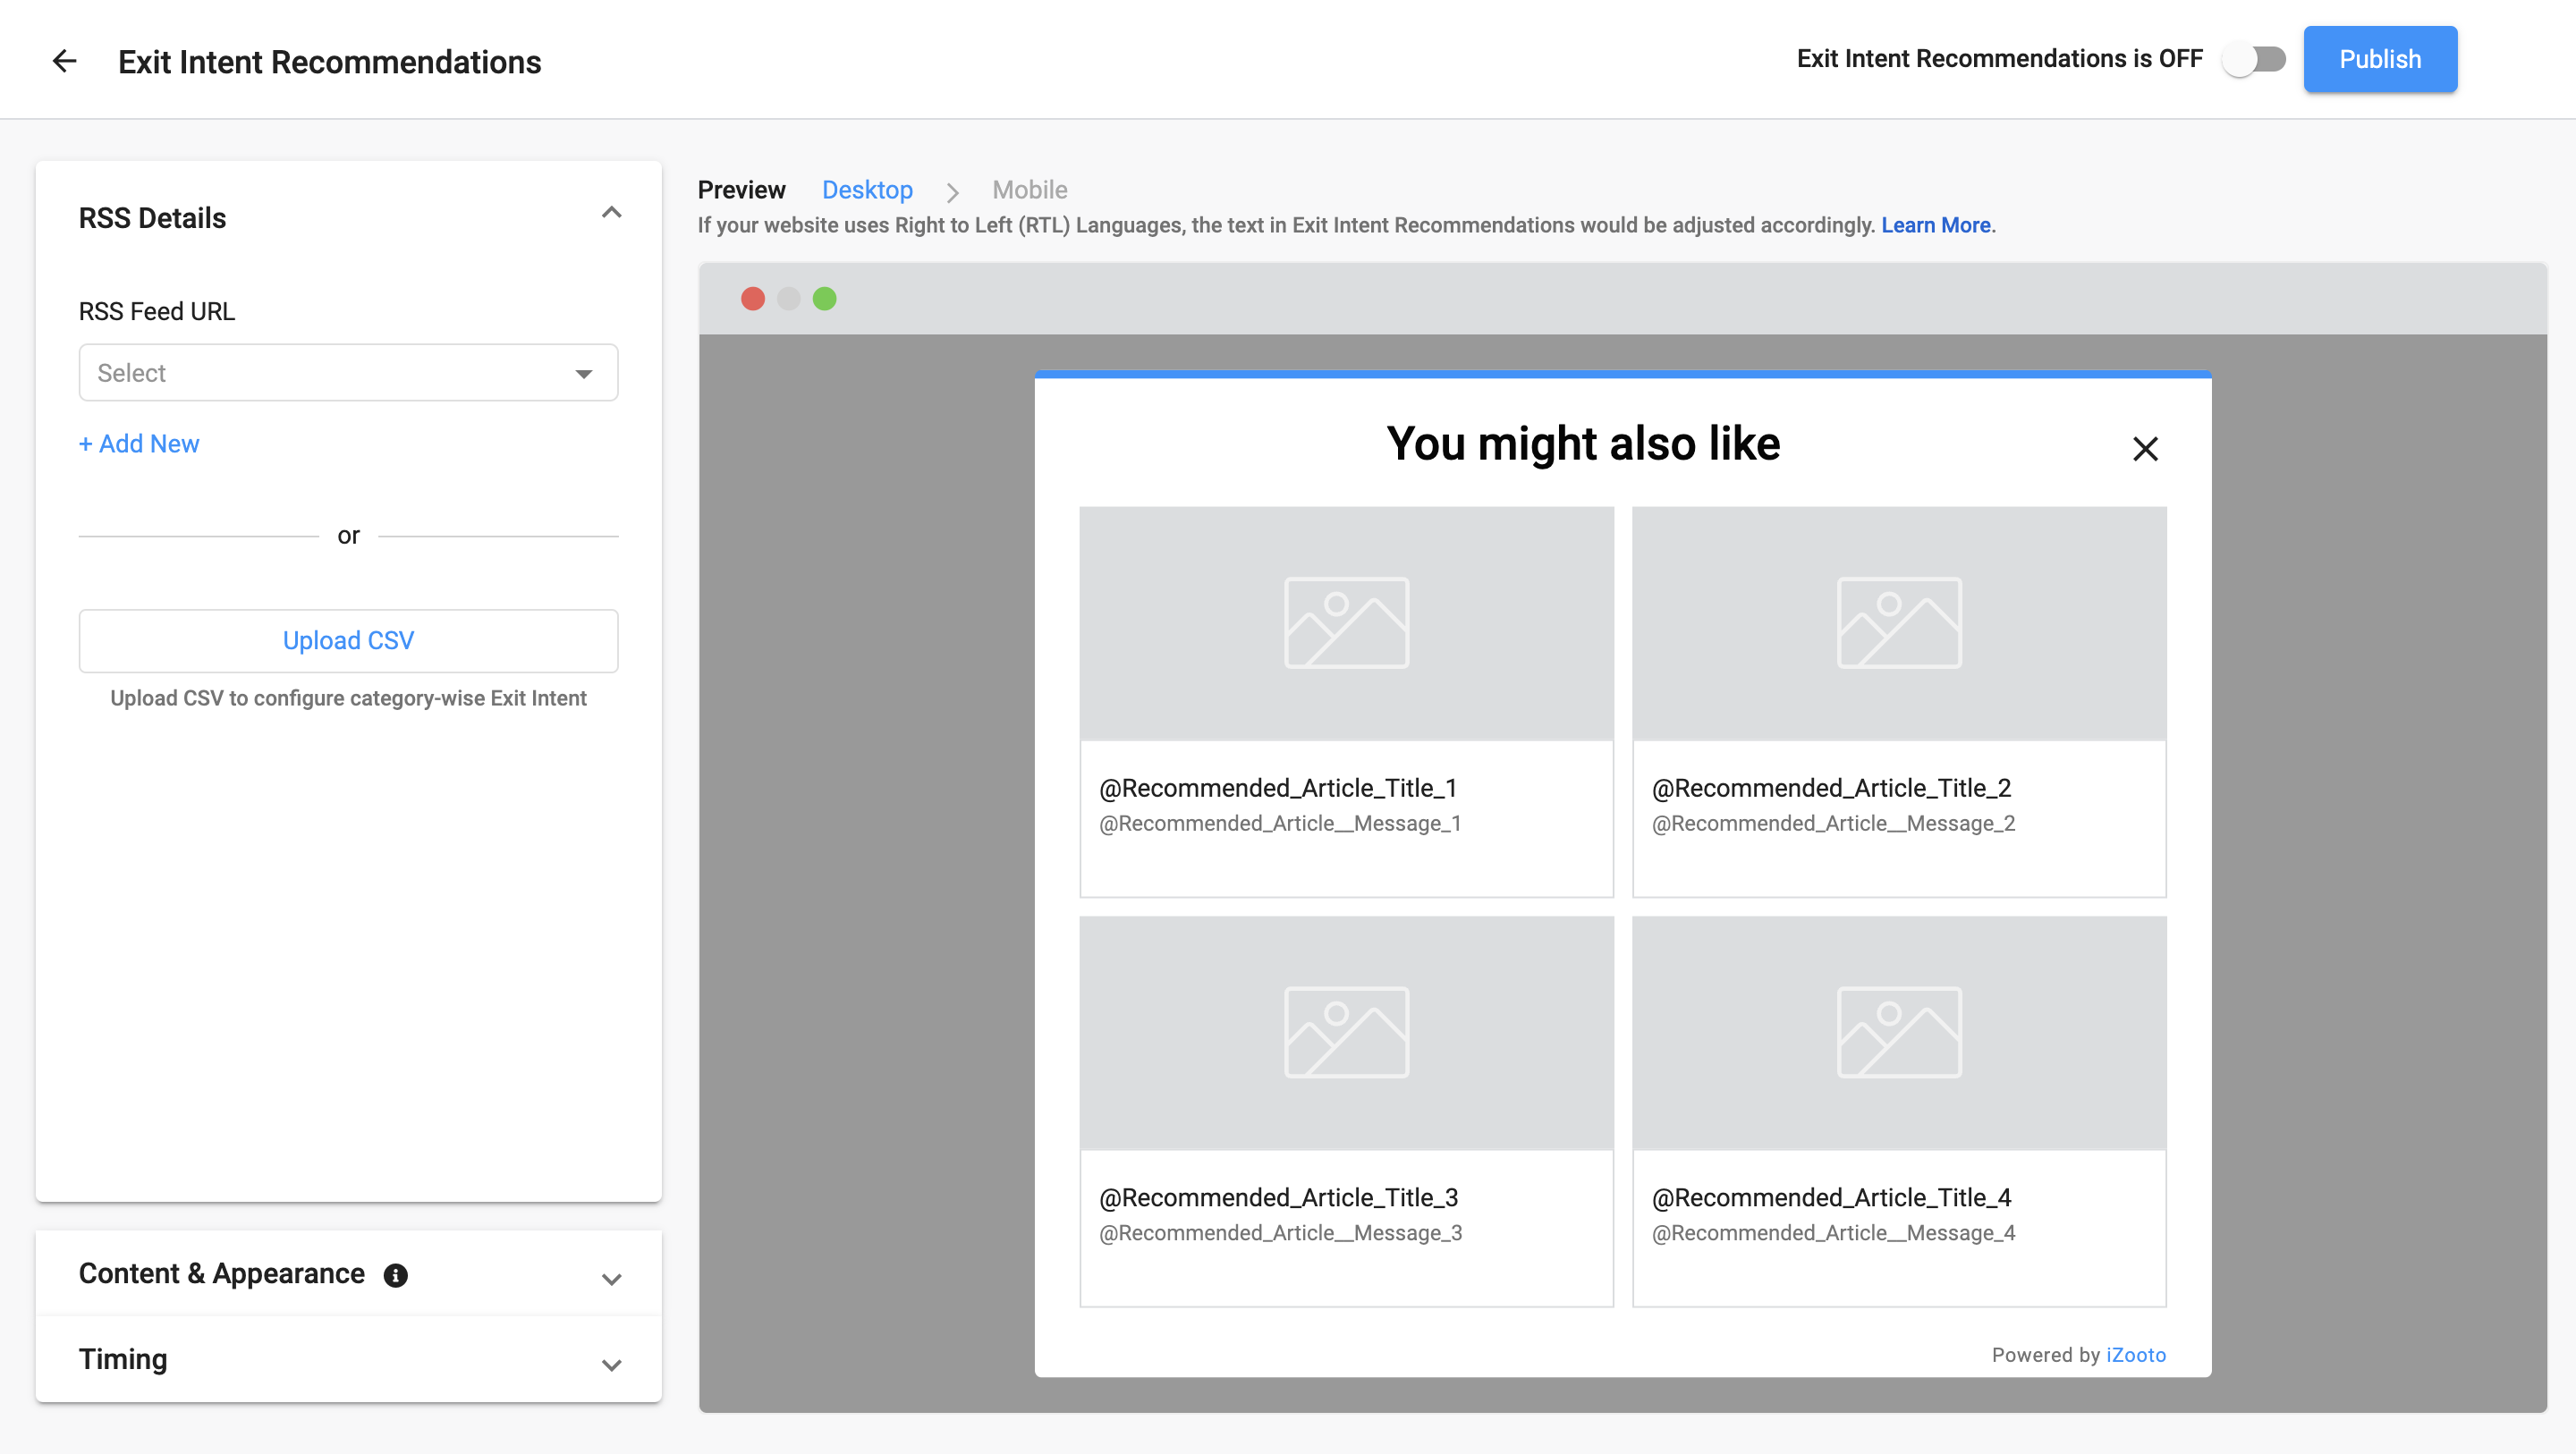
If you wish to connect a single feed for the entire website, select the feed from the drop-down or add a new feed. To see feeds in the drop-down, you will need to connect them from the RSS Feeds section under the Settings > Setup page. Refer to RSS Feeds Setup guide for details.
If you add a new feed, this will be added automatically under the RSS Feeds section on the Settings > Setup page.
Step 5
If you wish to connect multiple feeds as per the different categories on the website, then select the Upload CSV option to upload a CSV with the details.
Note the following points:
-
The CSV should follow the below format strictly:
pattern feedUrl feedName / https://timesofindia.indiatimes.com/rssfeeds/66949542.cms main page1 /nextpagestage/
stageredirectionpage.phphttps://www.abplive.com/entertainment/tamil-cinema/feed second page2 -
The CSV will not be accepted if the above format is not followed as is.
-
The feeds mentioned in the CSV will be added automatically under the RSS Feeds section on the Settings > Setup page.
Use Cases!
For Exit Intent Recommendations, various use cases require specific URL patterns. It's important to accurately use the category URL pattern provided in the .csv file. Refer to this URL patterns sheet for these use cases and their respective URL formats.
Note!
You can only perform either Step 4 or Step 5. You cannot perform both steps at the same time.
Step 6
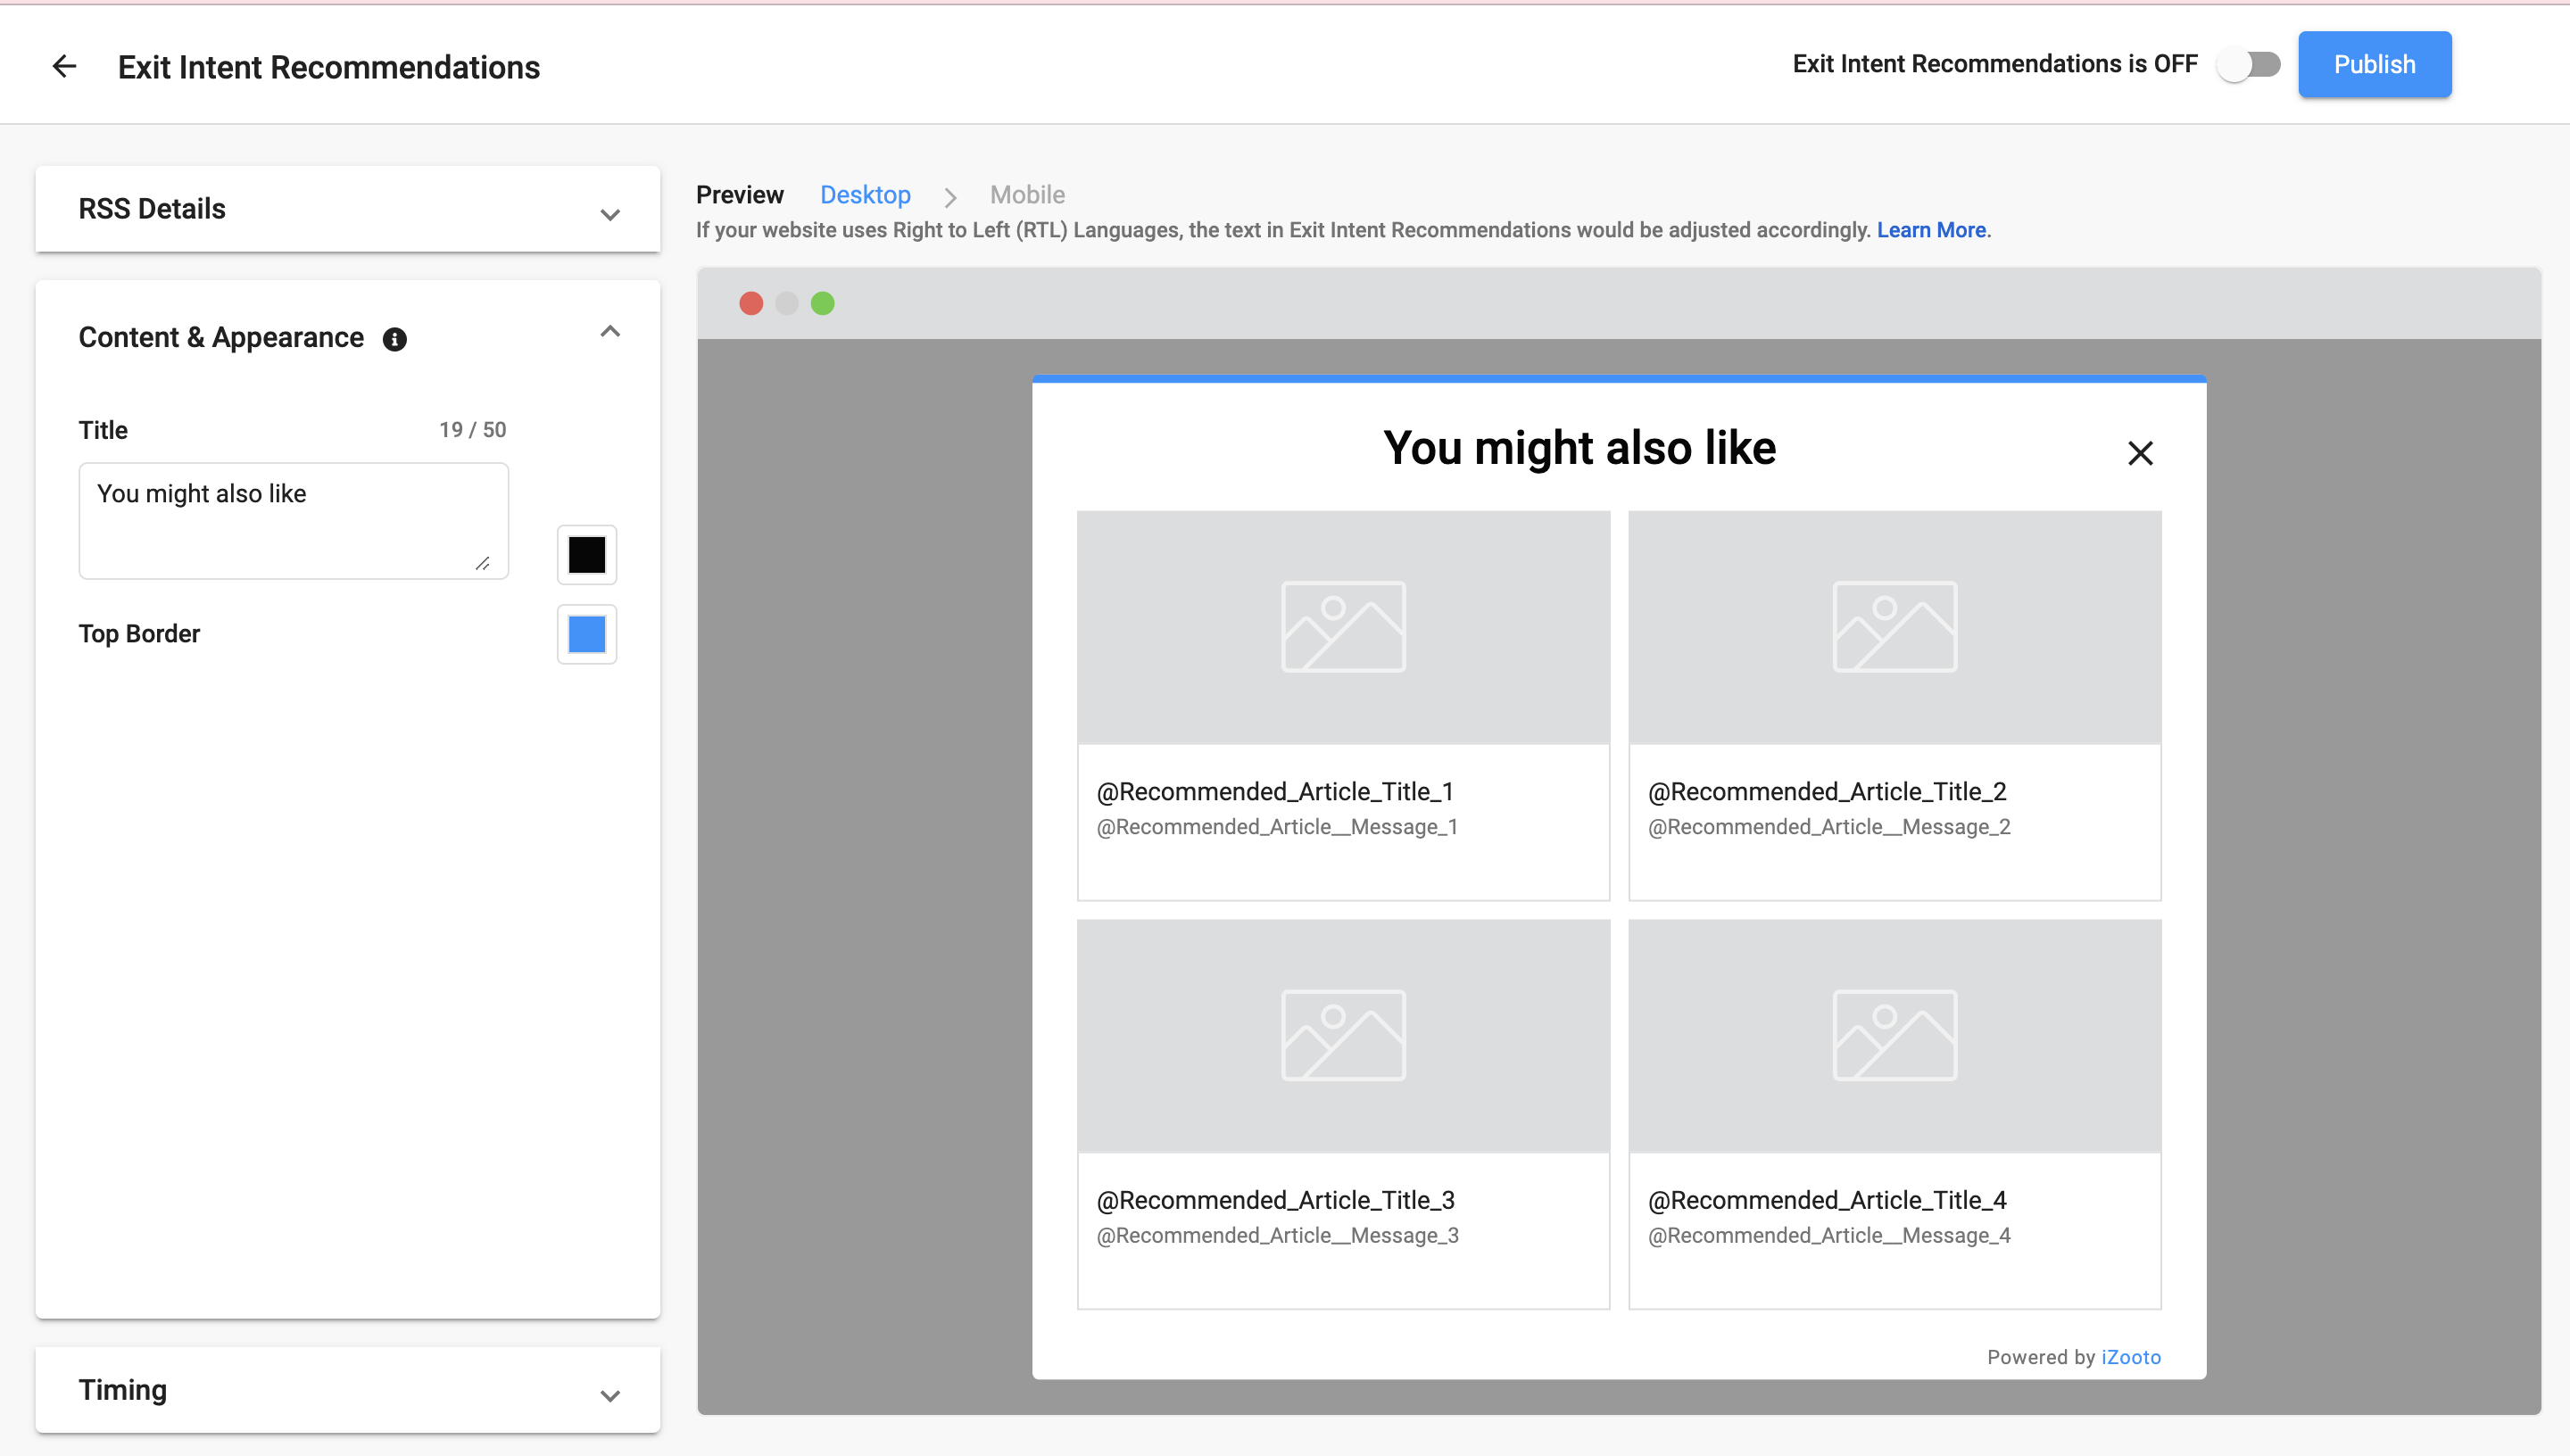
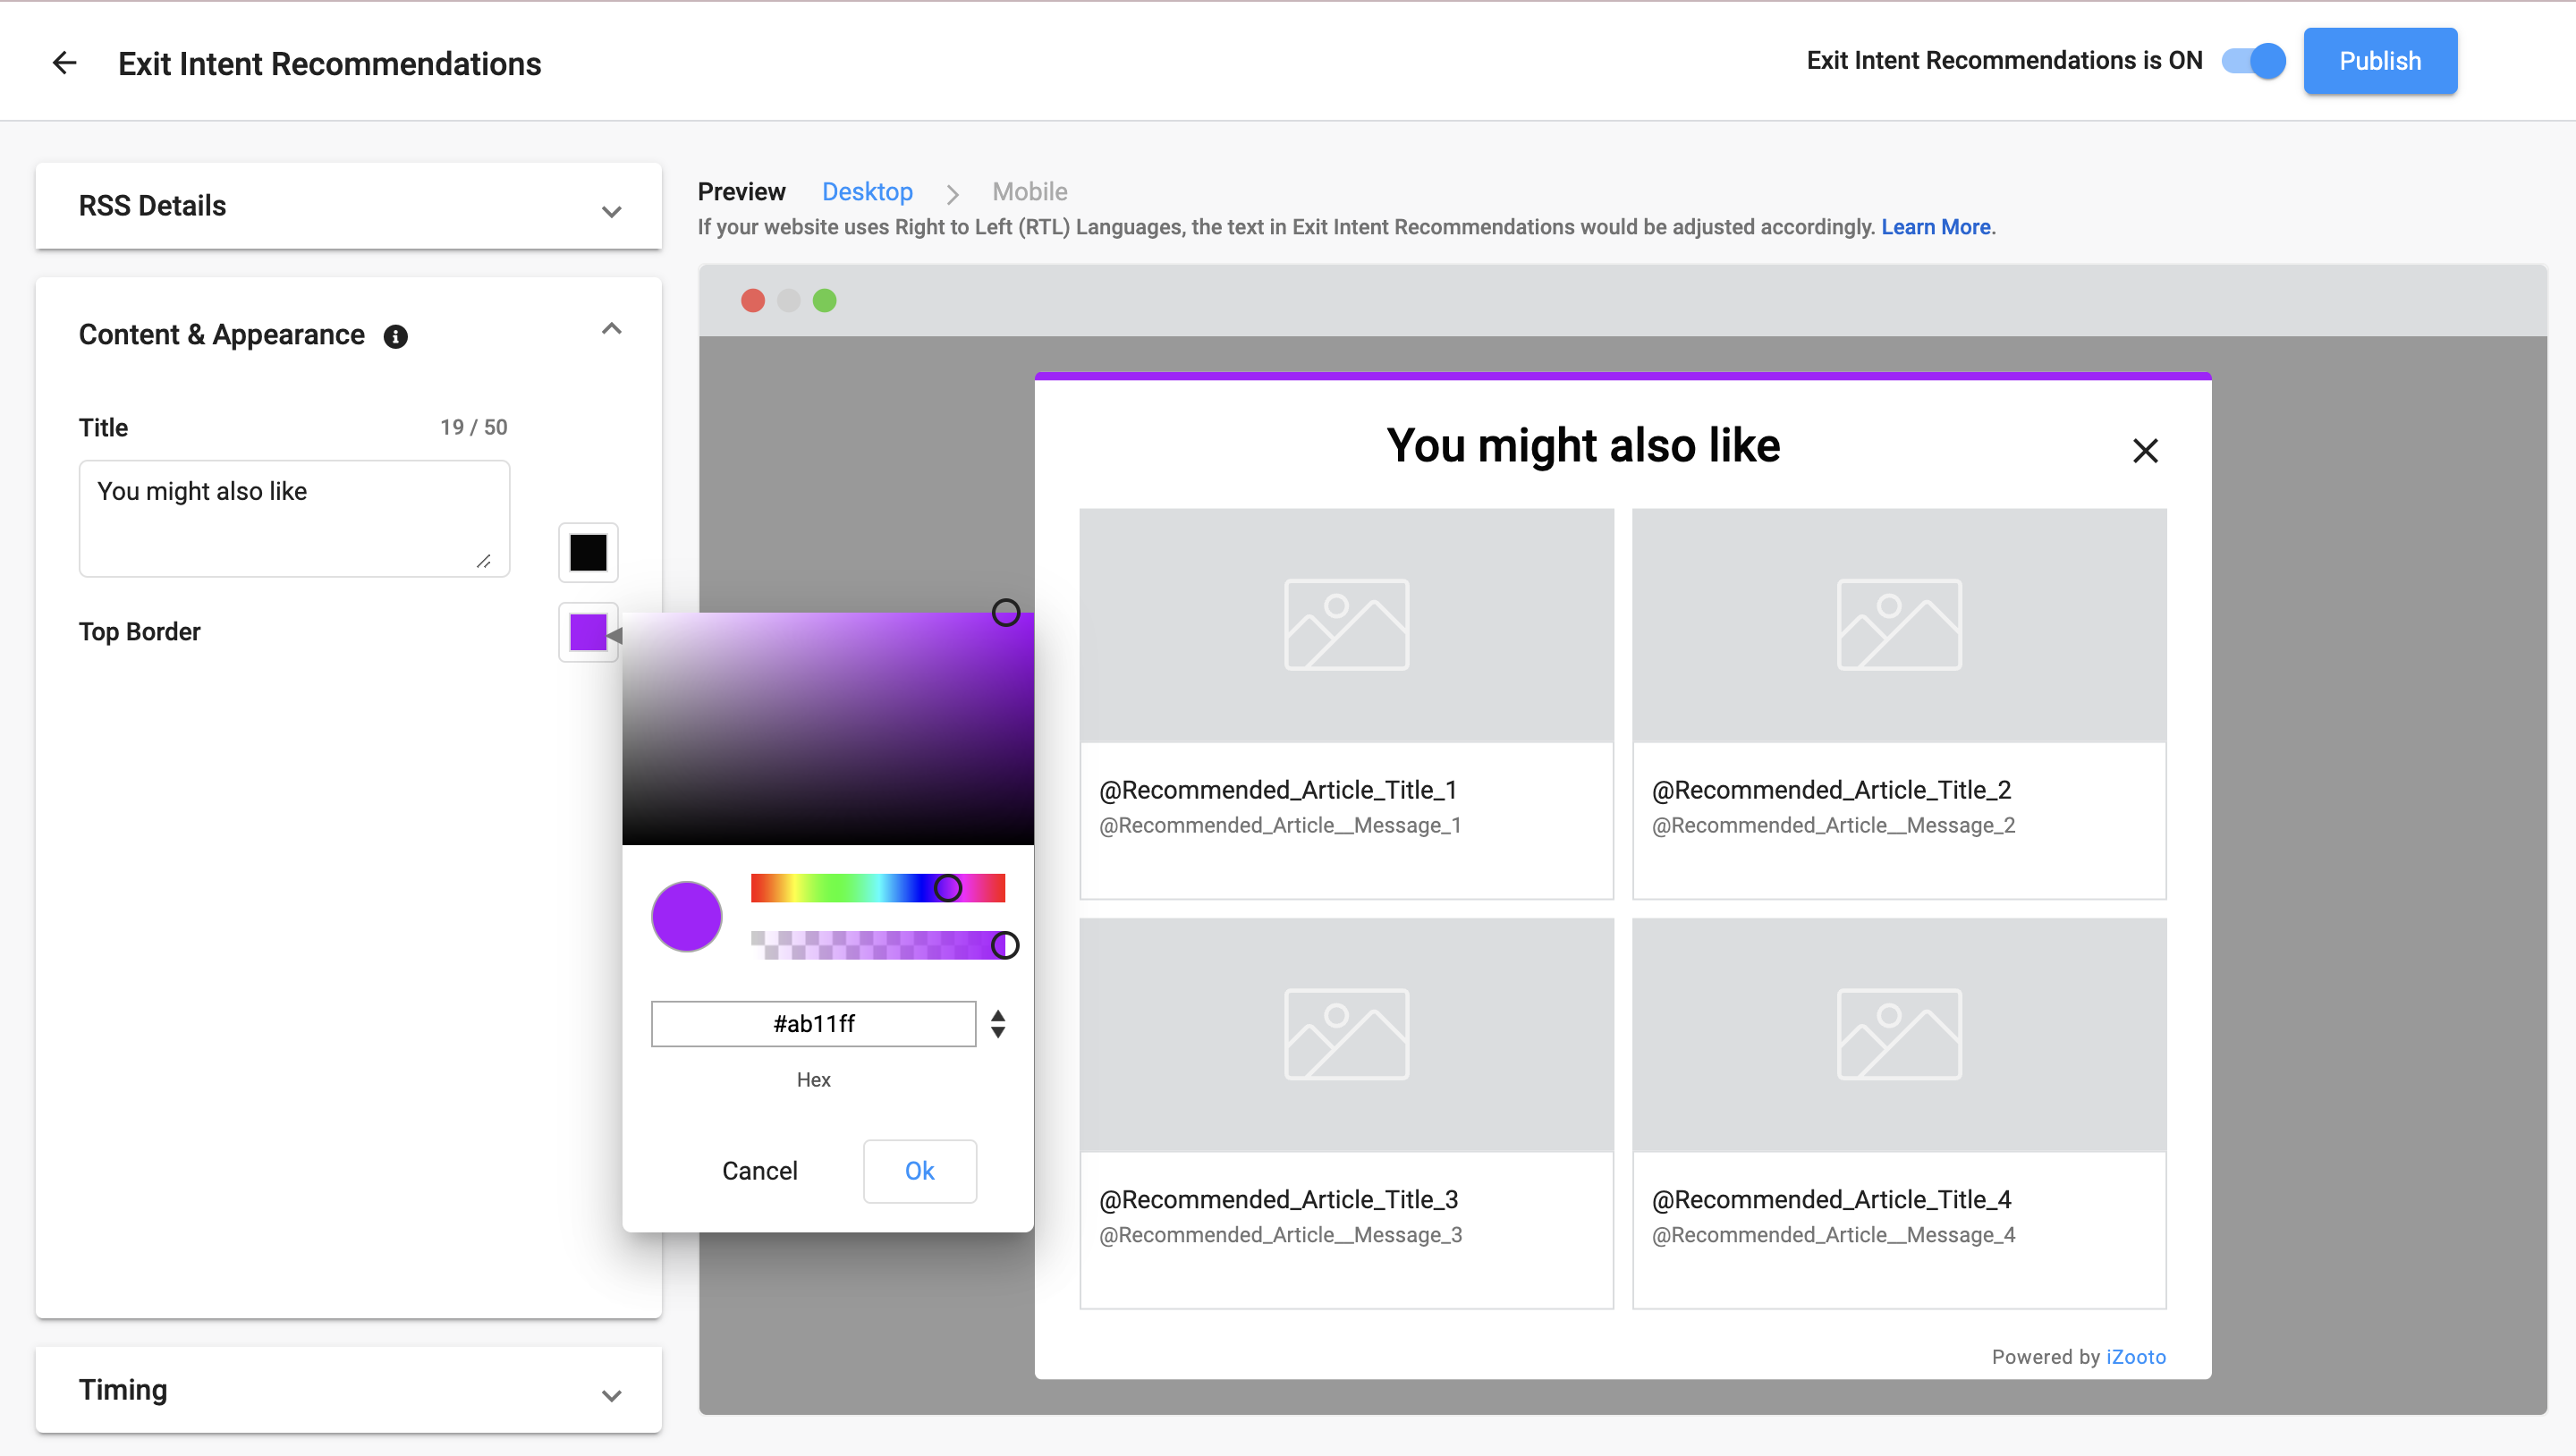
Update the Content & Appearance.
Step 7
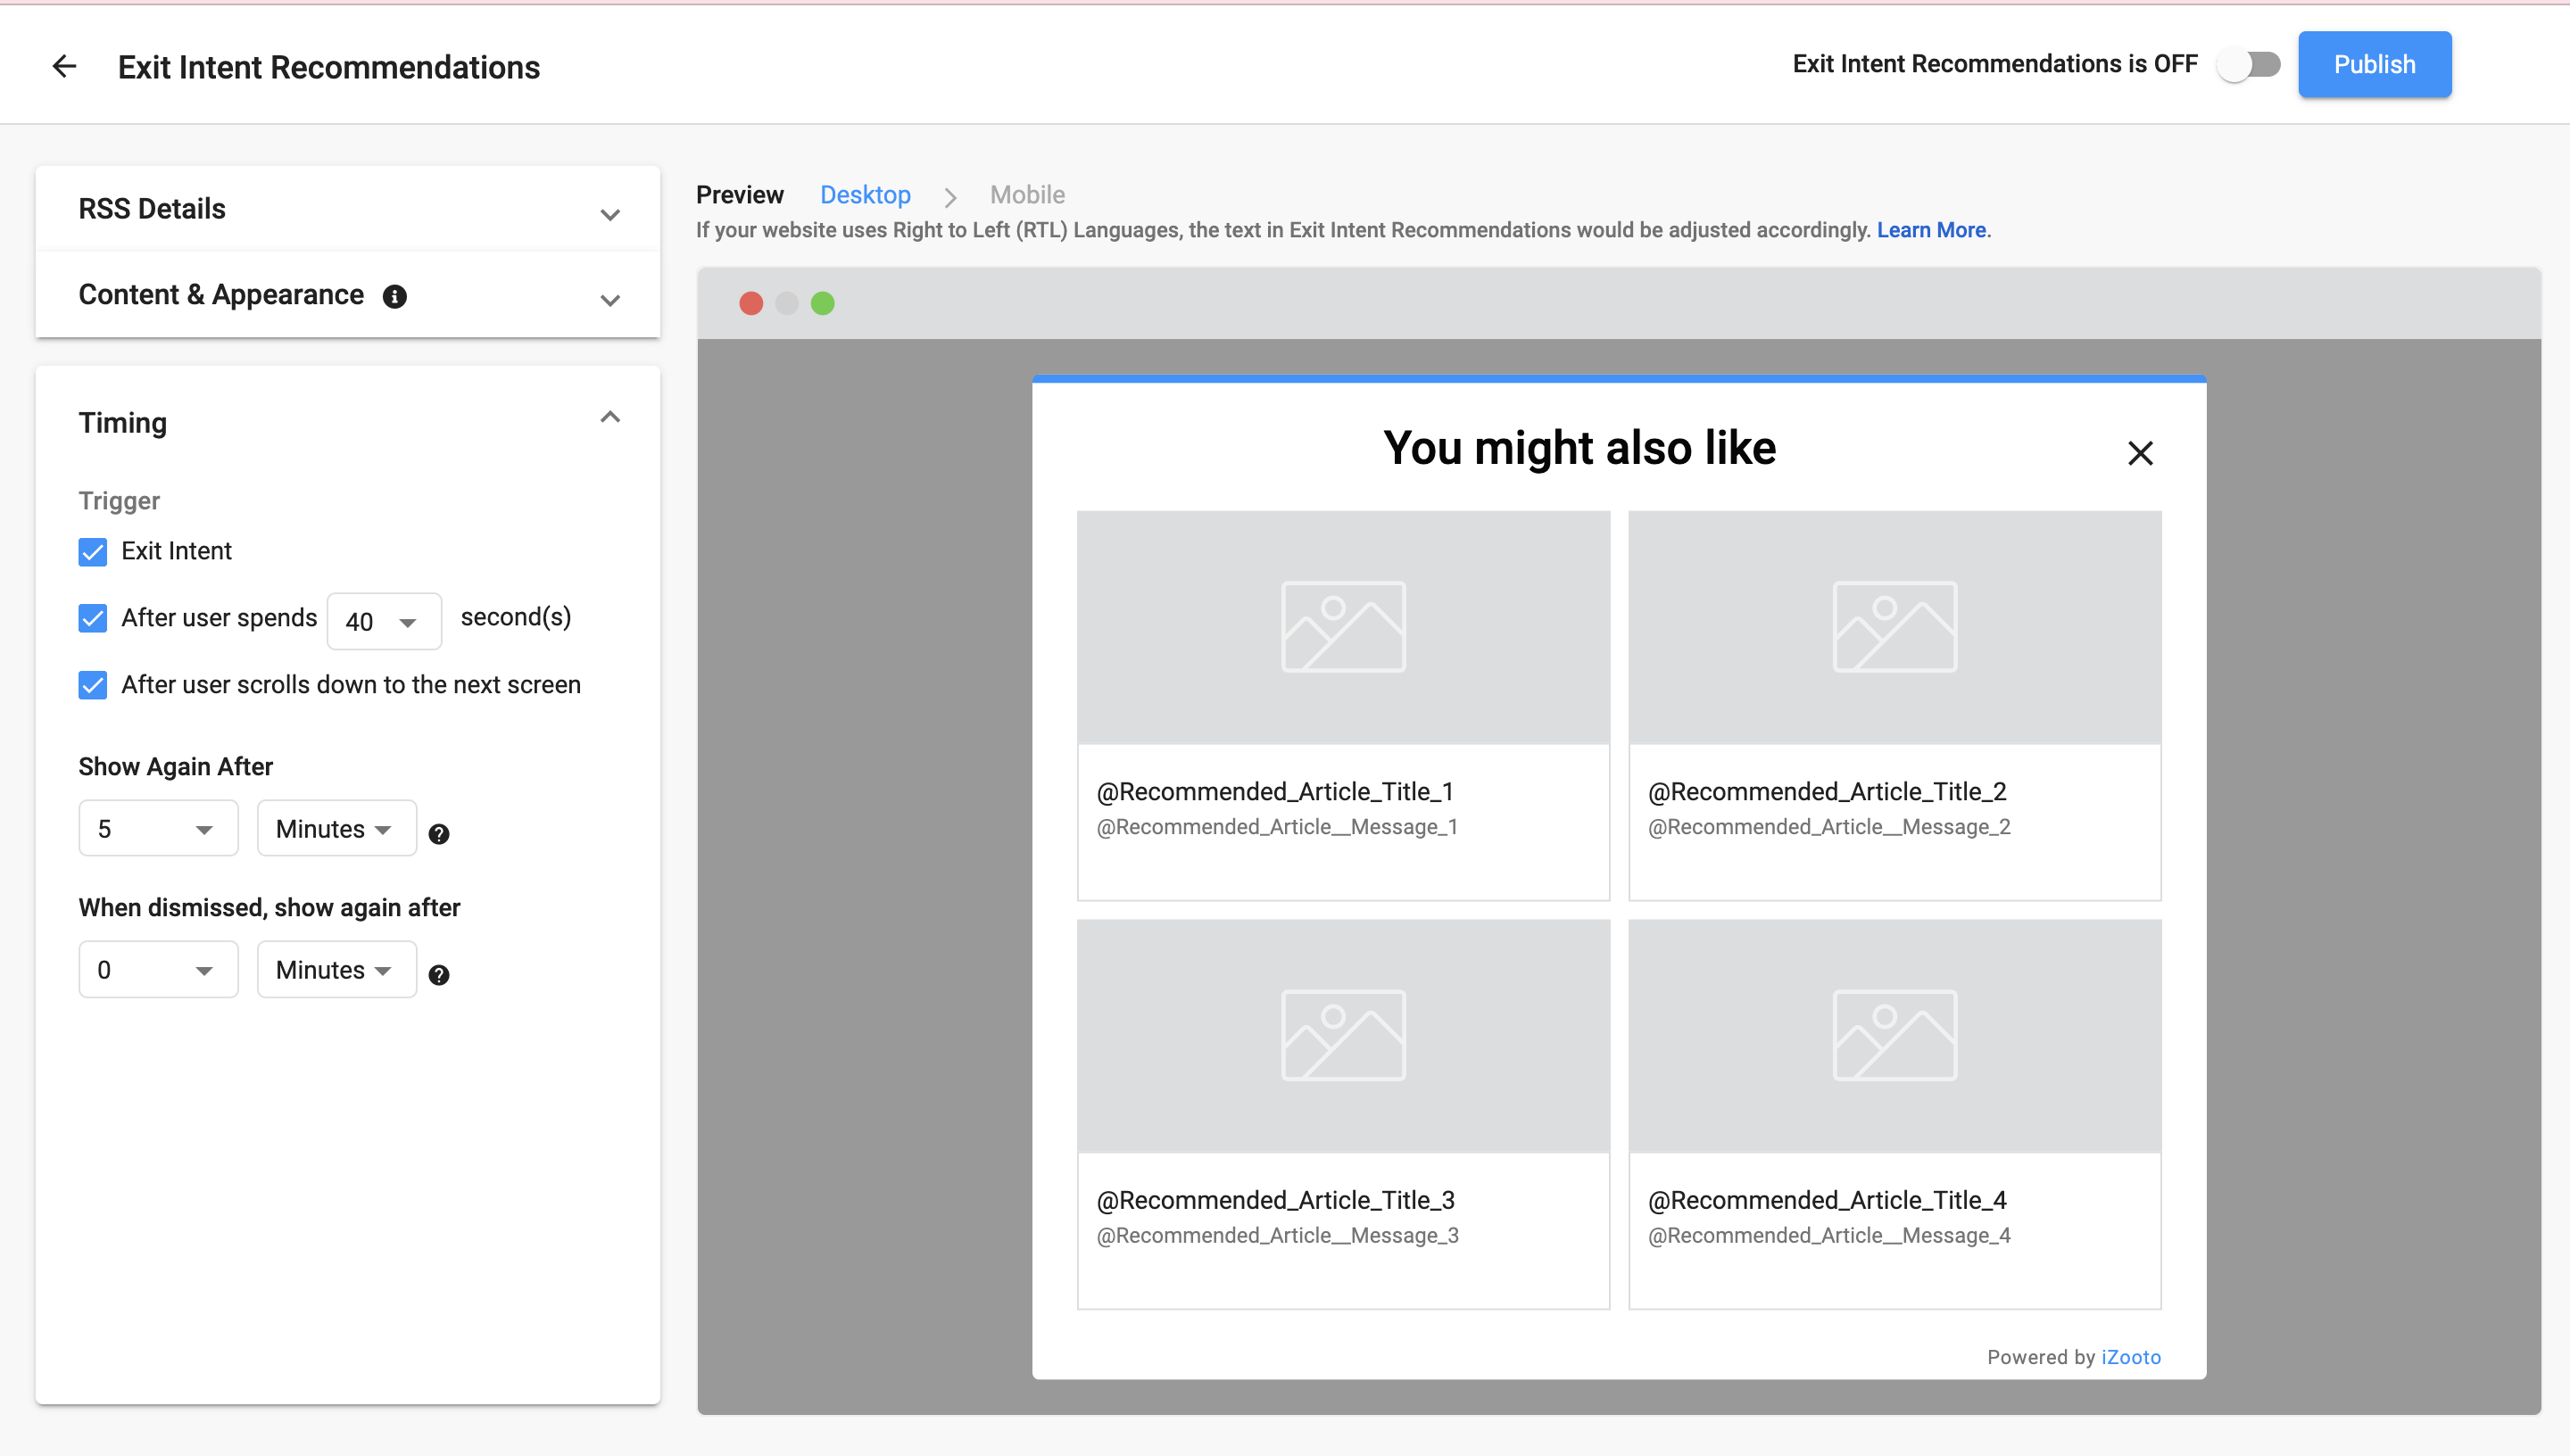
Update Triggers and Timing
Step 8
Turn On the Exit Intent Recommendations
Step 9
Publish

Customize Content & Appearance
Here you can modify the color and opacity of -
- Title
- Top Border
***## Triggers for showing Recently Published Articles -
Exit Intent - When the user tries to exit the tab or close the browser (on desktop devices) OR clicks on the browser back button (on mobile devices).
Timing - Once the end-user spends X seconds on the website
Scroll percentage - Once the end-user scroll X% of the screen
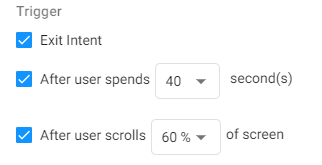
If all 3 check boxes are checked then whichever trigger is triggered first then the On-Site interaction will be displayed.
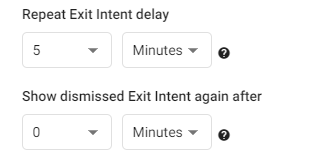
Timing
Repeat Exit Intent Delay - After X amount of time the Exit Intent triggers will be reset
Show Dismissed Exit Intent again after - The Exit Intent triggers will be reset after X amount of time when the end-user dismisses it.
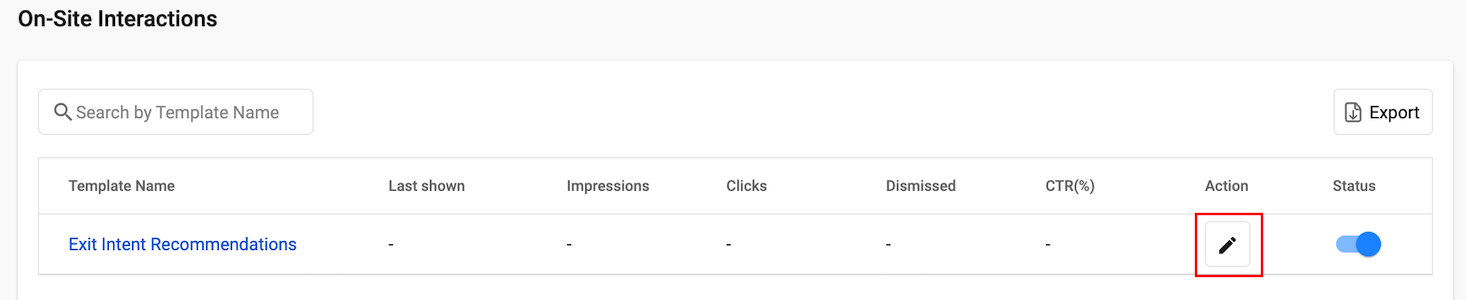
Edit
You can also edit the configurations for Exit Intent Recommendations.
Step 1
Click on the Edit icon available at the right of the template name.
Step 2
Under RSS Details, you will be able to see the already connected feeds for Exit Intent Recommendations. If you wish to change the feed, you will need to upload a CSV with the new details in the format as explained above in the Setup section in Step 5. While editing, you will need to upload a CSV mandatorily, even if you wish to connect a single feed again.
When you upload a CSV with new feeds, then the already connected feeds will be disabled. This status will be updated in the RSS Feeds section under the Settings > Setup page.
If there are multiple feeds connected and you wish to change only some of the feeds, then you will need to upload a new CSV with all the feeds that need to be configured including the ones that will not change. If you skip any feed at this time, then that feed will be turned off.
Step 3
Change the Content & Appearance and Timing & Triggers as needed and click on Publish at the top right of the page.
Analytics
- Click on the Template Name
- Check the Analytics(Available Stats - Impressions, Clicked and Dismissed)

Updated about 2 years ago