Web Push Setup
Setting up iZooto Push on your website(s)
Setting up Web Push Notifications is easy.
Follow the steps mentioned below to setup iZooto on your website.
For websites running on HTTPS
1. Insertion of the JS code
Add the JS code before the </head> tag on all the website pages. A sample code is mentioned below.
<script> window._izq = window._izq || []; window._izq.push(["init"]); </script>
<script src="YOUR_SCRIPT_HERE.js"></script>
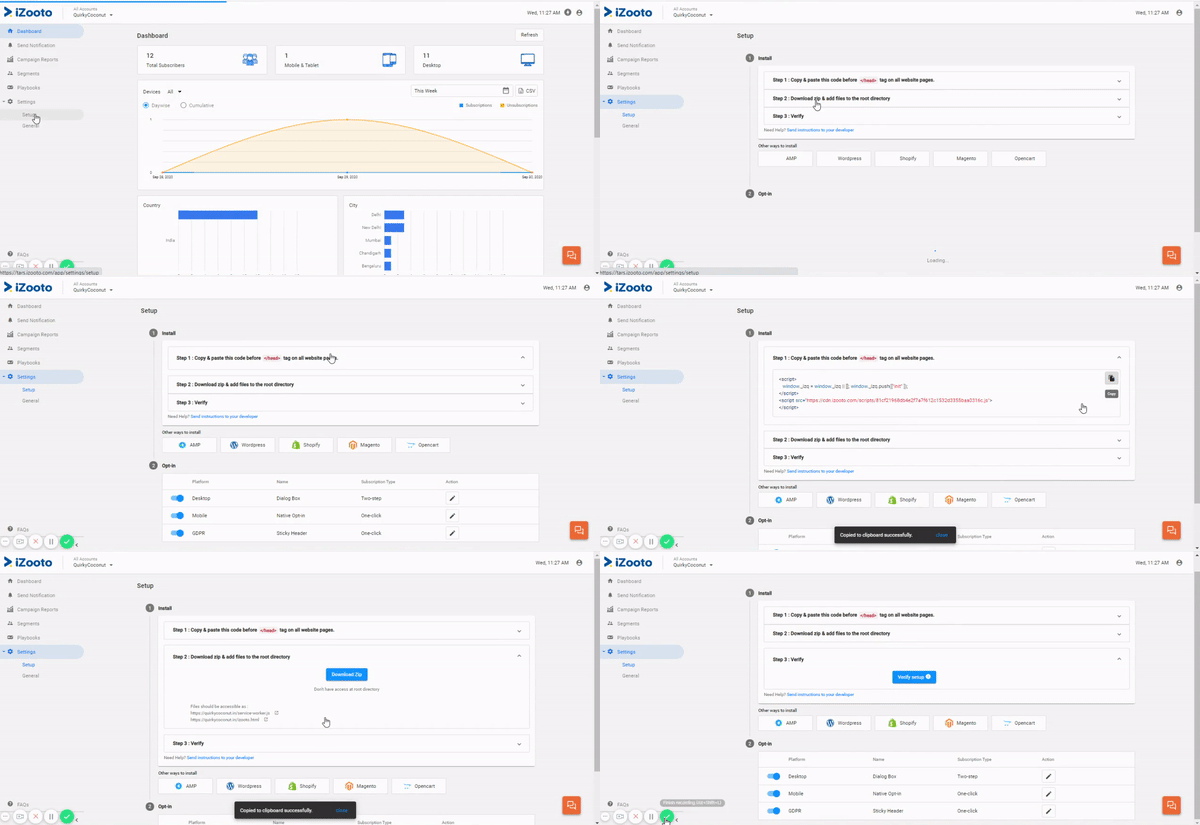
You can find the JS code for your website under Settings > Setup.

Follow the instructions on screen to access the iZooto JS.
You can also add this code asynchronously in case you are worried about the load time of your website.
<script> window._izq = window._izq || []; window._izq.push(["init"]); </script>
<script async="true" src="YOUR_SCRIPT_HERE.js"></script>
2. Uploading Files
Two files - izooto.html and service-worker.js need to be uploaded to the root folder of your website. They should be accessible as:
https://yoursite.com/izooto.htmlhttps://yoursite.com/service-worker.js
2.1 Root Folder Not Accessible
If, in case you do not have access to the root folder, click on Don't have access at root directory.

Enter the appropriate non-root directory path and hit Save.

Placing the files in your CDN will not work as the domain/URL would become different
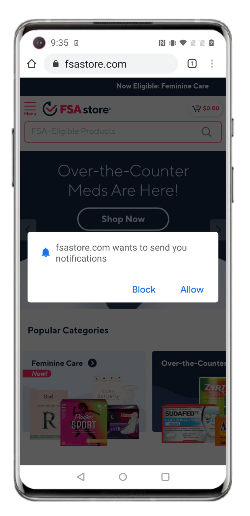
Here is how the subscription prompt would look like after the integration is done.

Subscription flow on HTTPS website
SetUp via GTM
You can go through the instructions here if you want to integrate iZooto via Google Tag Manager.
Here's a video that you can refer to understand Web Push Setup.
Updated over 1 year ago
