Power Push: Setting Up Huawei Messenger Service
Step 1: Pre-requisites
Ensure that you have integrated PowerPush SDK in your app as mentioned here.
Step 2: Register as a Huawei Developer
The first step to access Huawei Messenger Service is to register as a Huawei developer on the Huawei Website.
Step 3: Login to Console and Create your Application
3.1 Once you're registered as a developer, log in to the Huawei developer console.
3.2 Click on AppGalleryConnect under App Services.
3.3 Navigate to My Projects.
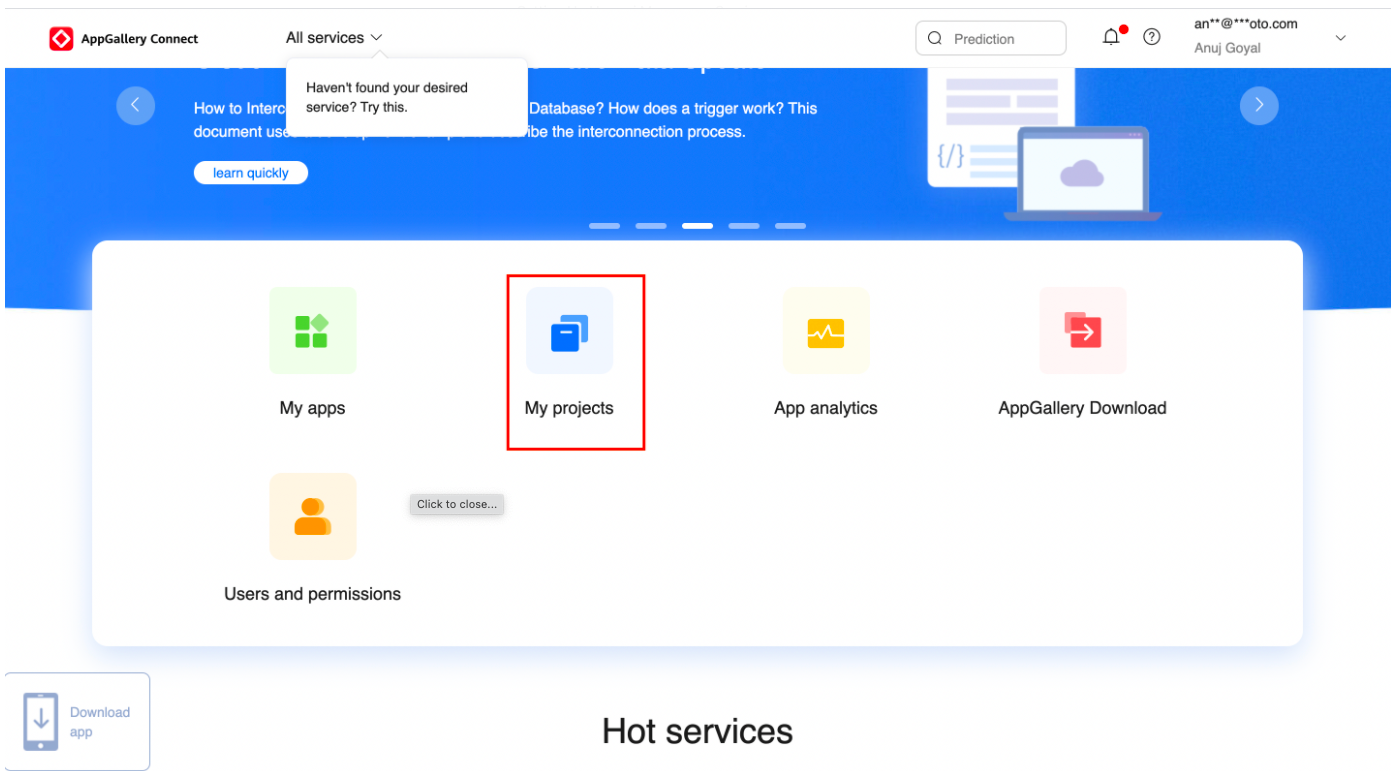
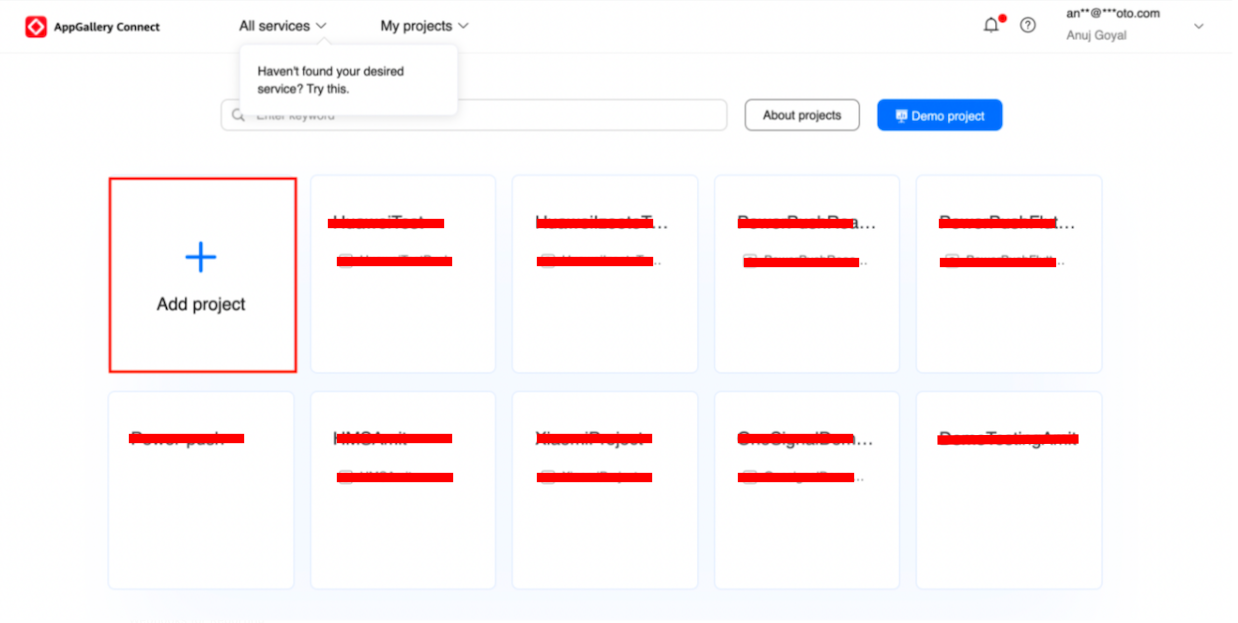
3.4 Click on Add Project.
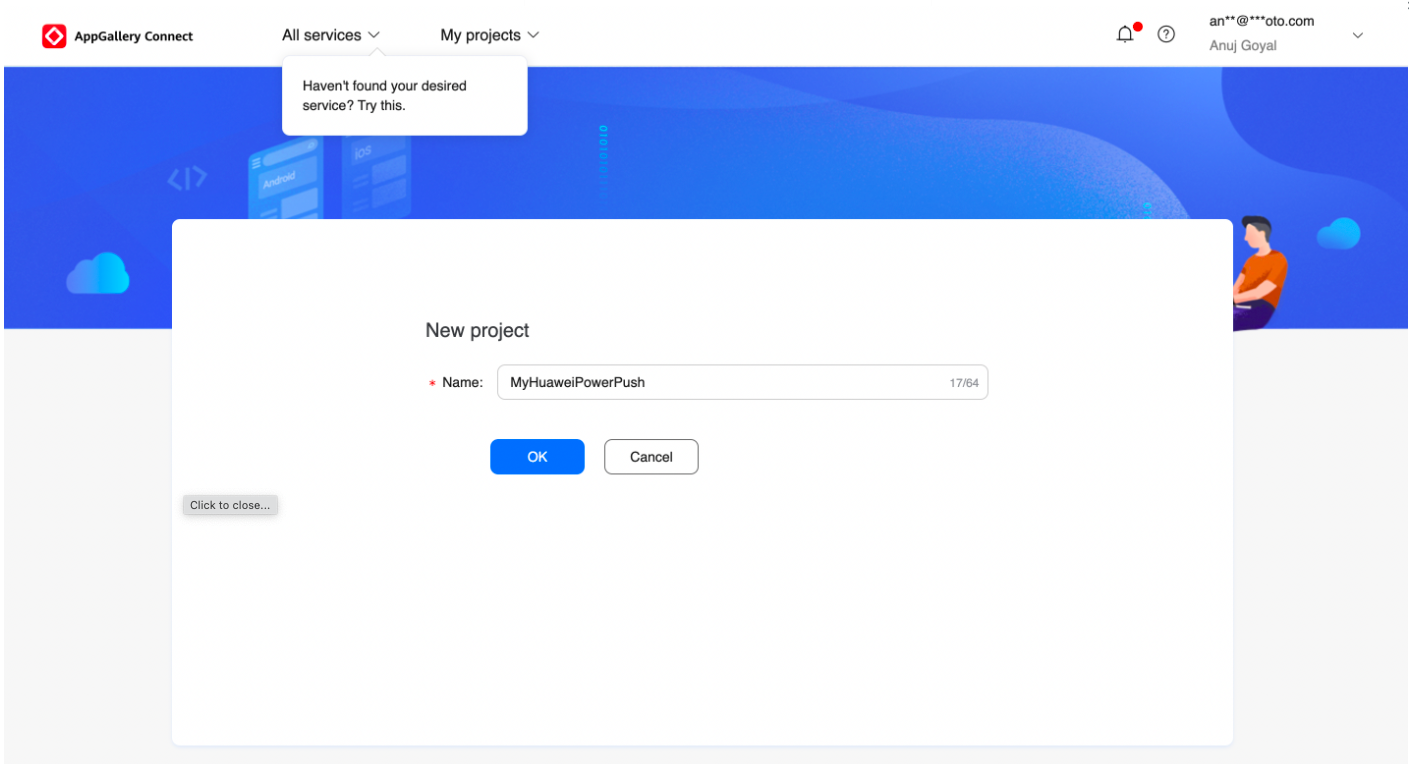
3.5 Give a name to your project and click on OK.
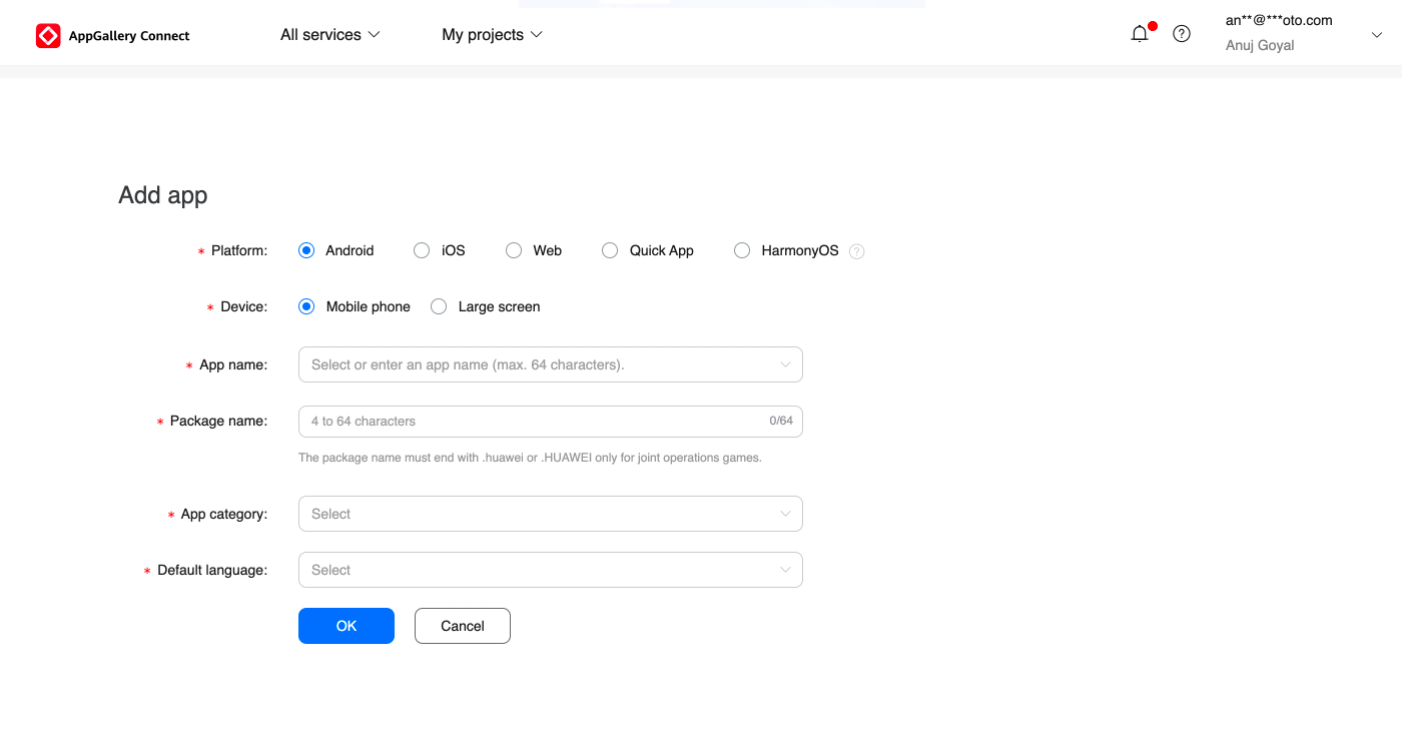
3.6 Under the General Information tab click on Add App and fill in the required details.
Step 4: Add the Huawei Messenger SDK
Click on Add SDK under the General Information tab and follow the steps given on the Huawei console.
4.1 Navigate to the app build.Gradle (Module: app).
4.1.1 Add the below under the dependencies tag:
implementation 'com.huawei.hms:push:6.1.0.300'
4.1.2 Add the Huawei plugin to the top of the file:
apply plugin: 'com.huawei.agconnect'
4.1.3 Add the signature configuration information to the android closure:
signingConfigs {
  release {
    storeFile file('YOUR_JKS_FILE_PATH')
      keyAlias 'YOUR_JKS_ALIAS'
      keyPassword 'YOUR_JKS_KEY_PASSWORD'
      storePassword 'YOUR_JKS_STORE_PASSWORD'
    }
}

buildTypes {
  release {
    minifyEnabled false
    signingConfig signingConfigs.release
    proguardFiles getDefaultProguardFile('proguard-android-optimize.txt'), 'proguard-rules.pro'
  }
  debug {
    signingConfig signingConfigs.release
  }
}
4.2 Navigate to the project build.Gradle.
4.2.1 Add the following repositories to the buildScript tag:
maven {url 'https://developer.huawei.com/repo/'}
4.2.2 Make sure that the following are added to the dependencies tag:
classpath "com.android.tools.build:gradle:4.1.2"
classpath 'com.google.gms:google-services:4.2.0'
classpath 'com.huawei.agconnect:agcp:1.4.1.300'
4.2.3 Add the following repositories to the allProjects tag:
maven {url 'https://developer.huawei.com/repo/'}
4.3 Ensure that you have added the agconnect-services.json file in the app directory of your app.
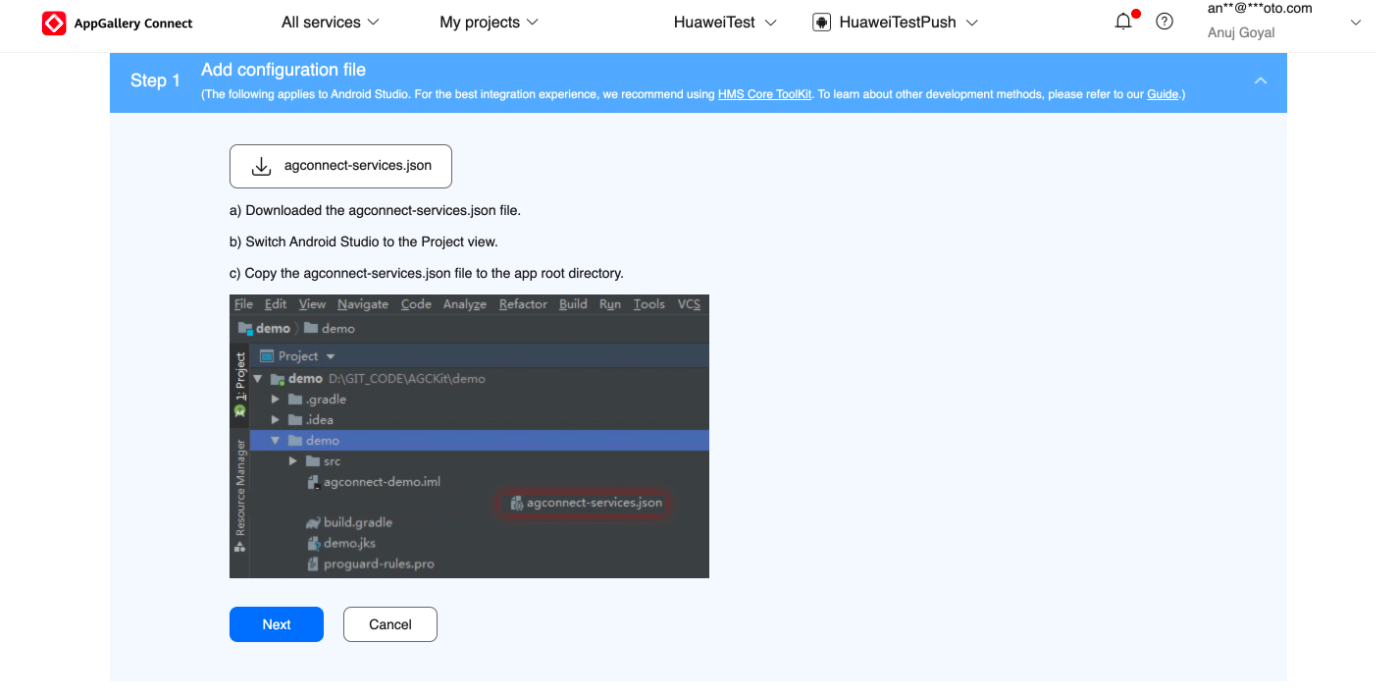
4.4 Add the following lines of code to your proguard-rule file:
-ignorewarnings
 -keepattributes *Annotation*
 -keepattributes Exceptions
 -keepattributes InnerClasses
 -keepattributes Signature
 -keepattributes SourceFile,LineNumberTable
 -keep class com.hianalytics.android.**{*;}
 -keep class com.huawei.updatesdk.**{*;}
 -keep class com.huawei.hms.**{*;}
 -keep class com.izooto.shortcutbadger.impl.SonyHomeBadger { <init>(...); }
Step 5: Enable Huawei Push
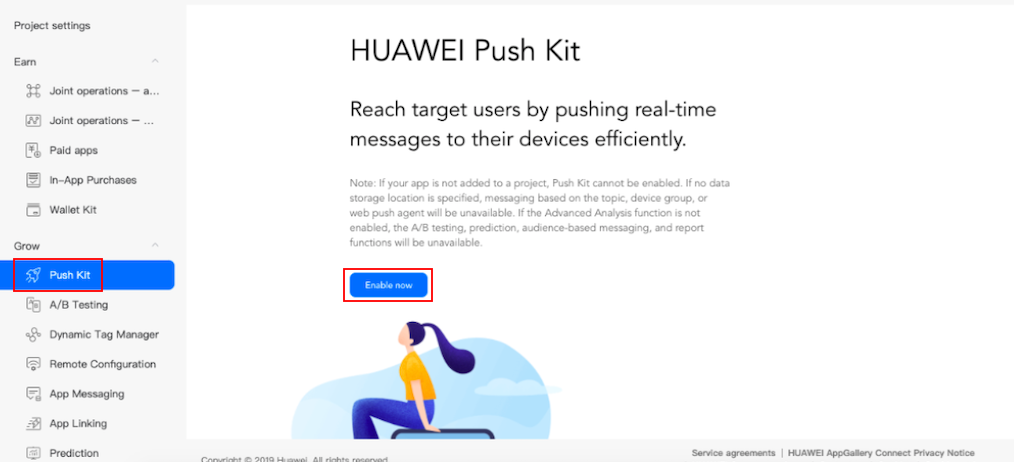
Navigate to Huawei Push Kit on the Huawei panel and click on Enable Now to start using Huawei Messenger services.
Step 6: Getting the App ID and Secret Key
Once your application is created on the Huawei console, go to General Information and get your application details.
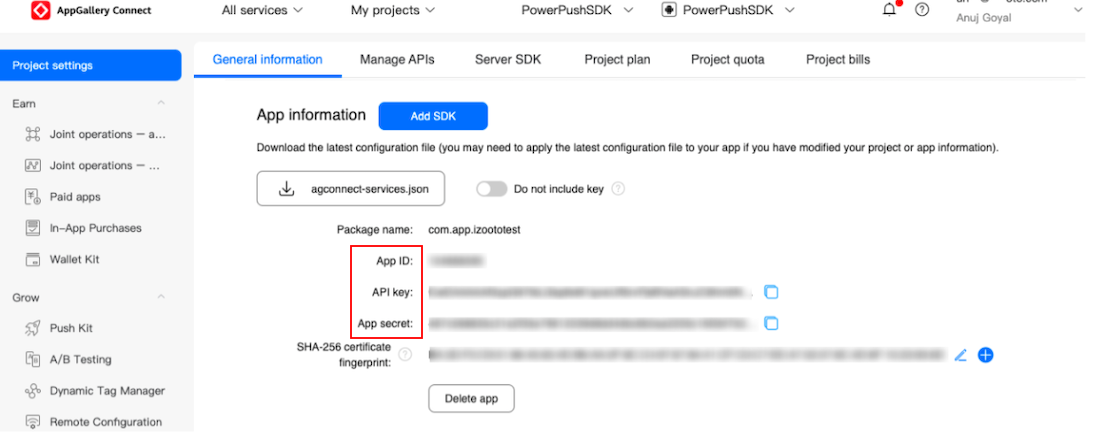
Once you have these details - please write to [email protected] to get these configured for your account.
Updated about 4 years ago
