Modifying Opt-in Prompt
Web push notification is a permission-based communication channel and visitors need to opt-in to start receiving the notifications. When visitors visit your website they are shown an opt-in prompt asking for their permission and once they allow, they get subscribed to your website.
You can customize your opt-in prompt according to your website and audience to create a better user experience.
Prompts for device types and GDPR compliance
You can configure the following opt-in prompts:
- Desktop Prompt: This prompt is shown to your Desktop Visitors.
- Mobile Prompt: This prompt is shown to your Mobile Visitors.
- GDPR Compliance Prompt: This prompt is shown to your EU visitors to get their permission to get access to their location and track their activities on your website. Please note that iZooto doesn't capture any personally identifiable information (PII).

We recommend you to keep the toggle button on for all - desktop & mobile devices and GDPR compliance to ensure maximum reach within your visitors.
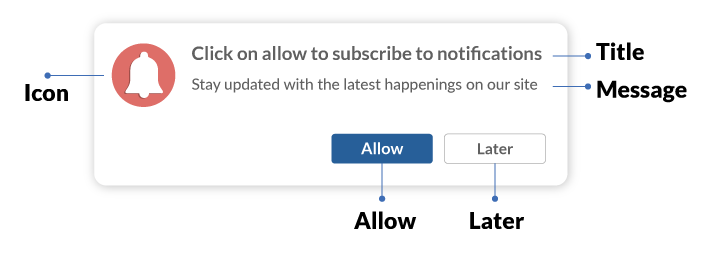
Anatomy of Opt-in prompt
This is an example of how an opt-in prompt can look like:
Setting up your subscription and GDPR compliant prompt
Steps to customize your Subscription Prompt and GDPR Compliance message are the same. Here is how you do it:
Read
You can read more about GDPR Compliance here.
1. Log in to your iZooto account, go to Settings > Setup > Opt-In and toggle on the buttons next to Desktop, Mobile, and GDPR Compliance.
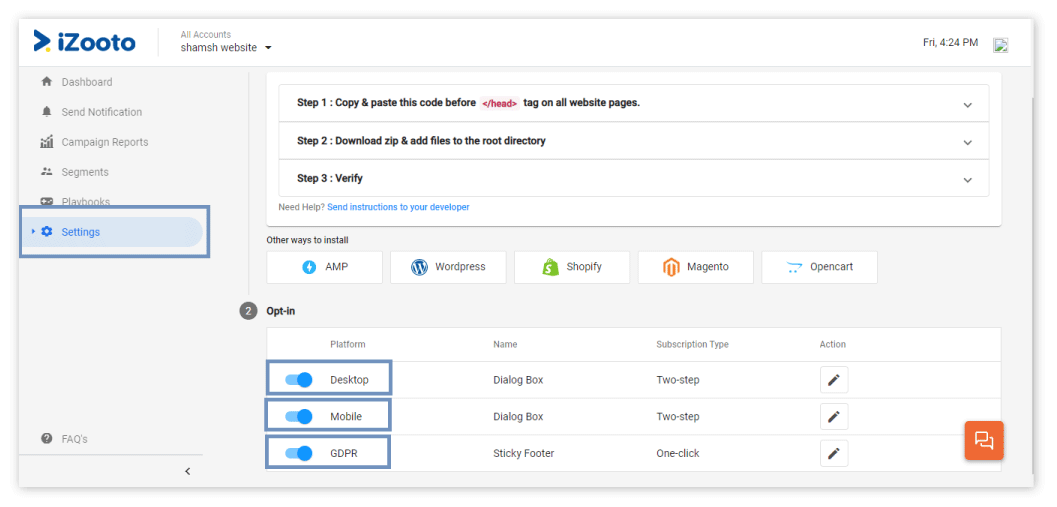
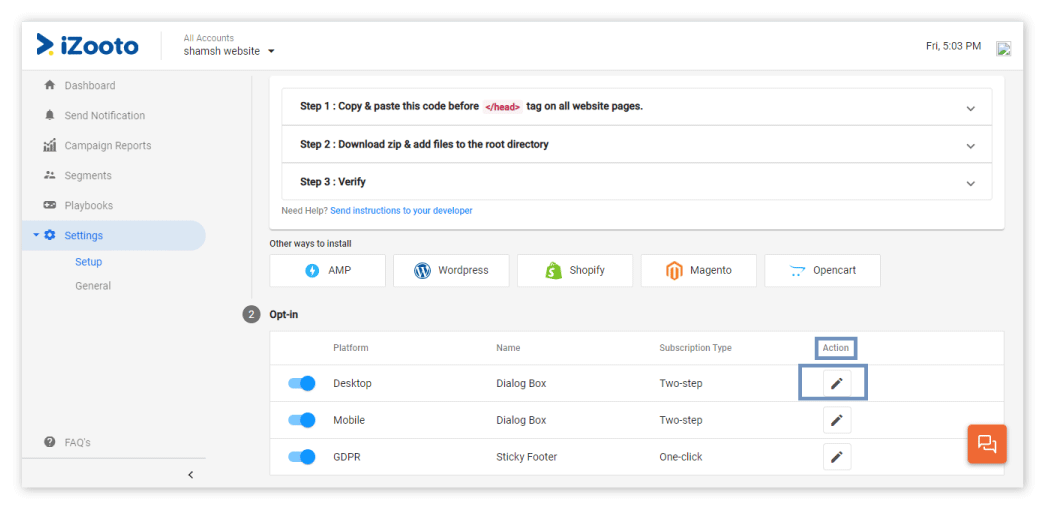
2. Click on the Edit icon corresponding to the Platform, that is, Desktop, Mobile or GDPR.
3. Select the opt-in prompt design you want to show your visitor. You can also see the preview on the right side of your screen for different designs.
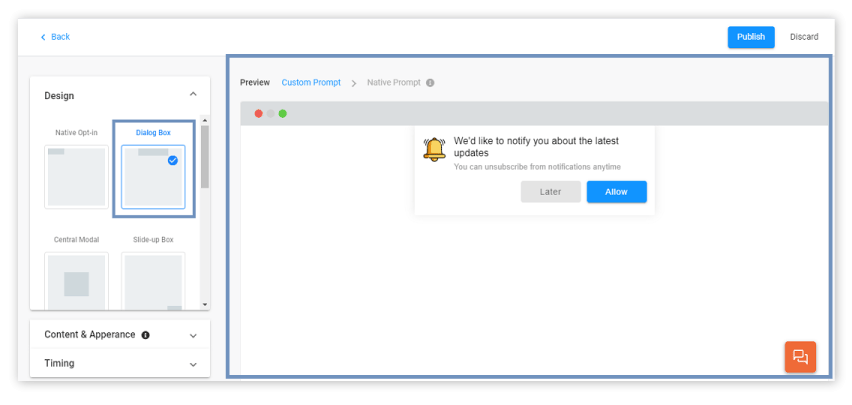
Select prompt design and preview it
4. You can customize the different elements of your prompt to resonate with your website and audience and preview the changes on the right side.
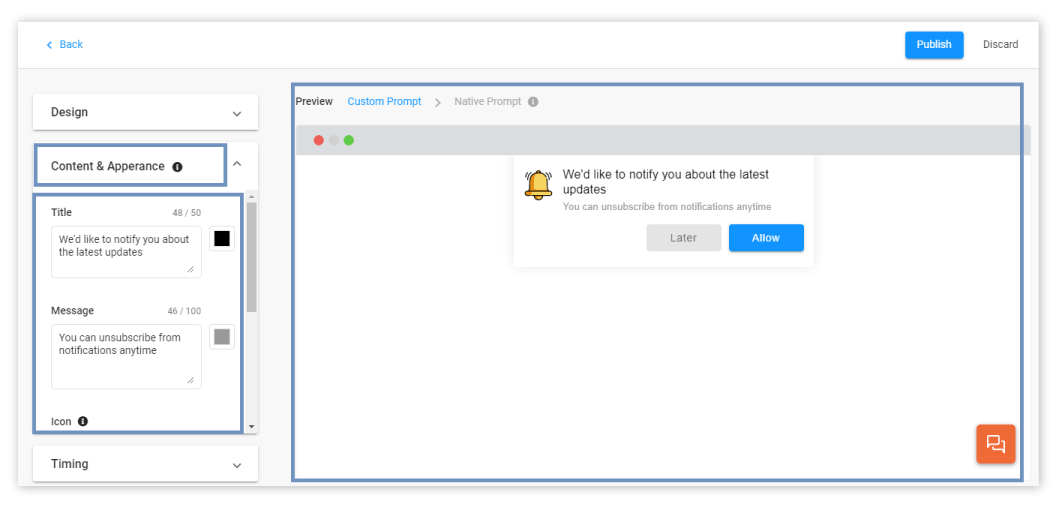
5. Once you have made the changes, you can click on the Publish button.
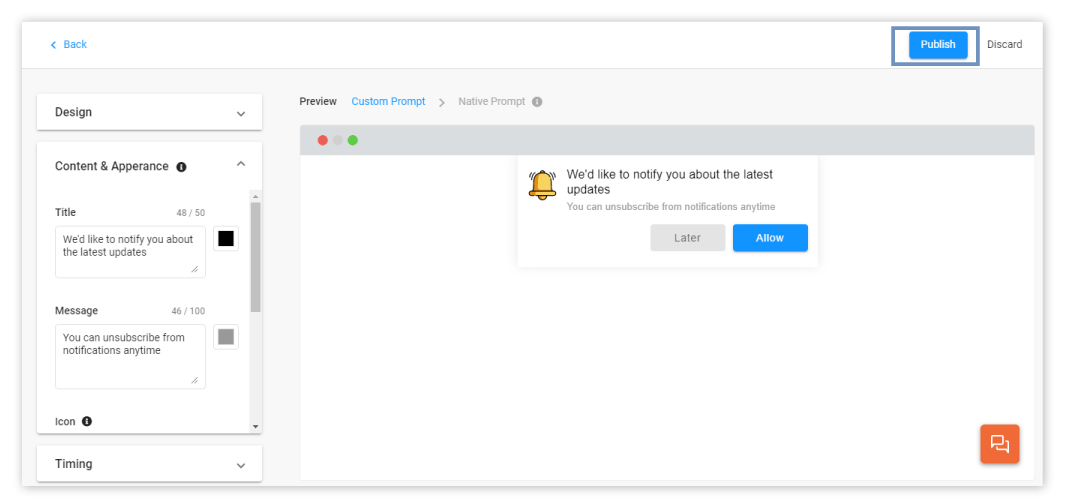
Please note that whenever you use a custom opt-in prompt (as explained above), the subscription becomes a 2-click process. First, the user will click on Allow on the custom prompt and then, he will need to click on Allow on the native prompt.
The native prompt is controlled by the browser and can neither be modified nor over-ridden.
Design Options for your Subscription Prompt
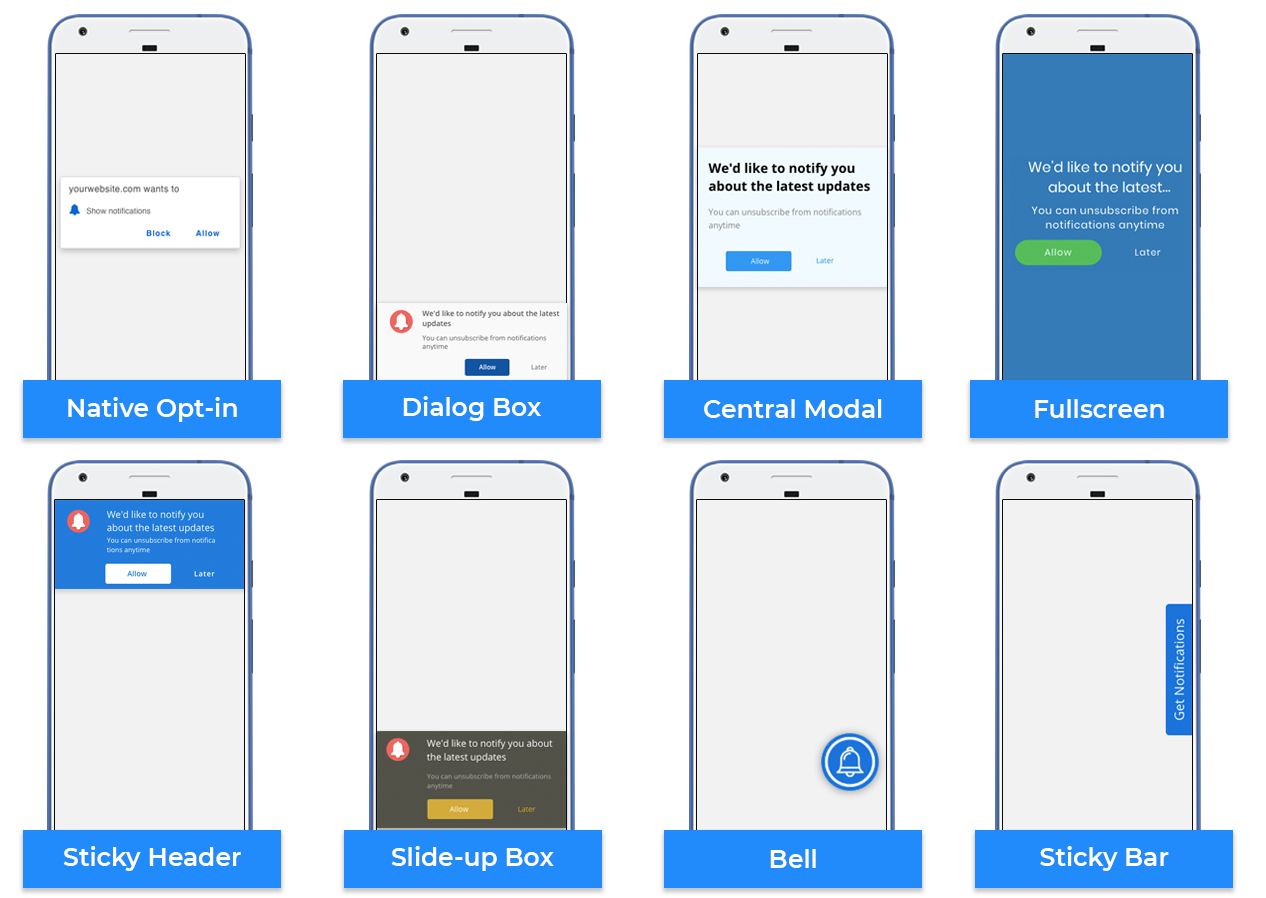
iZooto gives you 17 design options for your Subscription prompt, 9 for Desktop devices, and 8 for Mobile Devices.
Subscription Prompt Designs for Desktop Devices
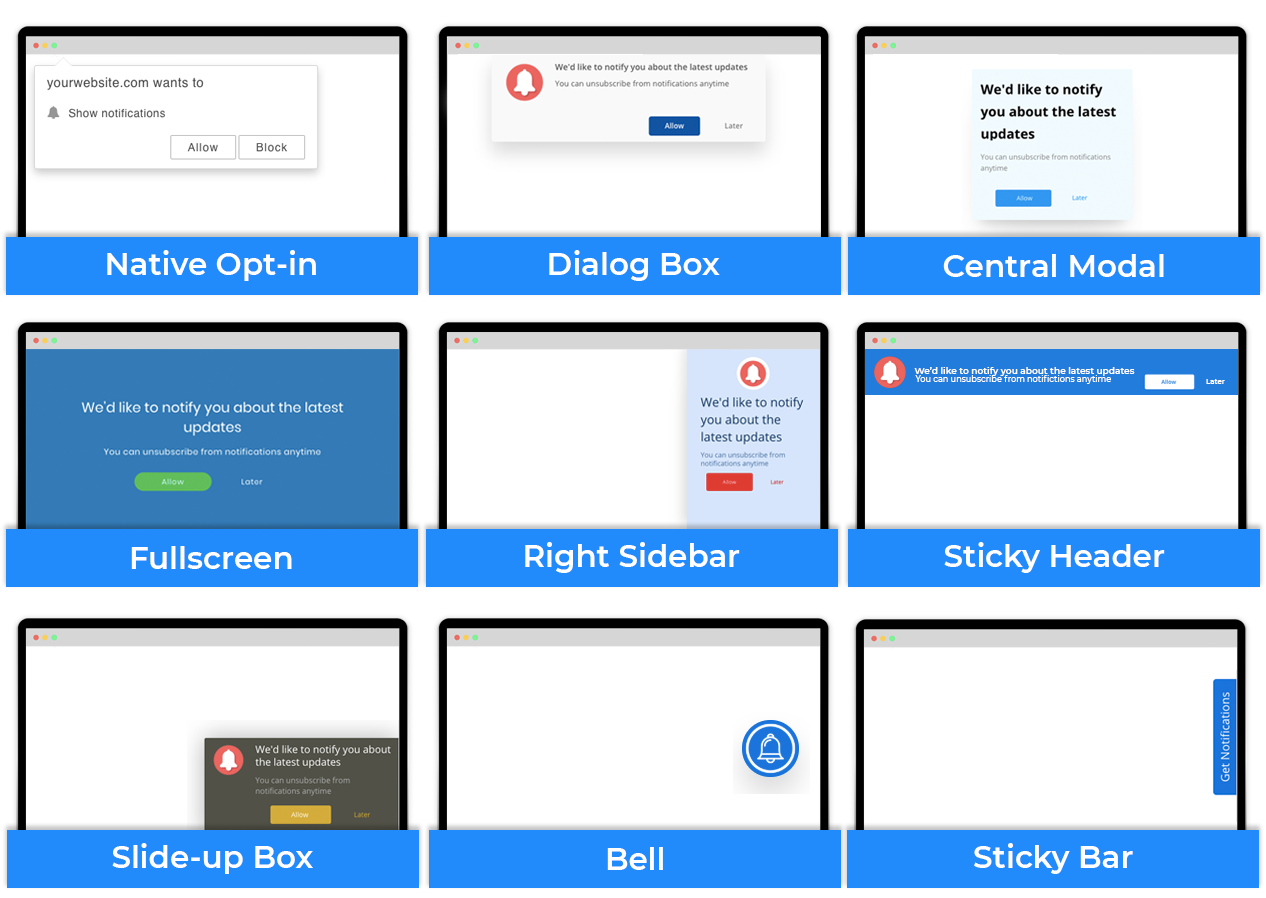
Desktop Prompt Designs
Subscription Prompt Designs for Mobile Devices
What can you Customize in your Opt-In Prompt?
You have the freedom to customize the following elements of your opt-in prompt:
- Content - You can edit the text of your notification - Title, Message, and Buttons and use an icon of your choice.
- Appearance - You can change the background colour of the prompt and buttons and the text colour of Title, Message, and Buttons.
- Timing - You can also optimize the time after which the first opt-in will show up and even the time after which the prompt will repeat itself in cases, wherein, the visitor has not clicked on any button or has clicked on the Later button.
Note: If your visitor dismisses the native opt-in thrice, the browser will not allow you to show the prompt again.
Here is a list of what design elements can be changed for different Subscription Prompt designs.
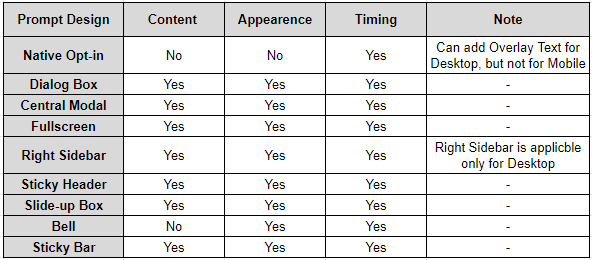
Customize your Opt-In Prompt Content
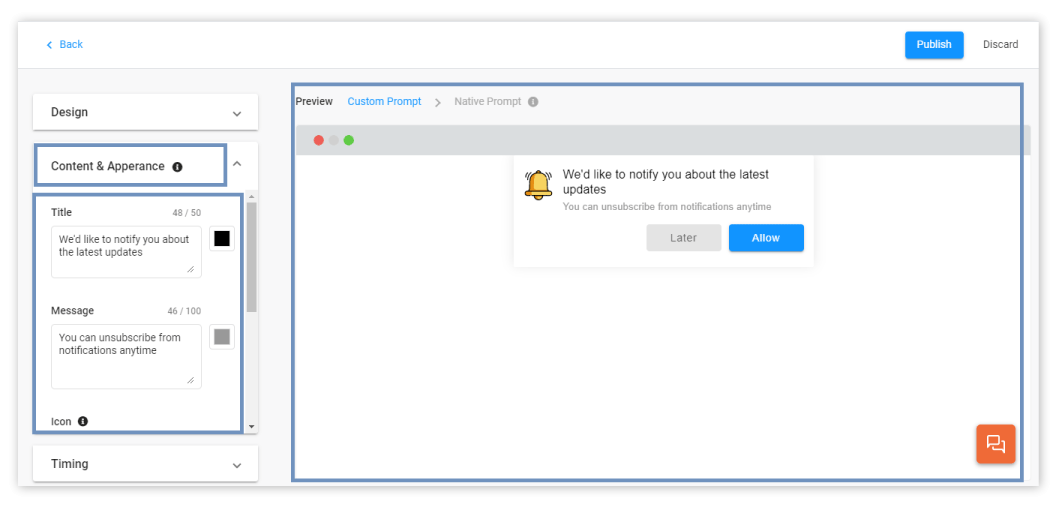
You can work on the following content elements of your opt-in:
- Icon
- Title Text
- Message Text
- Allow Button Text
- Later Button Text
You can also see the preview of the changes on the right side of your screen.
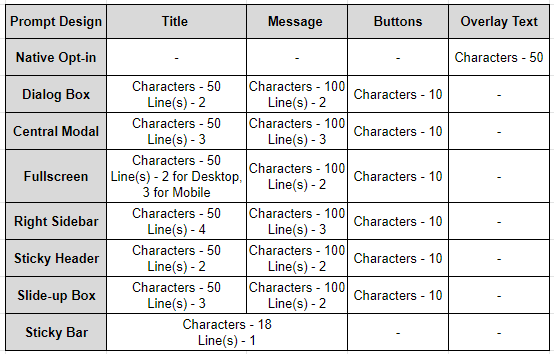
For different Subscription Prompt designs, the text elements support a different number of characters. Here is the specification for each text elements for all Prompt designs:
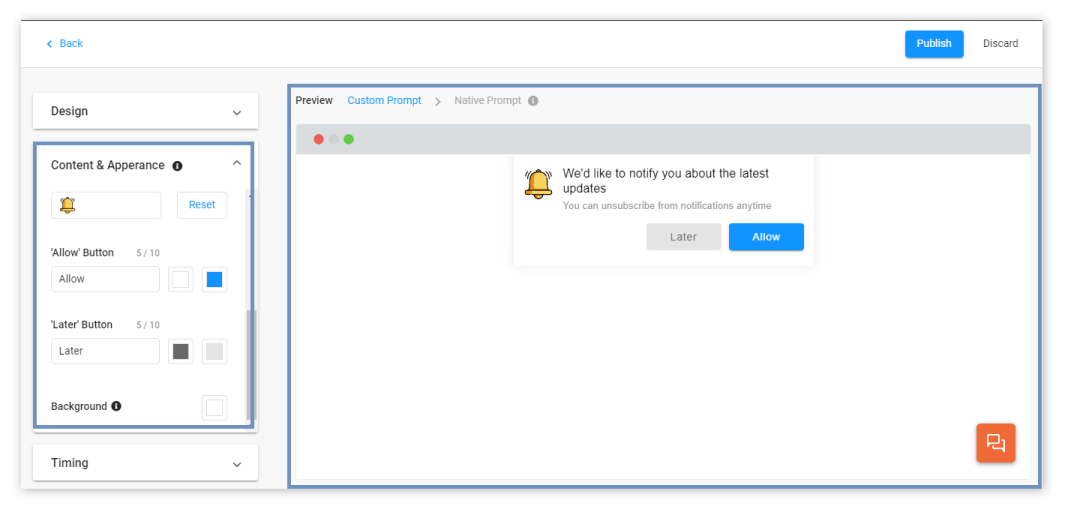
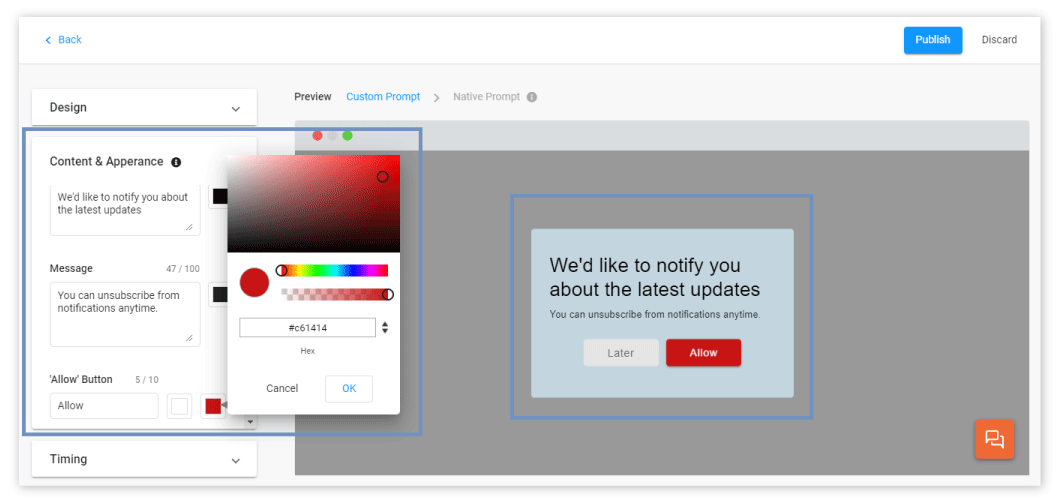
Customize Opt-In Prompt Appearance
You can work on the following appearance elements of your opt-in prompt:
- Prompt Background Color
- Title Text Color
- Message Text Color
- Allow Button Text Color
- Later Button Text Color
You can also see the preview of the changes on the right side of your screen.
Customize Opt-In Prompt Timing
You can work on the following Timing elements of your opt-in prompt:
- Immediately: Shows the prompt as soon as the page loads.
- After user spends
xseconds: Specify the time after which the prompt should appear for a website visitor. - After the user scrolls down to the next screen: The prompt would be shown on a scroll to the next screen. In case there's no scroll, the prompt would be visible after 5 seconds by default.
- Repeat Prompt Delay: Specify the time after which the prompt should appear if the visitor has not clicked on any of the buttons.
- Later Prompt Delay: Specify the time after which the prompt should appear if the visitor has clicked on the "Later" button.
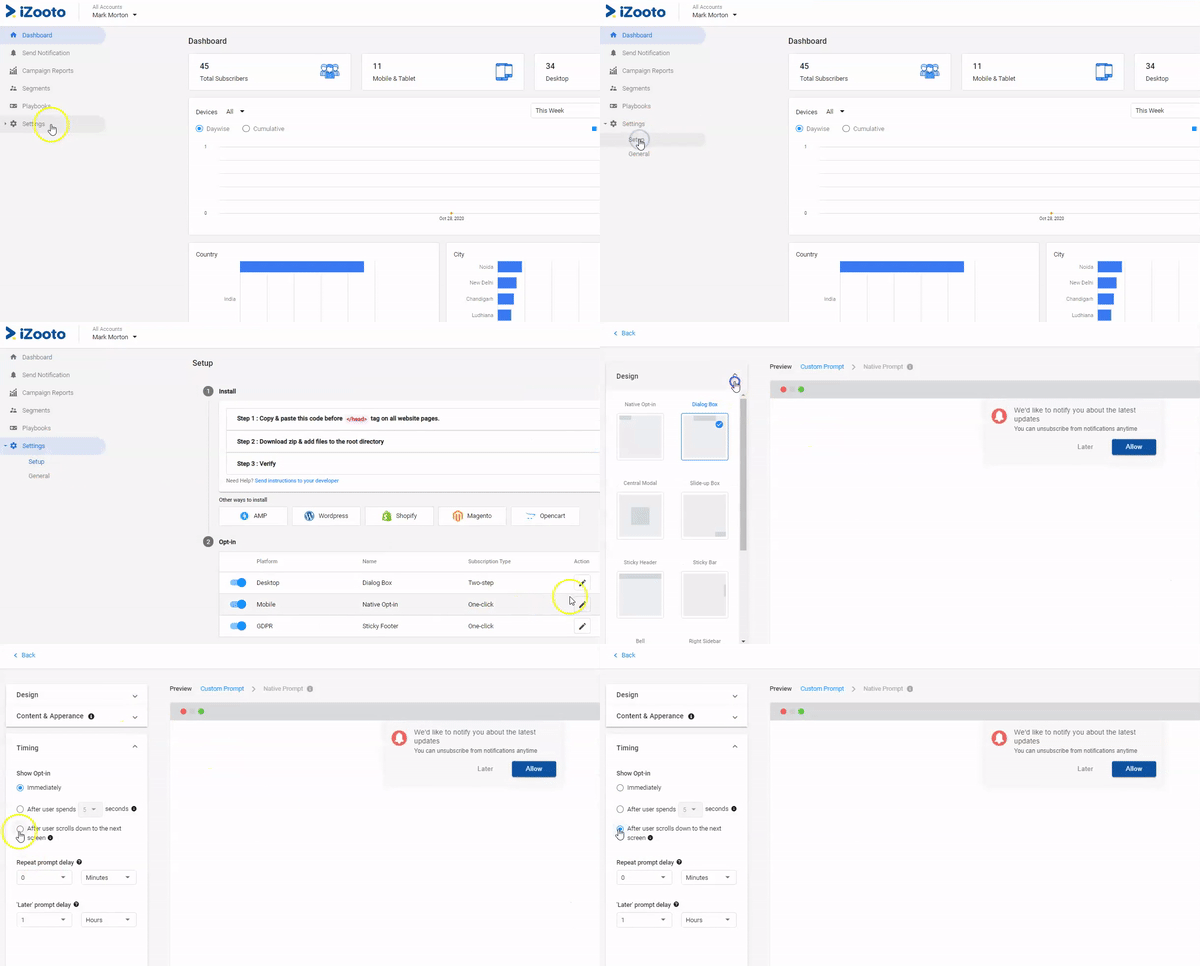
We recommend that you time the opt-in prompt to come up only after the visitor has spent some time on your website.
Capture User Preferences at Subscription
A lot of times, a user might be interested in receiving notifications from only a particular category of your website. This especially holds true for news and content websites. And iZooto allows you to capture these preferences at the time of subscription itself.
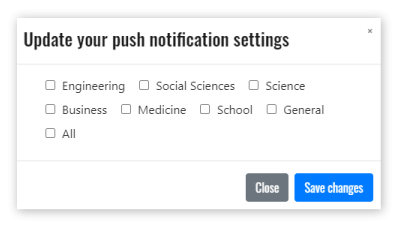
Note:
Image for reference only. You will have to design your own subscription opt-in.
Step 1: Design your opt-in
Design the opt-in prompt for your website. You can refer to the template mentioned above.
There are three key components to the subscription opt-in:
a. Categories (Represented by the checkboxes above)
b. Subscription action
Add the subscription prompt trigger to the 'Subscribe' button using the 'triggerPrompt' function mentioned below.
<button onclick="window._izq = window._izq||[]; window._izq.push(['triggerPrompt']);">Subscribe</button>
c. 'Not Now' action
If the user doesn't want to subscribe to notifications on the first visit, you can set a cookie delay on the 'Not Now' button to prompt the user only after the specified delay.
Please note that you should disable the automatic prompt on page visits first.
<script>window._izq = window._izq || []; window._izq.push(["init",{"auto_prompt" : false}]);</script>
This works only with the browser native opt-in design.
Step 2: Save user preferences
Save the options selected by the website visitors in cookies as soon as they click on 'Subscribe'.
Step 3: Assign preferences to subscribers
iZooto's callback function lets you assign user preferences at subscription using user properties. Here is the sample code:
<script>window._izq = window._izq || []; window._izq.push(["init",{"auto_prompt" : false}]);
window._izq.push(["registerSubscriptionCallback",function(obj){
	if(obj.statuscode==1){
		/*
			Your code comes here
			Extract user preferences and assign them using userproperties
		*/

  		window._izq.push(["userProfile",{"add":{
				"categories":preference;
			}
		}]);
	}
}]);</script>
<script src="https://cdn.izooto.com/scripts/<Your-Website-Hash-Key>.js"></script>
Step 4: Create an Audience
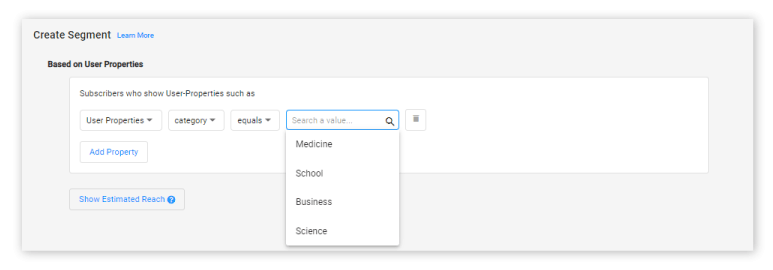
You can use preferences set at subscription to create the required audience (Segments > Create > Add Property > Select User Properties from the drop-down menu)
Updated over 3 years ago
