Creating Safari Web Push Certificate
This document will guide you to create Safari certificates that will help you enable Web Push Opt-in on Safari Browser on macOS.
Before we start, you need to have an active paid Apple Developer subscription to create a unique Push ID for your website.
The document is divided into 3 Steps:
- Create a Certificate Request
- Setting up Website Push ID for APNS (Apple Push Notification Service)
- Generating Web Push Certificate
STEP 1: Create a Certificate Request
In this step, we are going to create a certificate signing request.
- Launch the Keychain Access app.
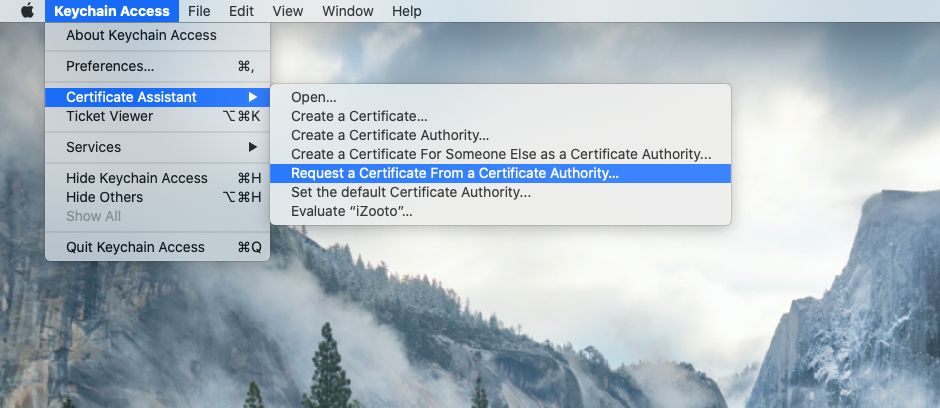
- Click on Keychain Access > Certificate Assistant > then, Request a Certificate From a Certificate Authority.
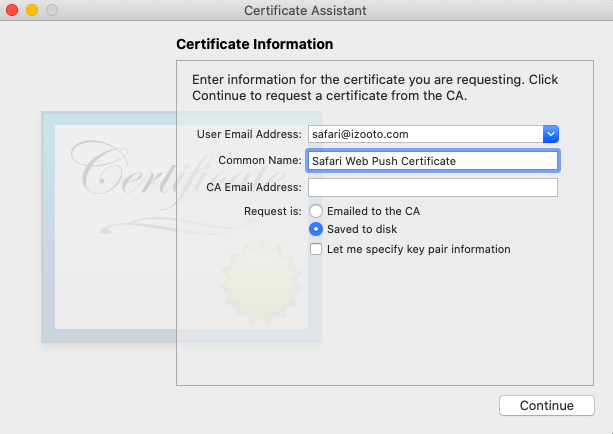
- Enter an email address, a name, and then check the "Saved to disk" option. Click on "Continue".
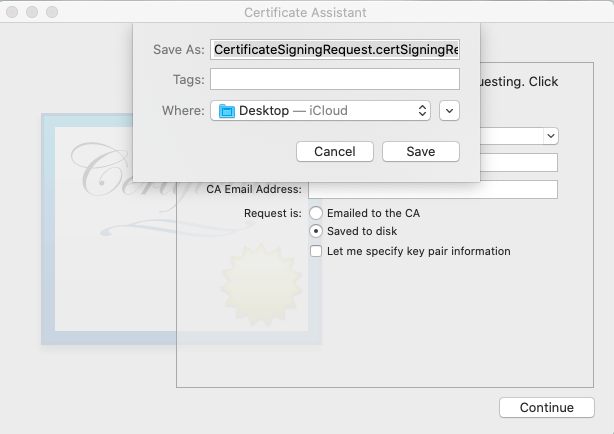
- Save the certificate signing request (CSR) with the given name, we will need it later to create the Website Push Certificate.
STEP 2: Setting up Website Push ID for APNS (Apple Push Notification Service)
-
You need to first login to the Apple Developer Console. Here, we will create a unique Website Push ID for push notifications.
-
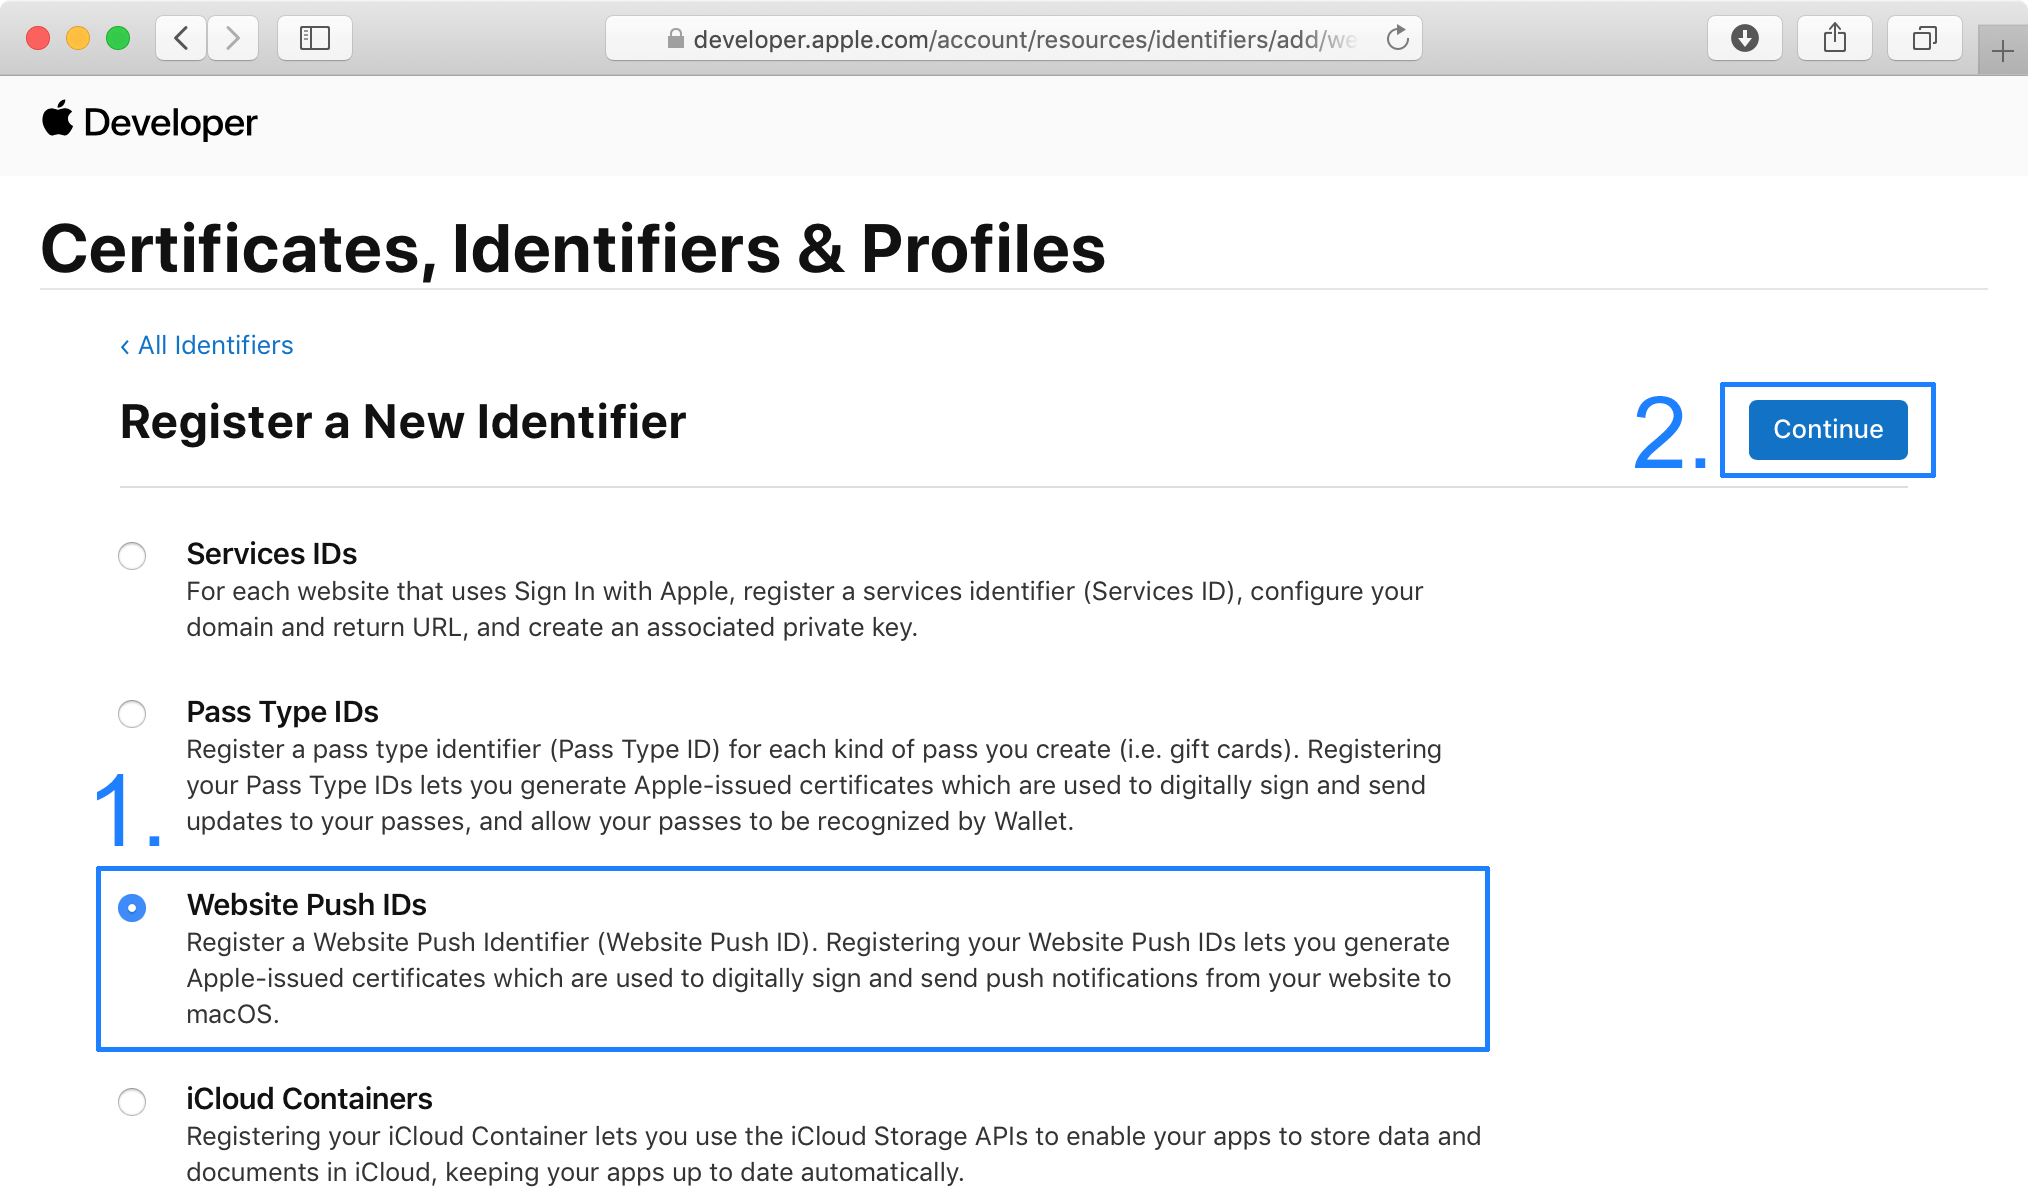
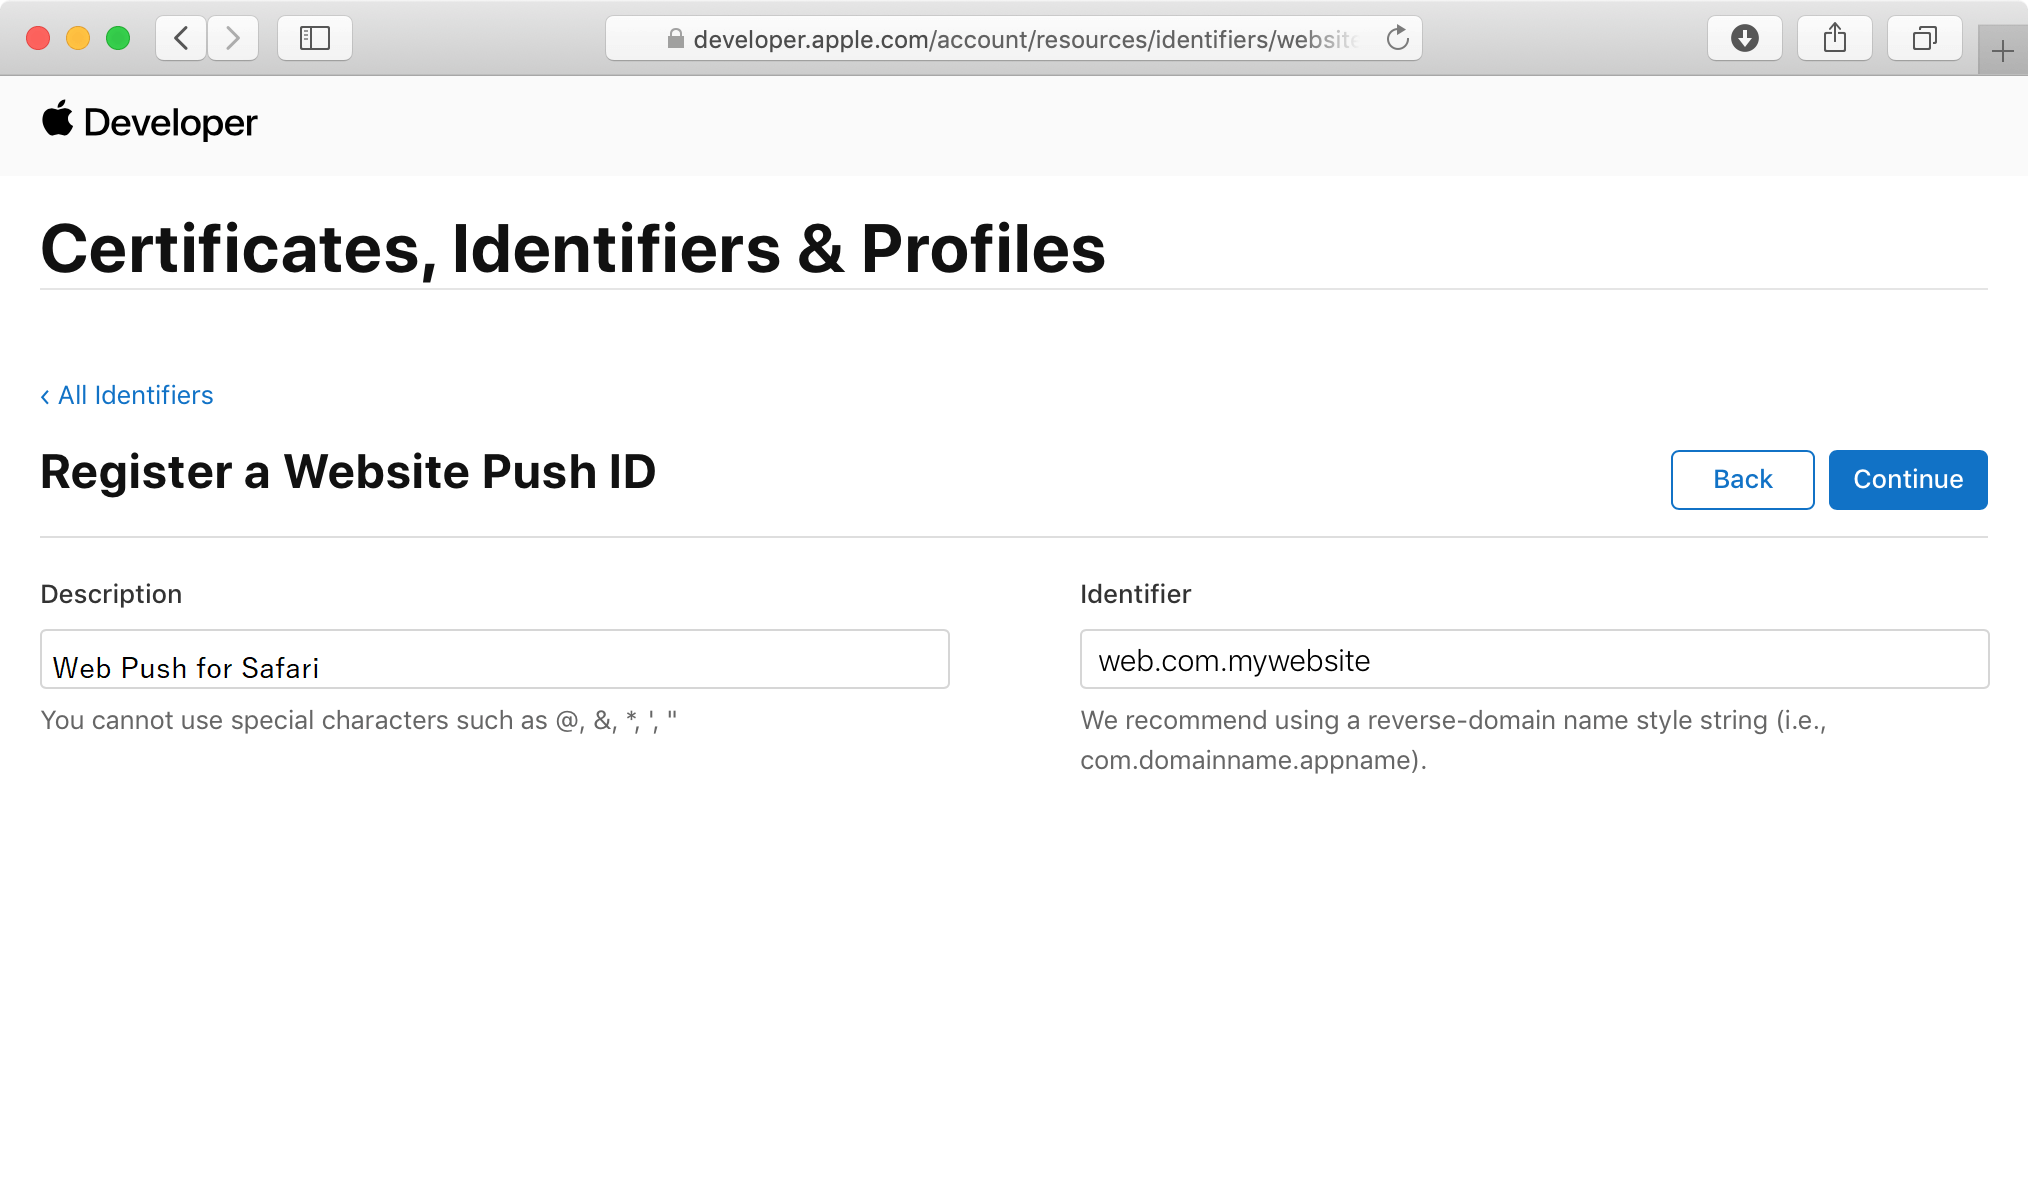
In the Developer Console, click on "Identifiers" and then click on "Register an App ID". Then select "Website Push IDs" from the "Register a New Identifier" list and click "Continue".
- Enter a Description. e.g. 'Web Push for Safari'
-
Then enter an identifier, which follows reverse-domain name styling. So you should enter something like "web.com.mywebsite".
(Note: "web" is added automatically to the identifier) -
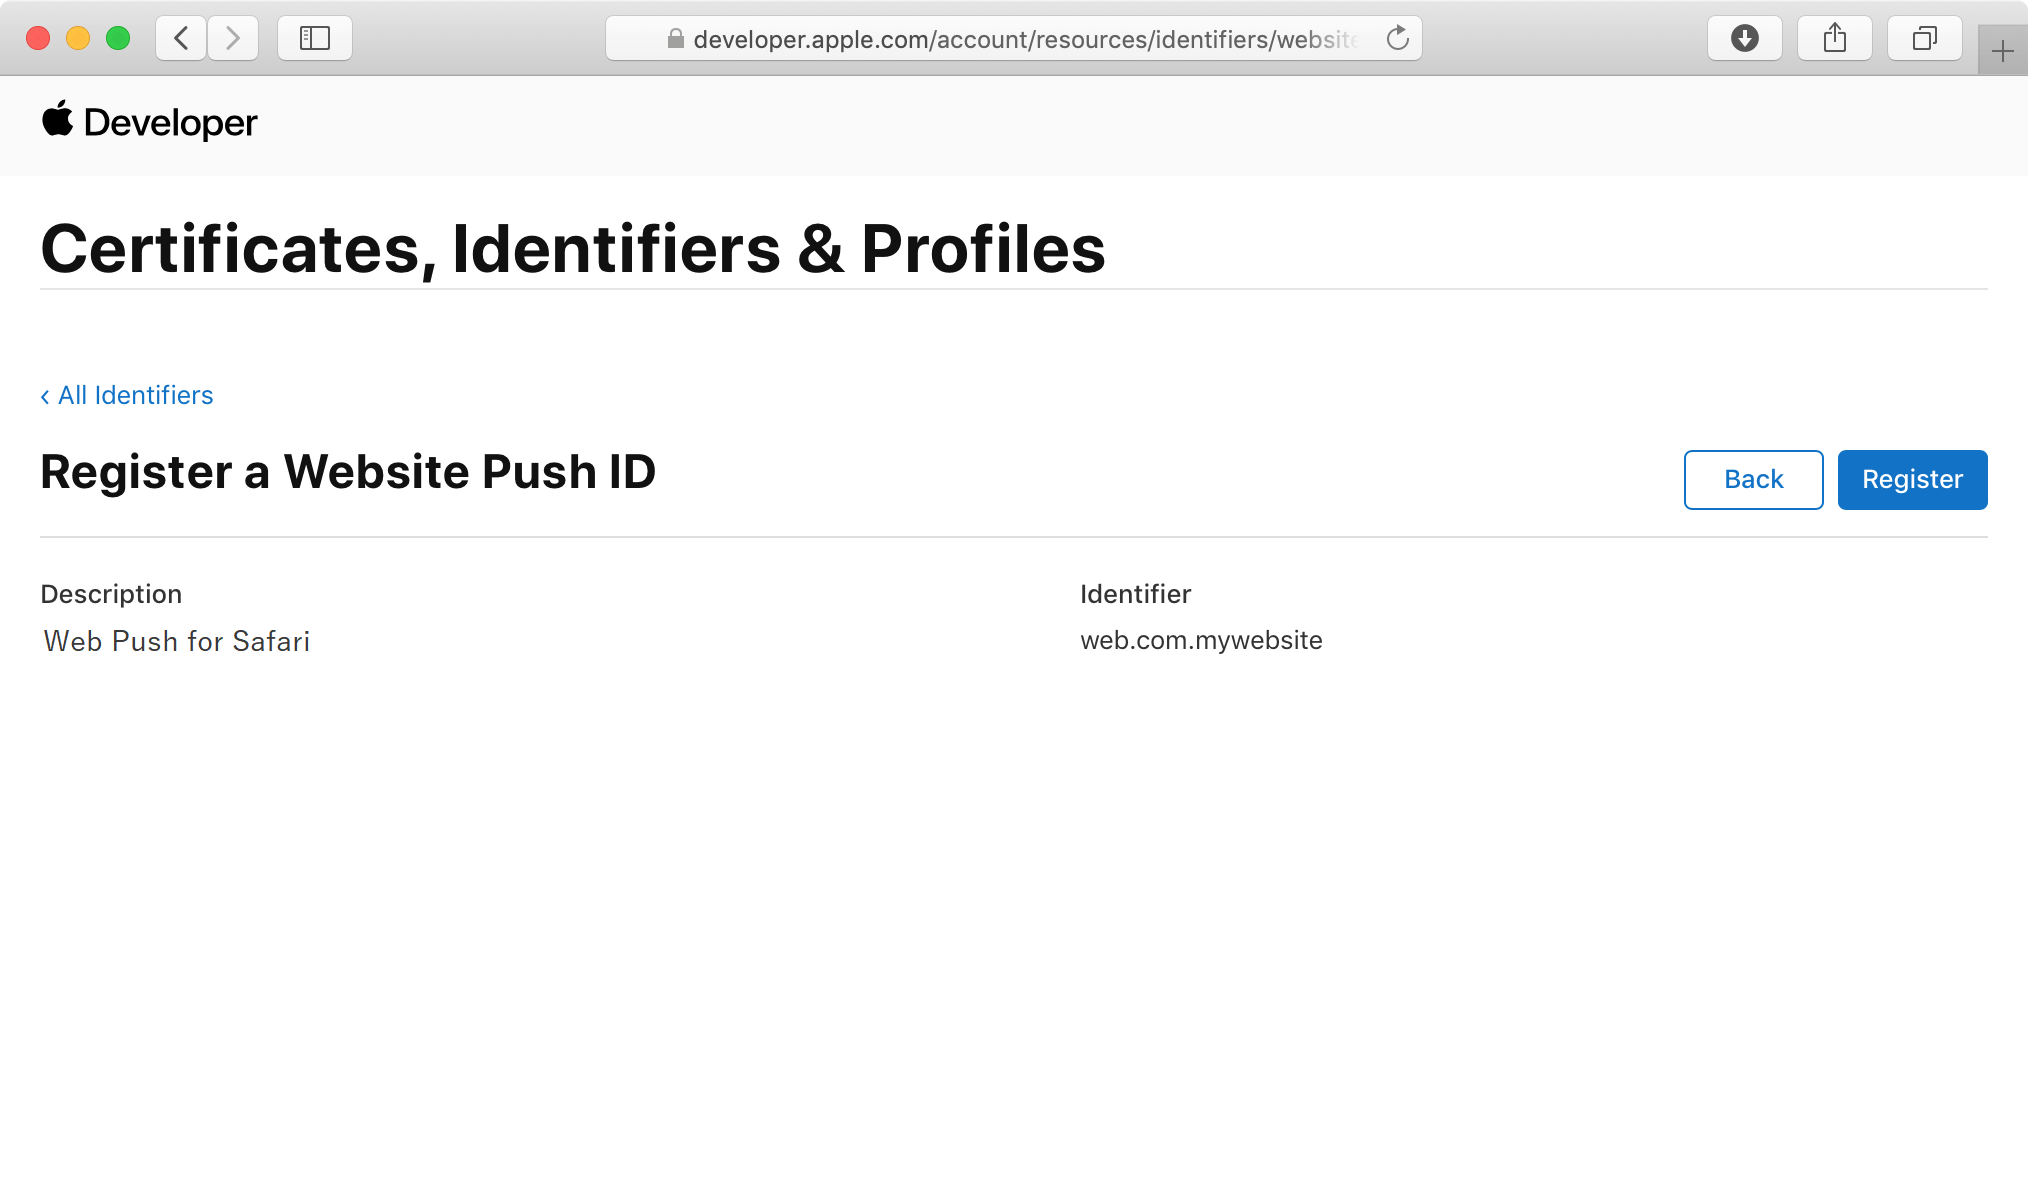
Click on "Continue", check everything is in order, and then click "Register."
STEP 3: Generating Web Push Certificate
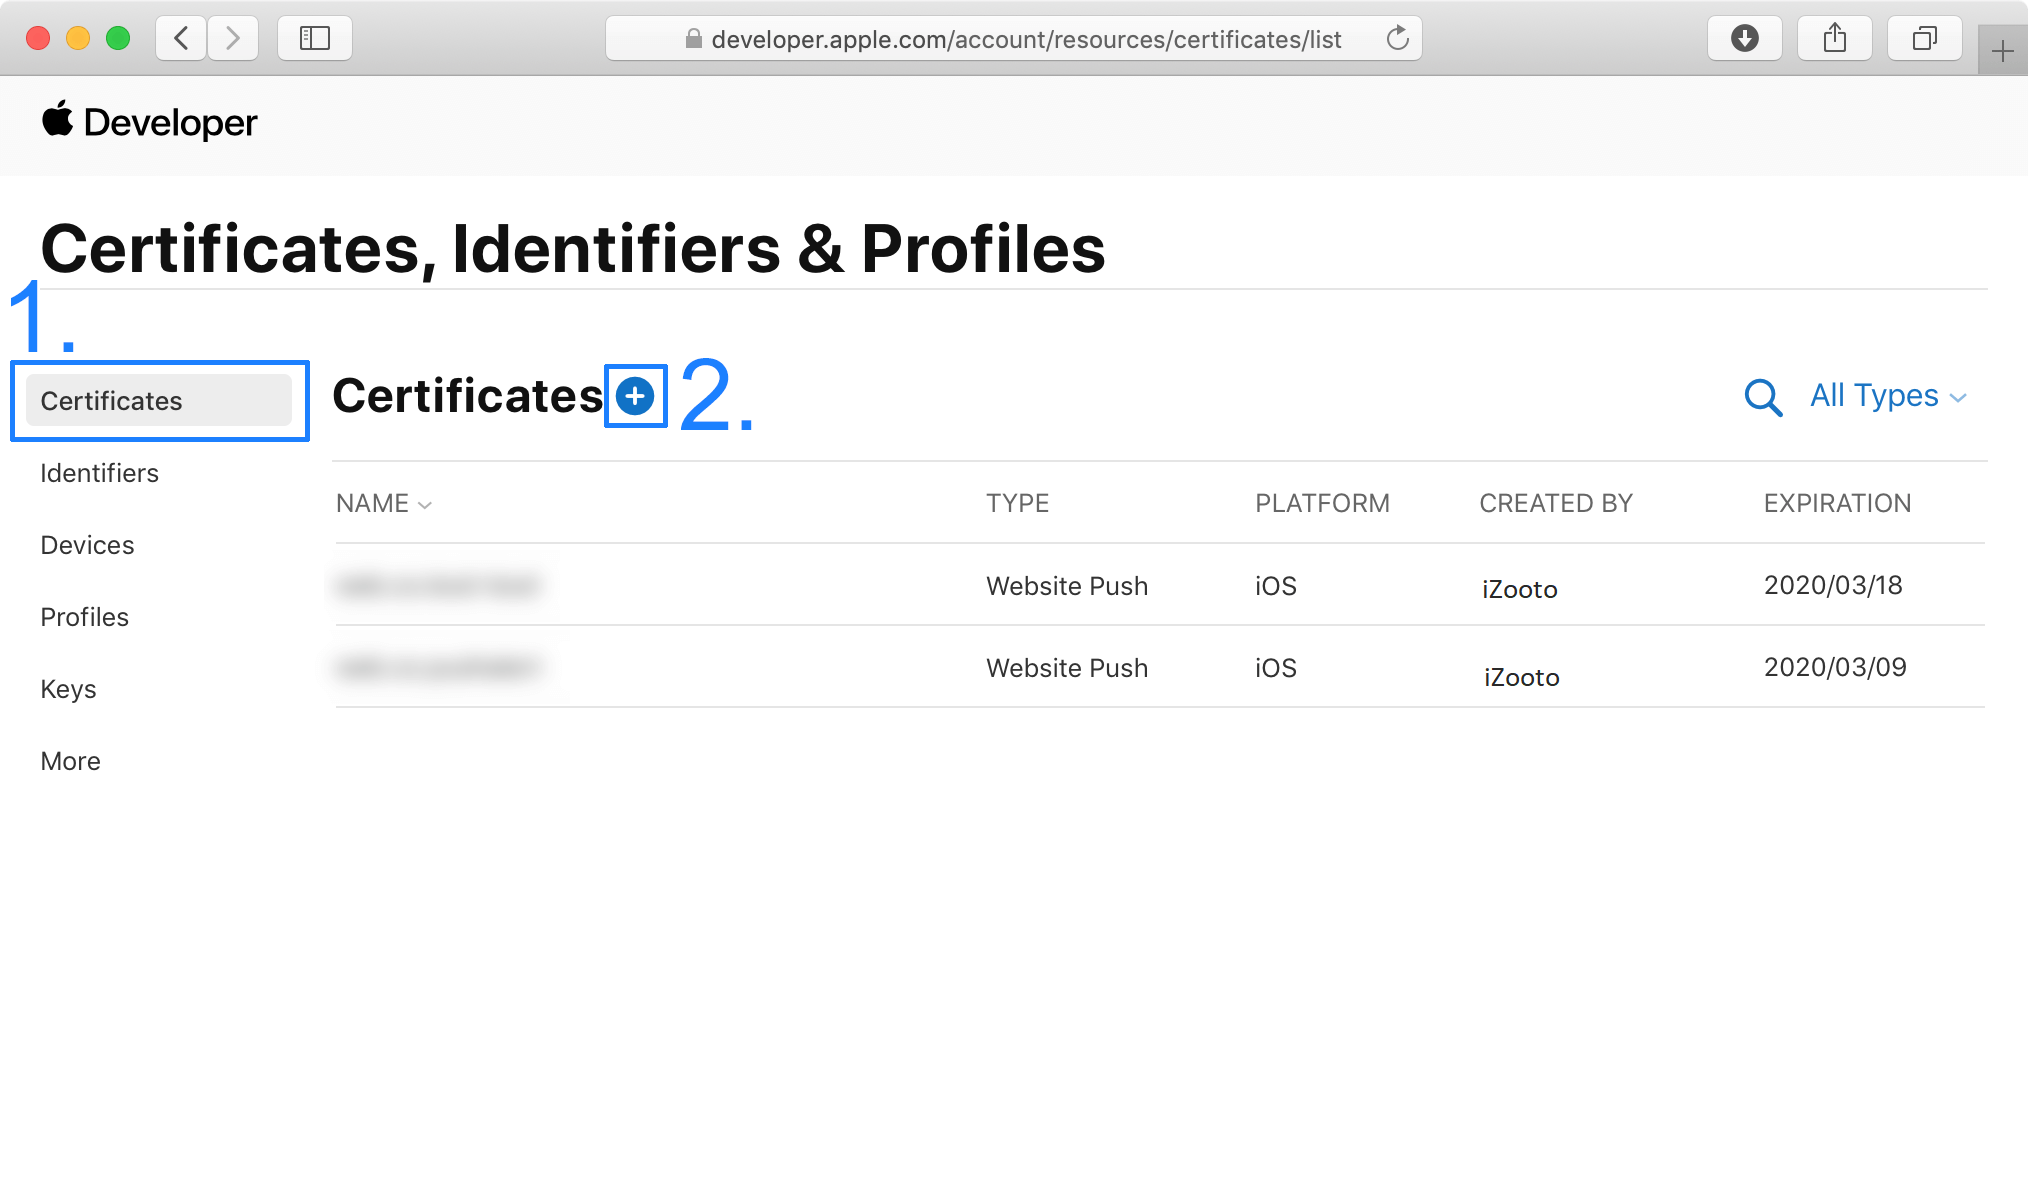
- Click on the Certificates section, then click "+" to see all available options.
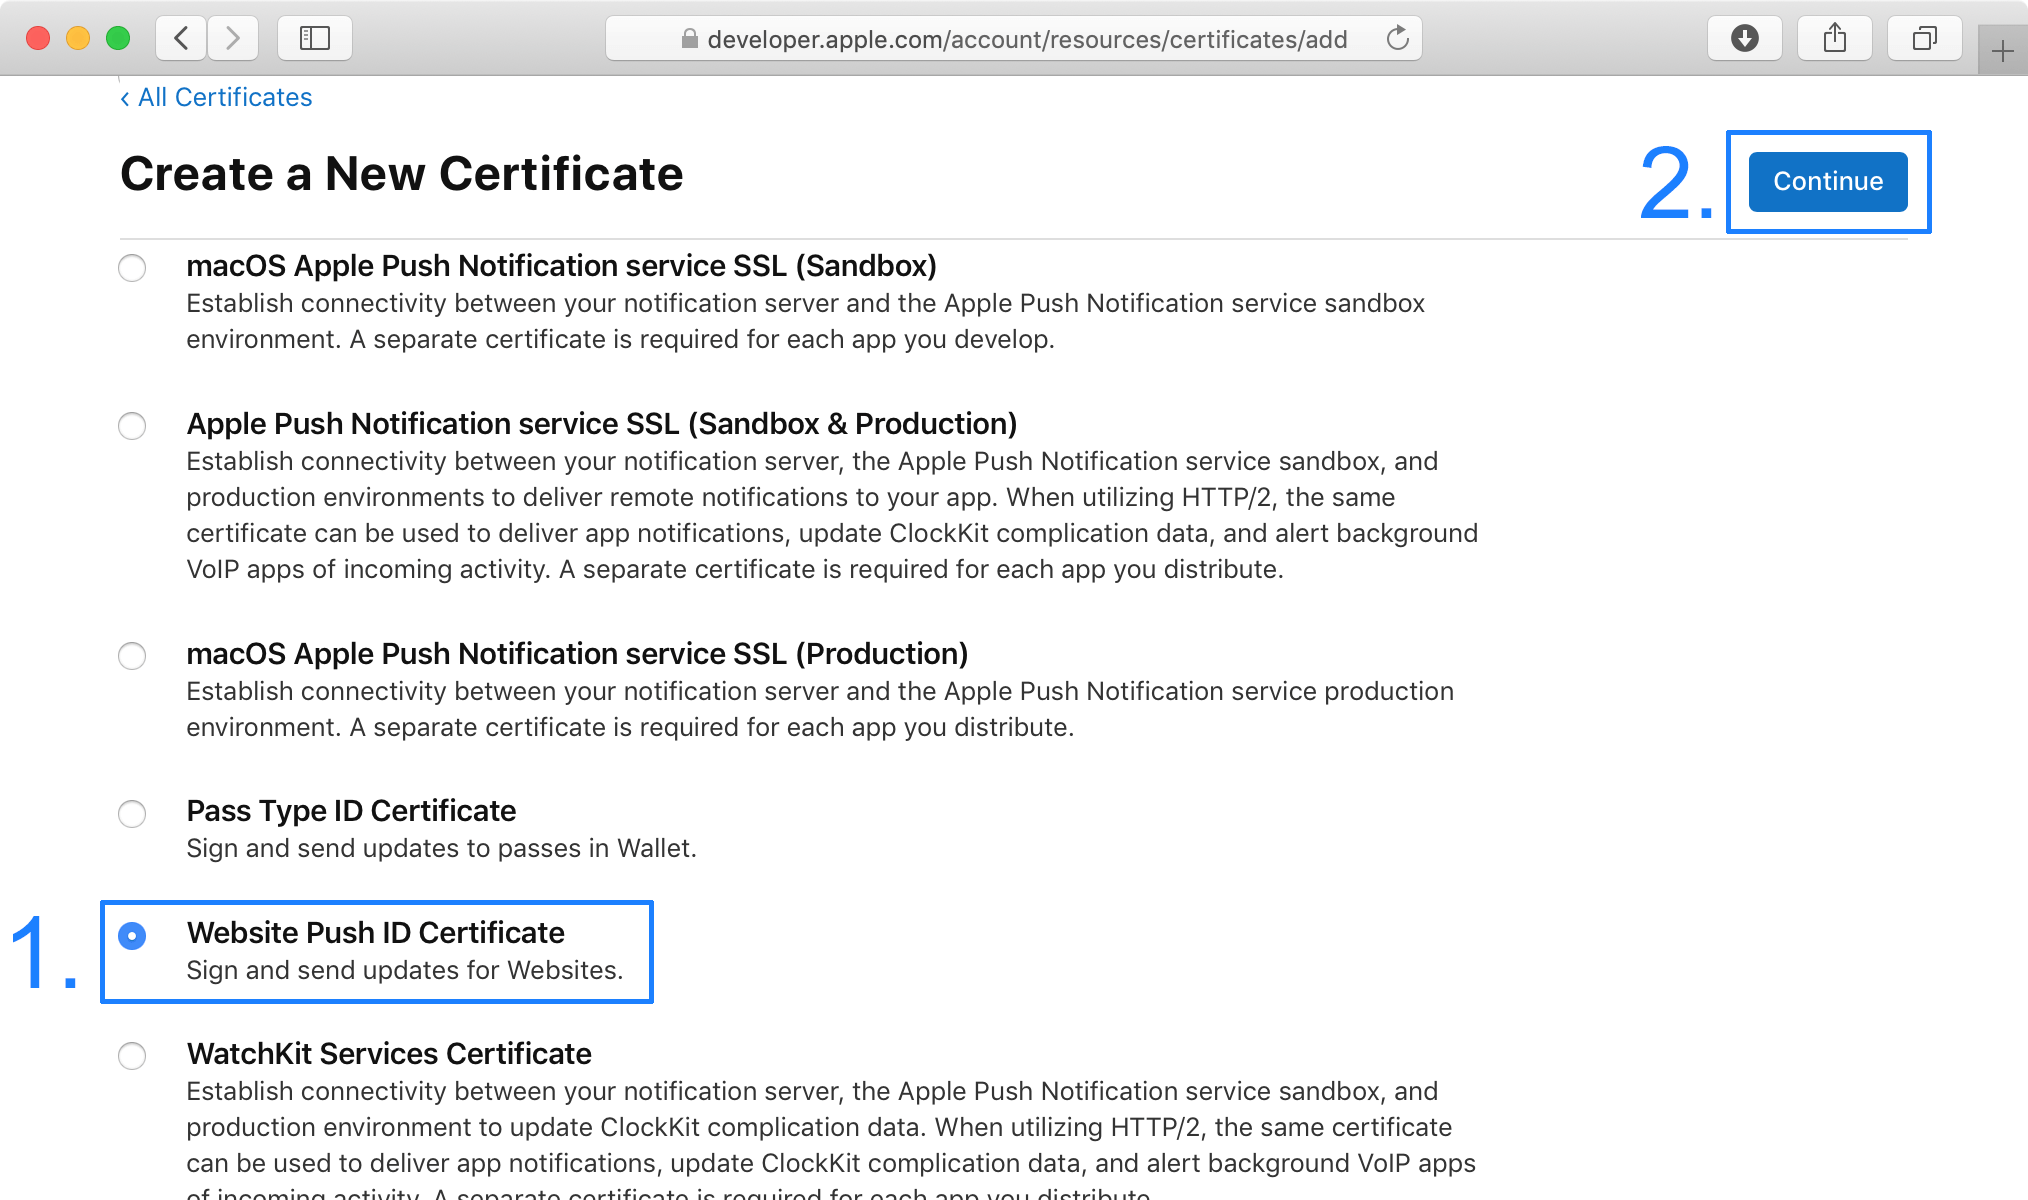
- Click on Website Push ID Certificate and Continue.
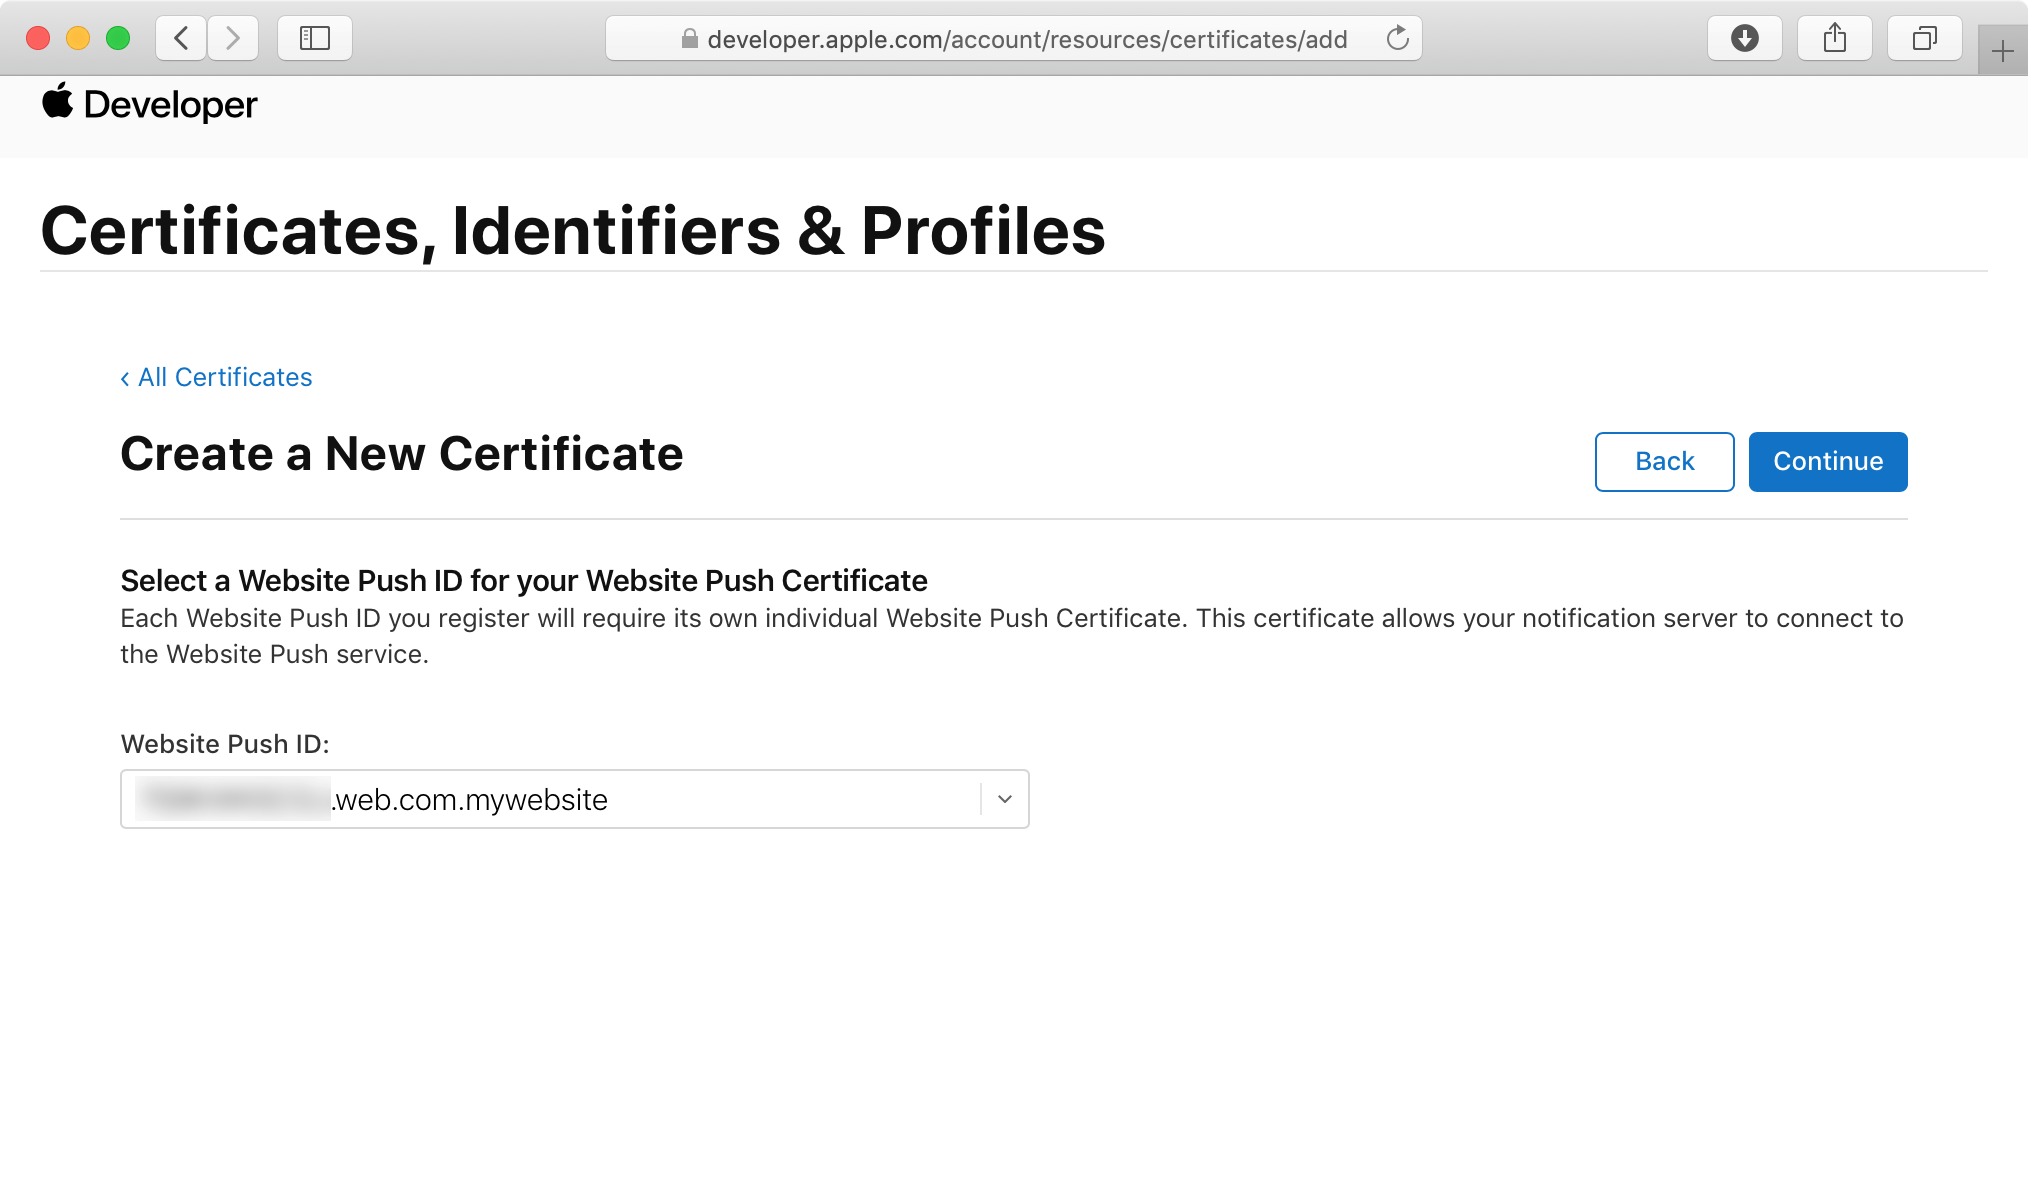
- Next, select the Website Push ID you created earlier in Step 2 and hit Continue.
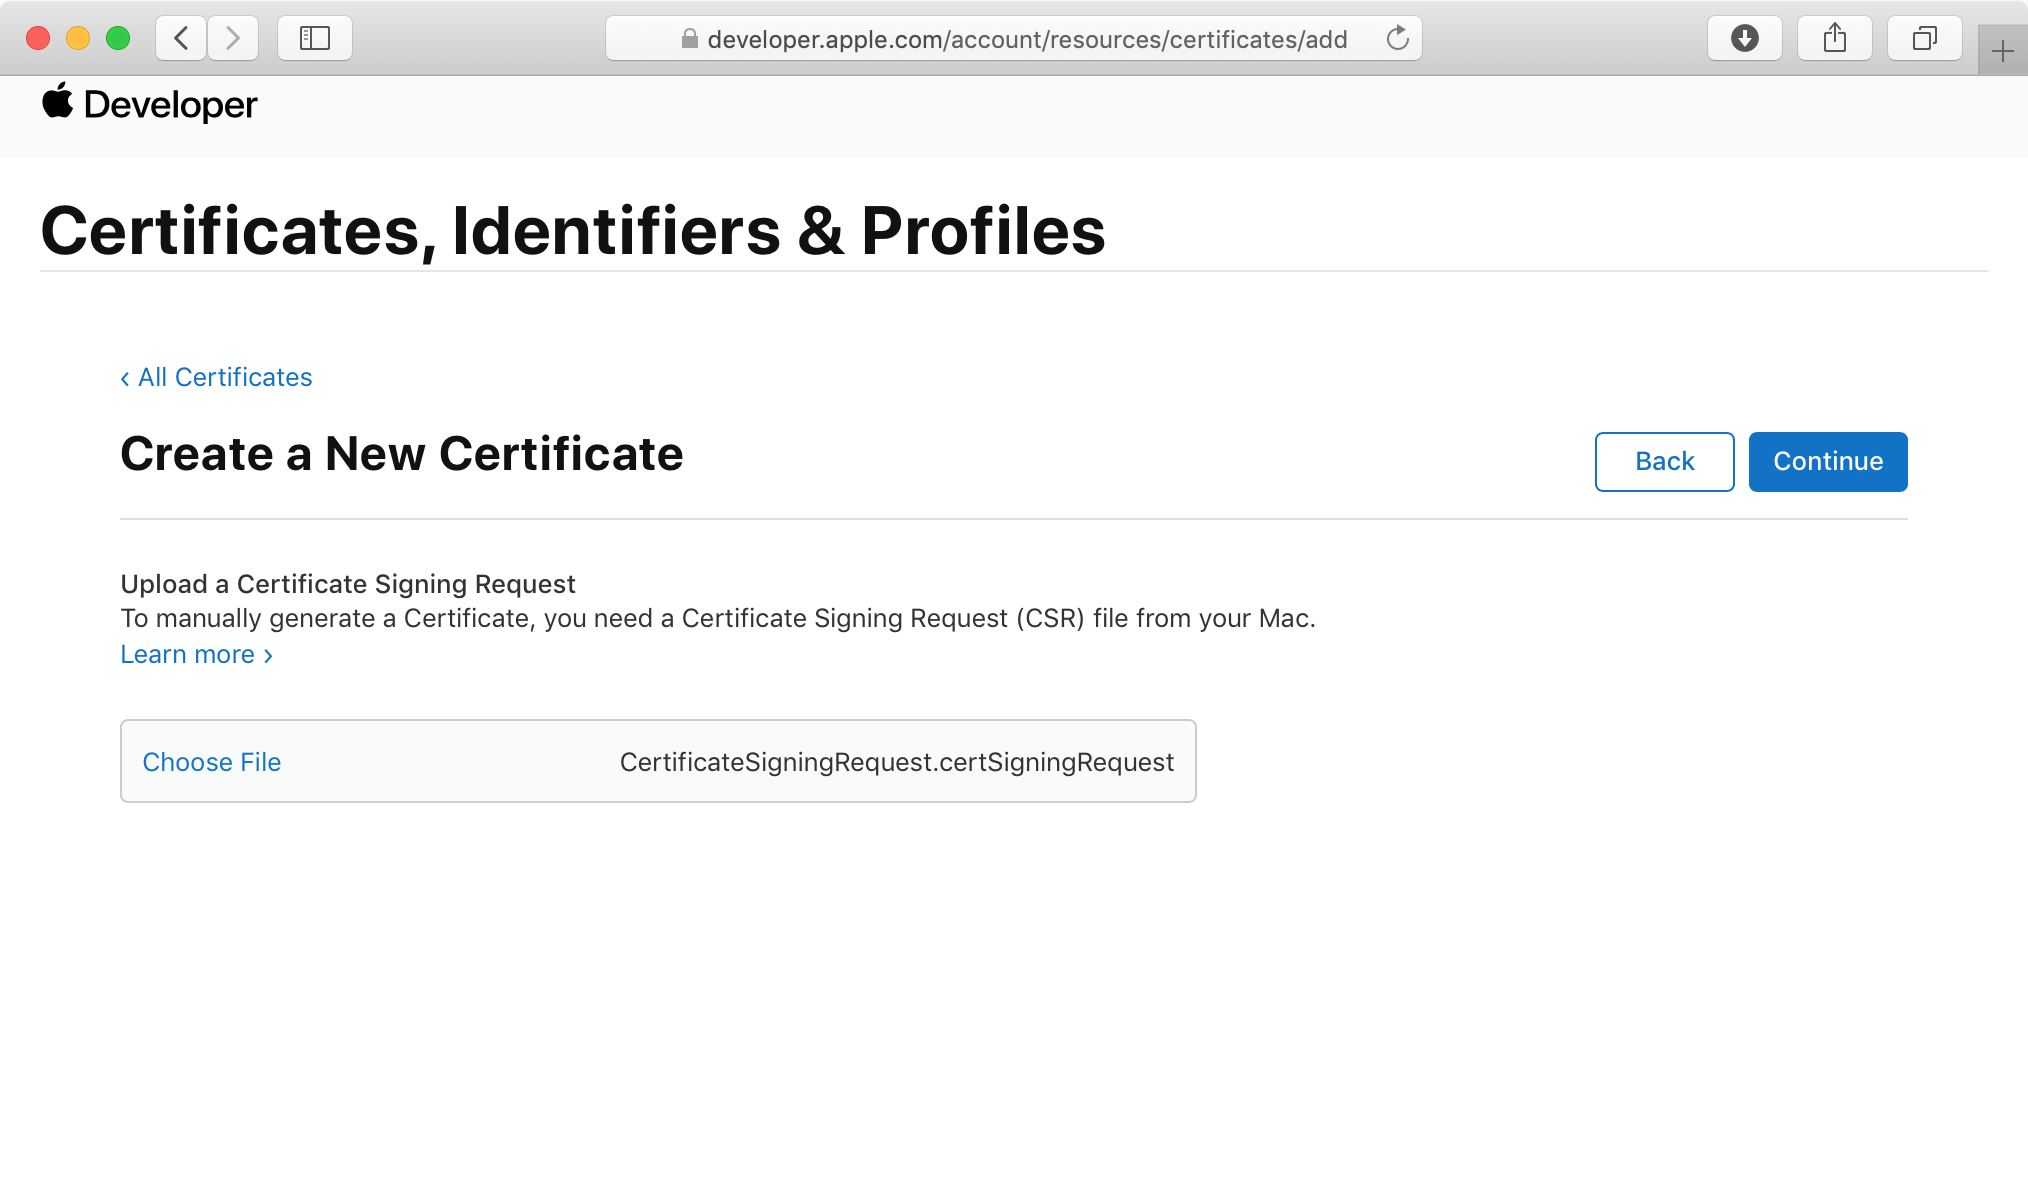
- Now we need the CSR file that was created in Step 1. Browse to the file with the Choose file button, and hit Continue to upload.
- On the next screen you will see "Download Your Certificate". Download the SSL certificate.
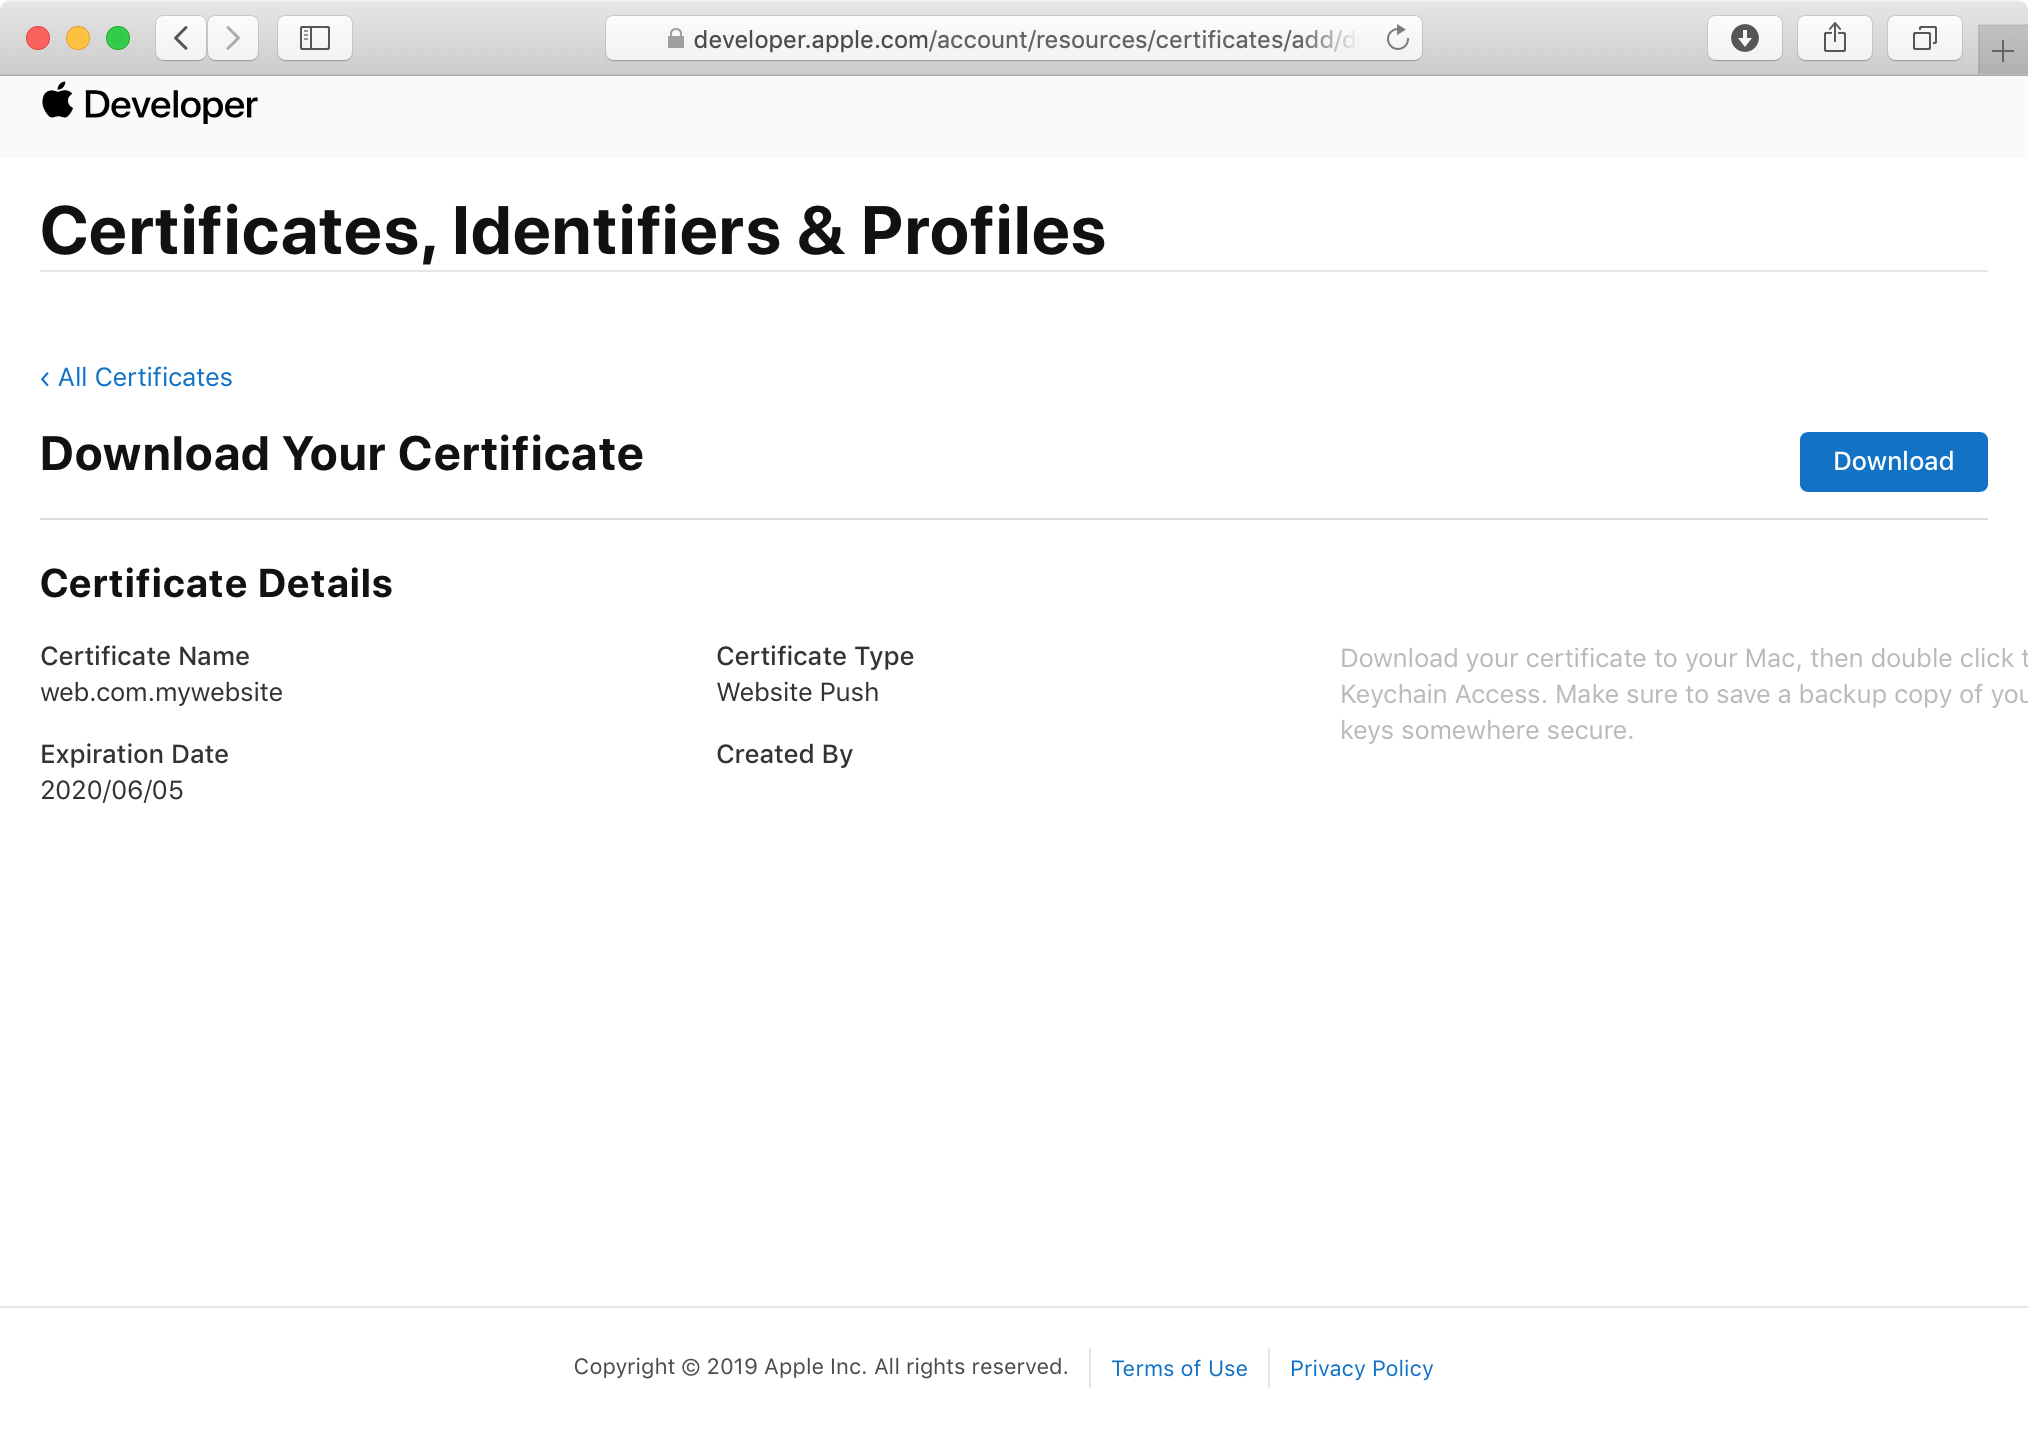
The SSL certificate will be used to send notifications to your Subscribers.
Now we need to install and export the Certificate.
- Double-click on the downloaded certificate, this will install the certificate in the Keychain Access app.
Let’s export the Certificate now.
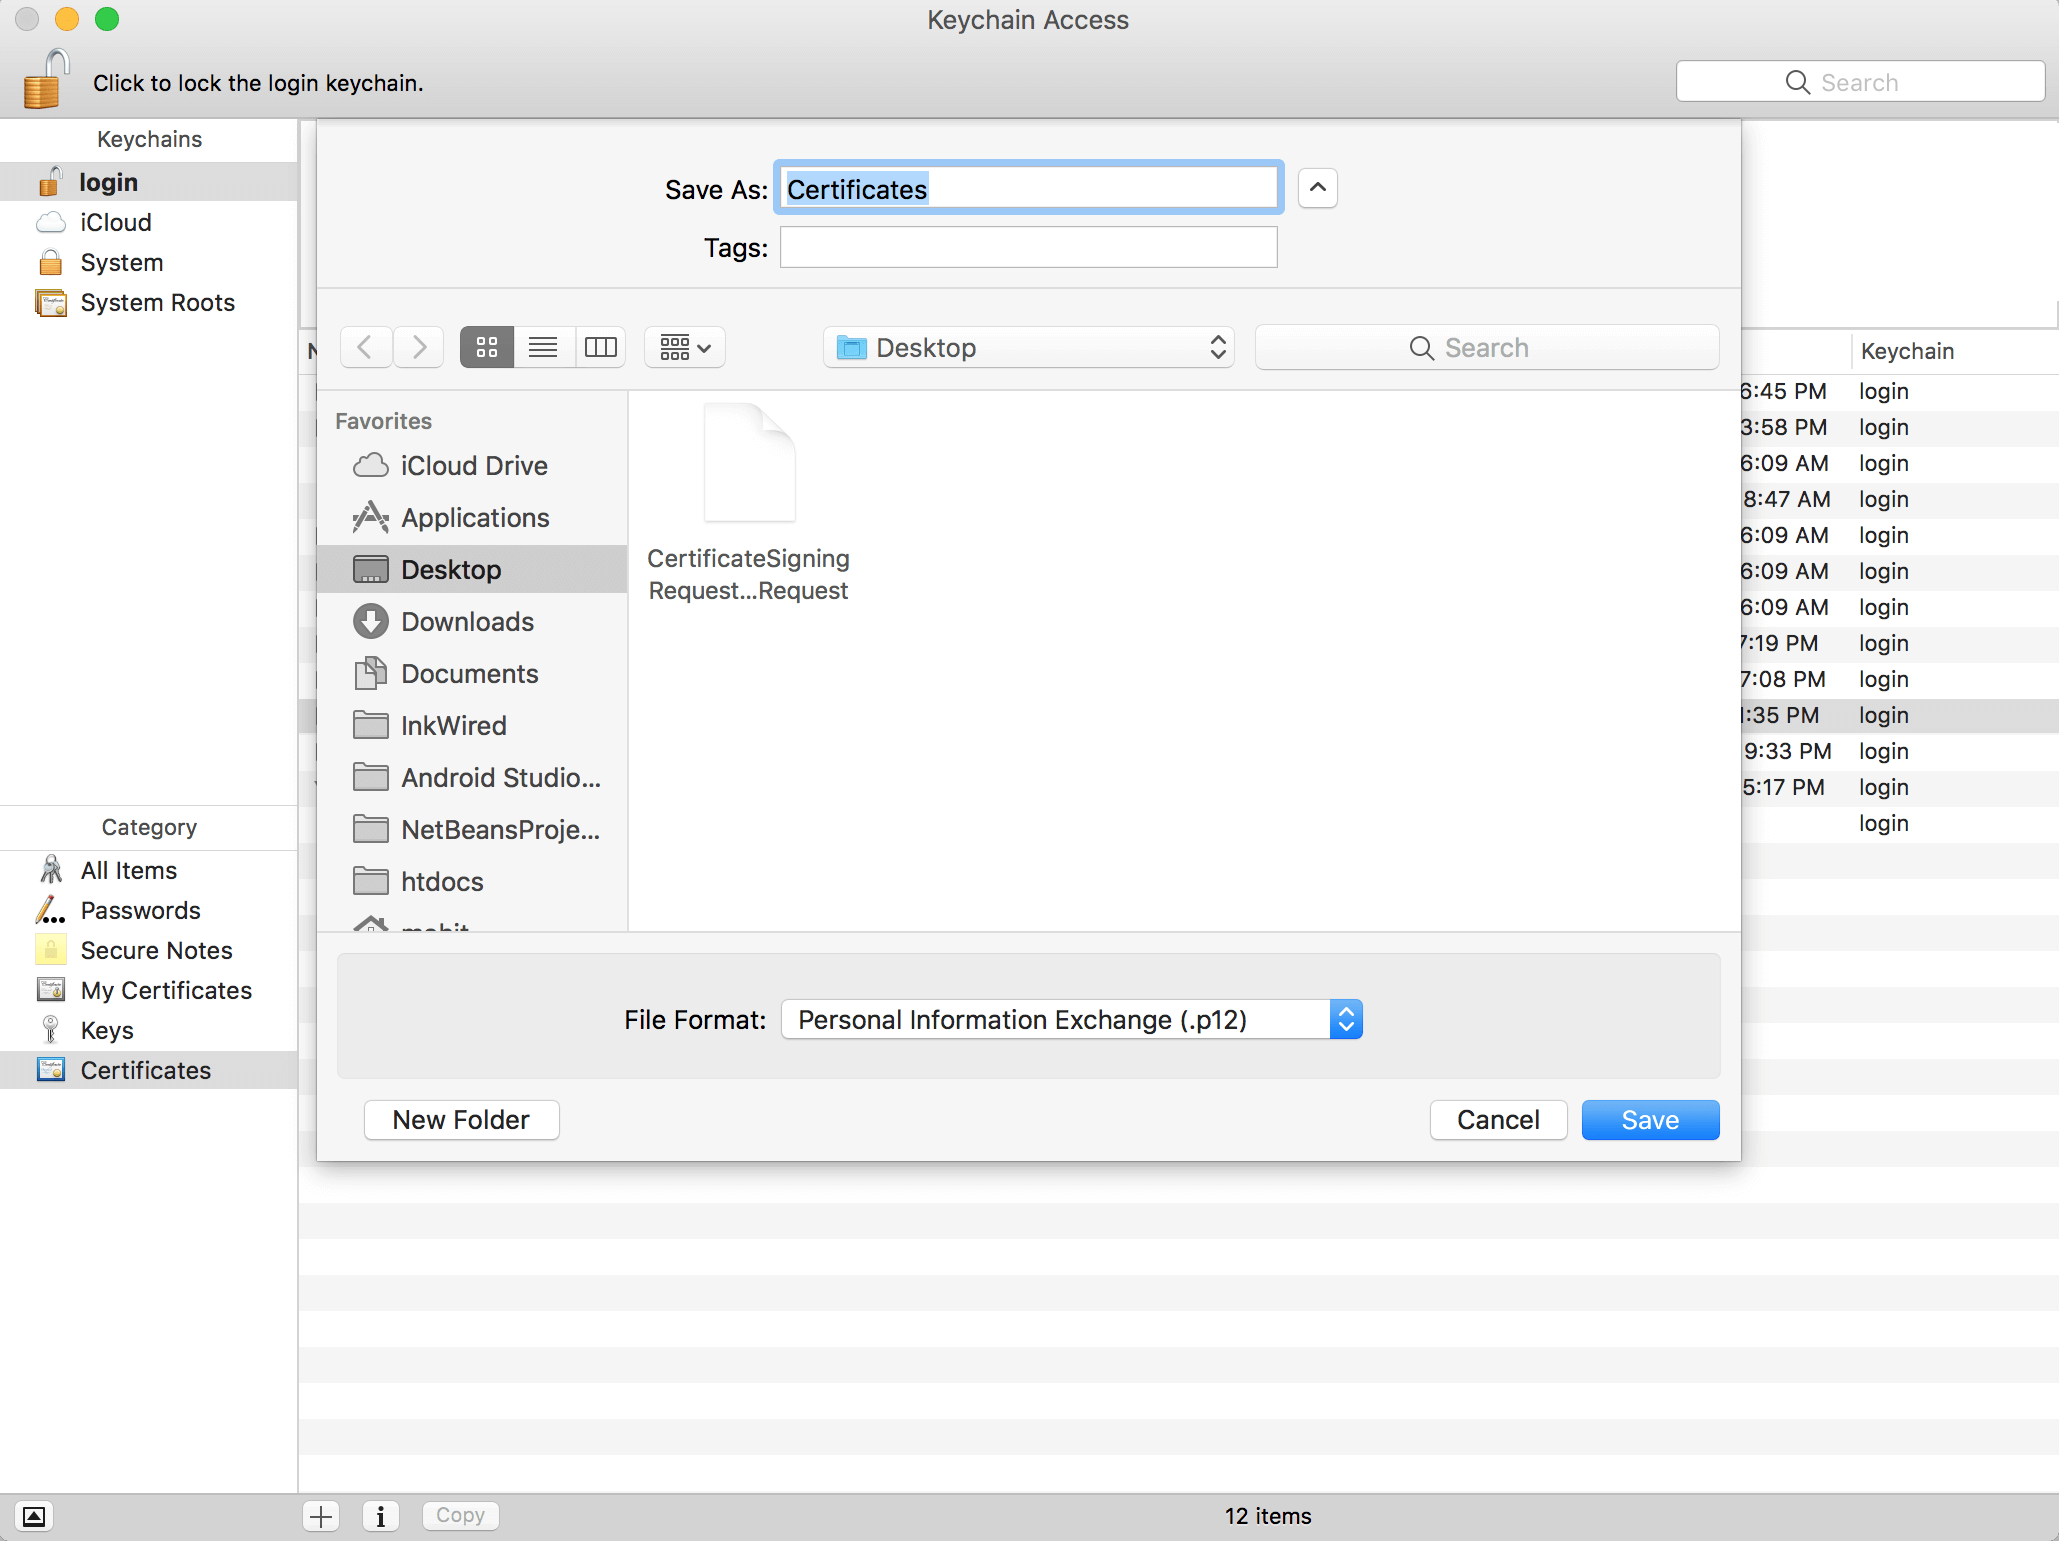
- Open the Keychain Access app and click on Certificates in the category section.
- Right-click on the Website Push ID for which we had created the certificate, and you will get a menu where you need to click on Export.
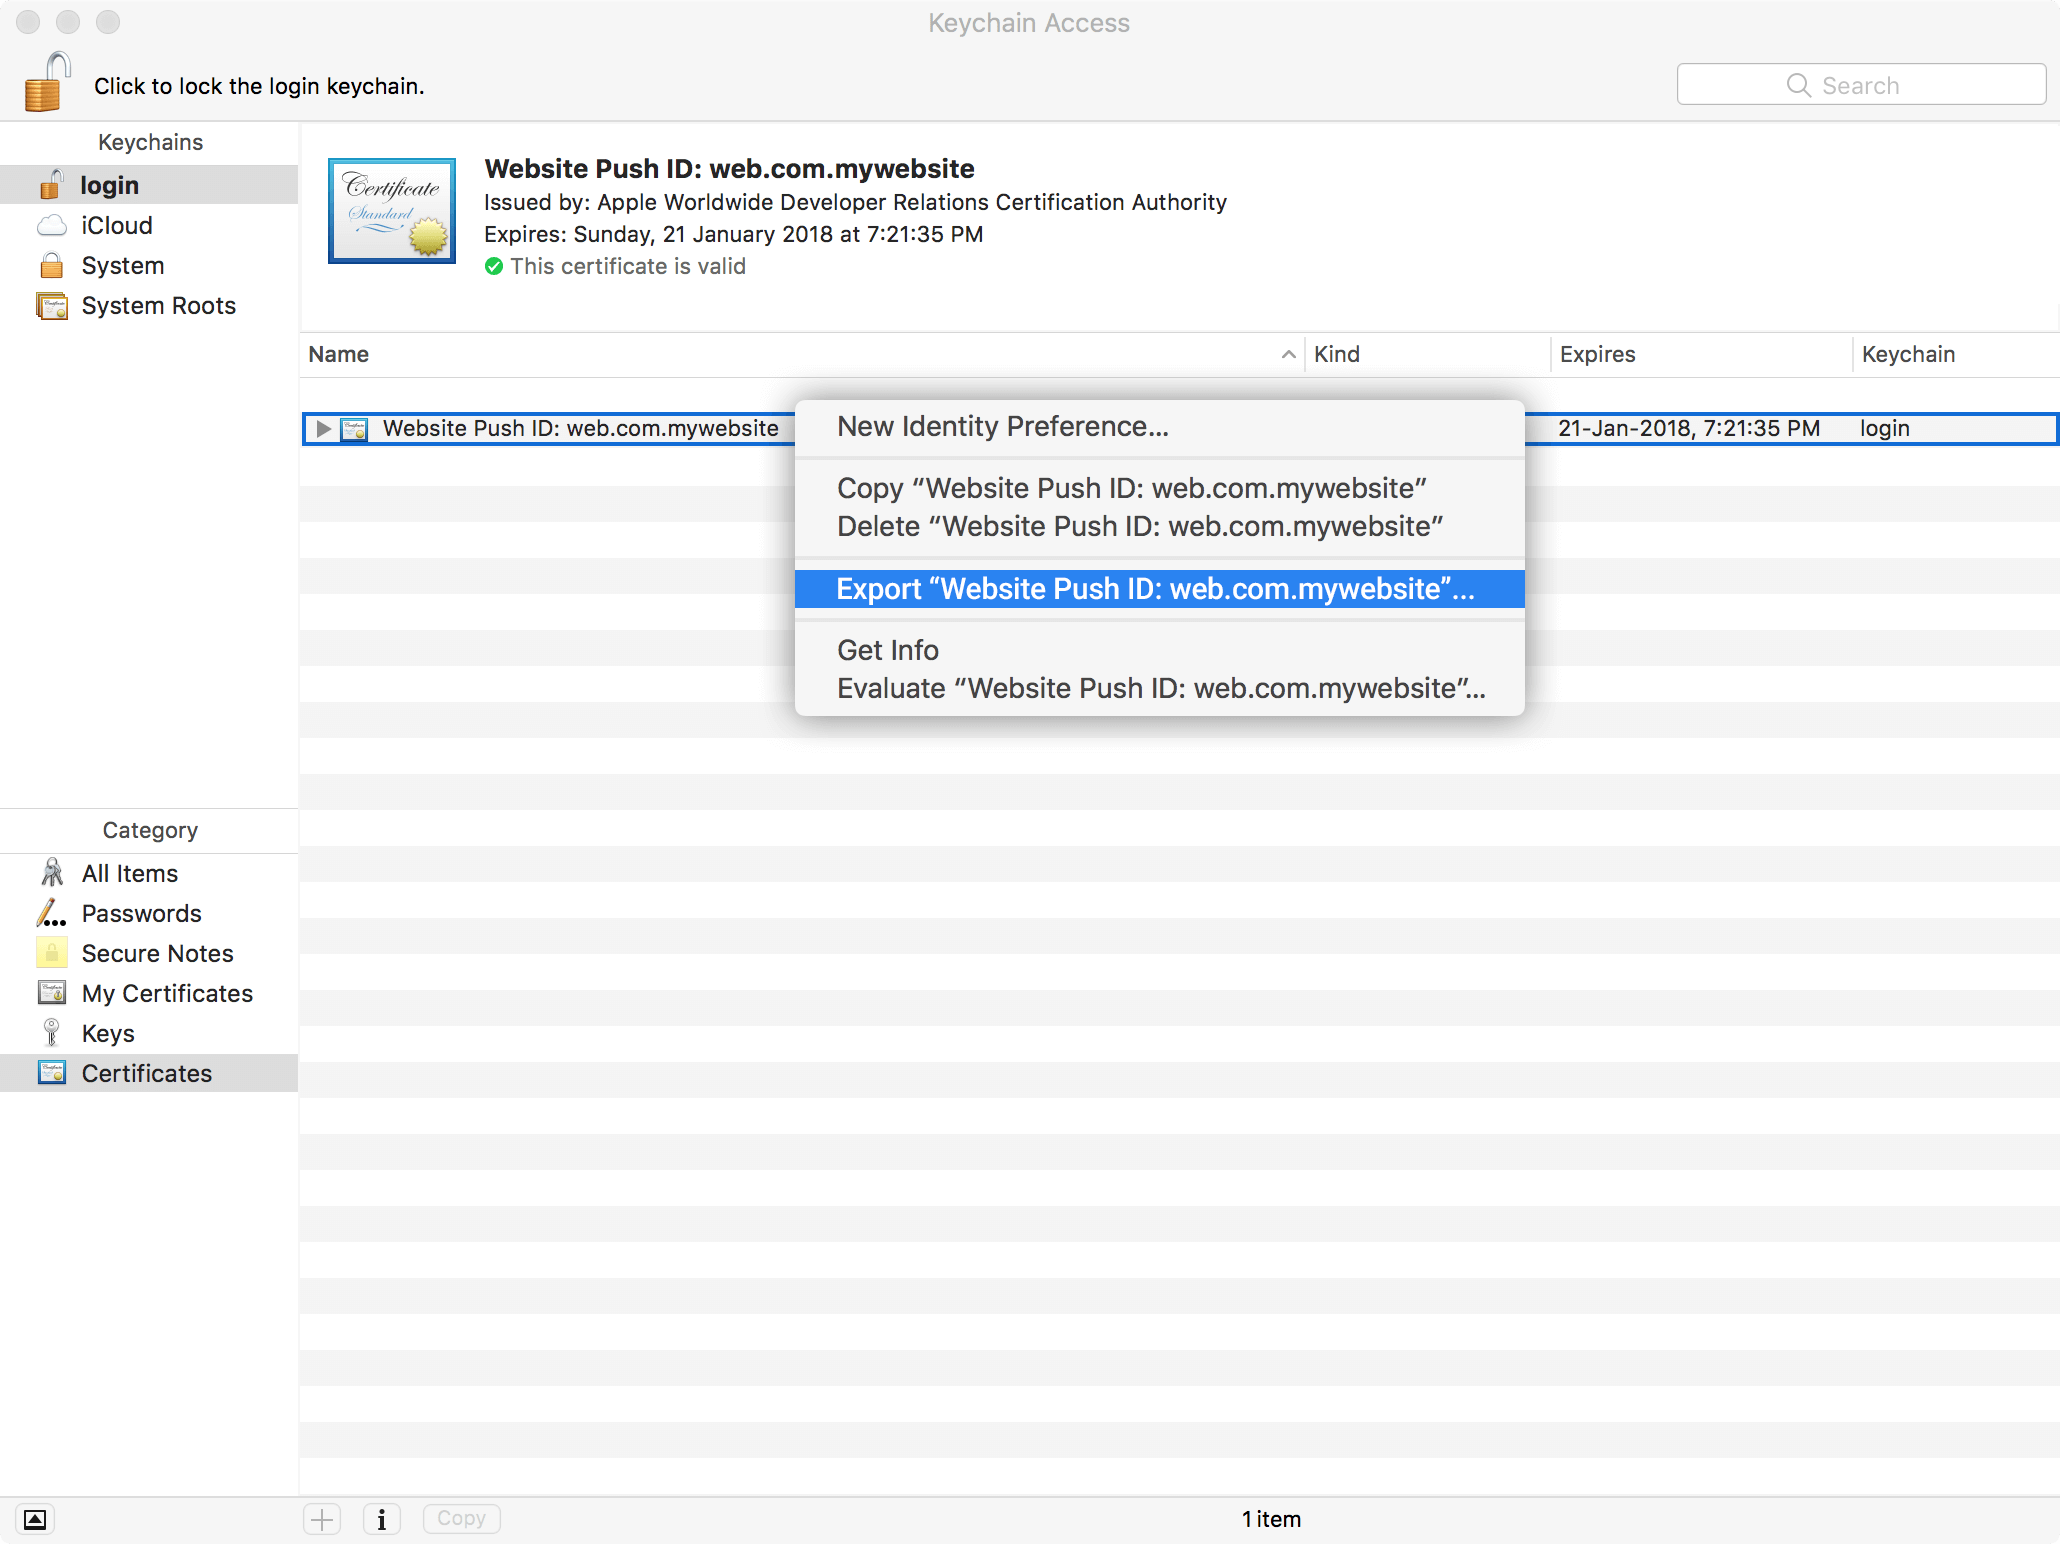
- While saving the certificate file, use the Personal Information Exchange (.p12) format.
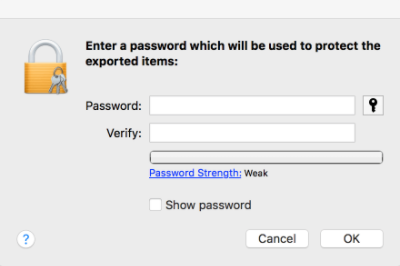
- Next, you will be prompted to enter a password, enter vtap and click on "OK". This is mandatory.
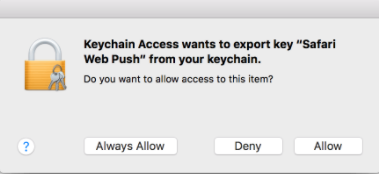
- Then click "Allow" and enter your Mac password to export the certificate to your Macbook.
STEP 4: Share the Certificate with iZooto
Share the Certificate
Once the above steps are followed, you will need to share this certificate with [email protected]
Updated over 2 years ago
