Send your First Notification
This page will explain how users can Push out notifications from the iZooto Panel using the latest "Send Notification" User Interface.
Creating a campaign has never been this easy and our latest UI is sleek, modern and efficient.
A notification has various elements to it. You can add Badges, Icons, Banner images, CTA(Click To Action) buttons & Landing URLs to make the content informative and effective. You can also make use of segments to decide and push notifications to targeted subscribers and invoke action. There are wide arrays of pre-configured segmentation templates that can be made use of.
Notifications can be pushed immediately or scheduled using recurring settings.
You can send notifications with a simple 3-step process to run effective campaigns for users. These are:
- Defining/Adding Notification Content
- Audience selection
- Time of Push
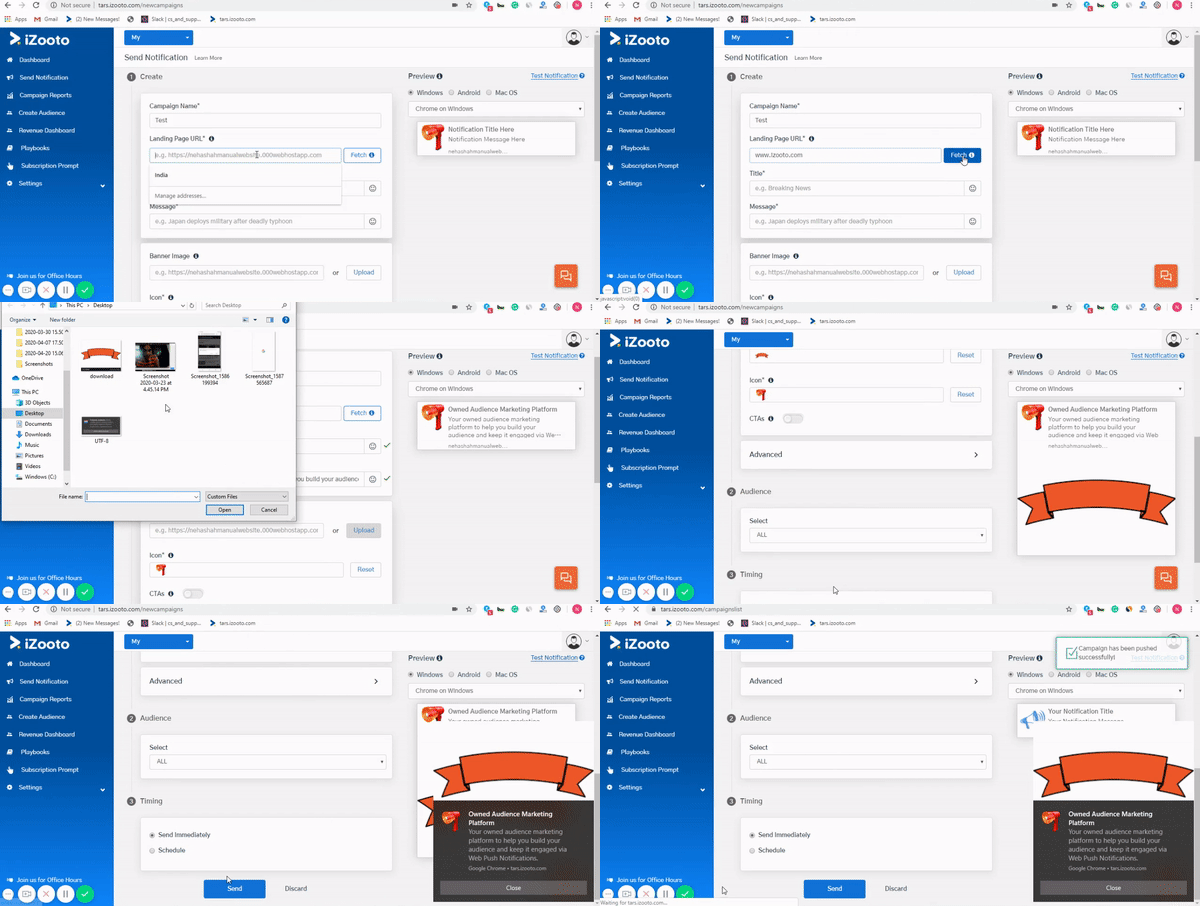
Notification Content
The first step is to Create. In this section, we will define various attributes for our notification which is to be pushed to the subscriber.
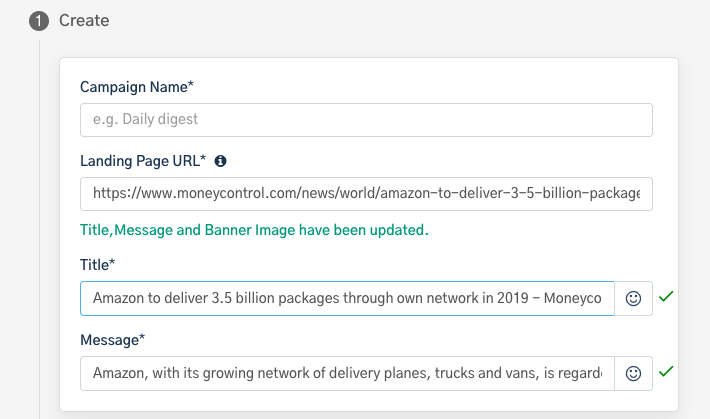
Here the following parameters need to be defined:
- Campaign Name:
Campaign Name will be used to differentiate various campaigns pushed over a period of time.
This name will be used for reporting purposes both inside the iZooto Panel and in Google Analytics, making it imperative about this being unique.
Note: this is a mandatory field
The Campaign Name should be within 128 characters. However, only the first 40 characters would be considered for the campaign name under UTM Parameters.
The Campaign Name would only be considered in English for UTM parameters. For any other language, the default value shall be passed unless any other value (in English) is manually typed.
-
Landing Page URL
This is the URL to which the subscriber would be redirected to when a notification is clicked.
iZooto has implemented the Auto-Fetch feature where once the URL is defined, the Title, Message and Banner Image would be automatically fetched and be auto-updated. You can definitely make changes to these if you so desire. -
Title:
This would be the Heading of your notification. We advise making this catchy because this is the first thing that a subscriber would read. Please note that only 40 characters would be displayed in a notification title. -
Message:
This is the main body of the notification.
Additional Inputs
-
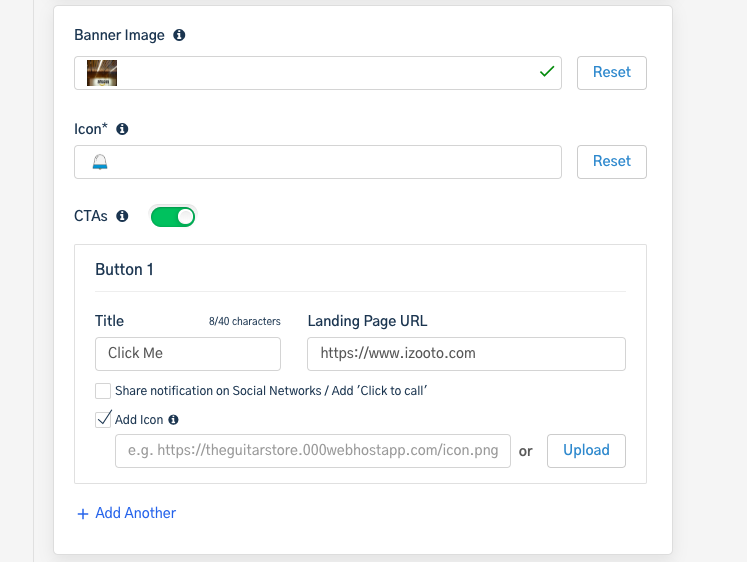
Banner Image
Banner images help you to amplify your message and make your notification visually appealing. We recommend that you use an image URL instead of uploading an image for better optimization and adherence to the aspect ratio. -
Icon
Since the recall value is maximum with a brand logo, we recommend that you use a 100x100 logo which is less than 20 KB. -
CTA
Up to 2 CTA buttons can be added. However, they are supported only on Chrome. These buttons can be even used to redirect a subscriber to a landing page, for sharing messages on social media platforms and/or triggering the dialer pad open (on mobile devices).
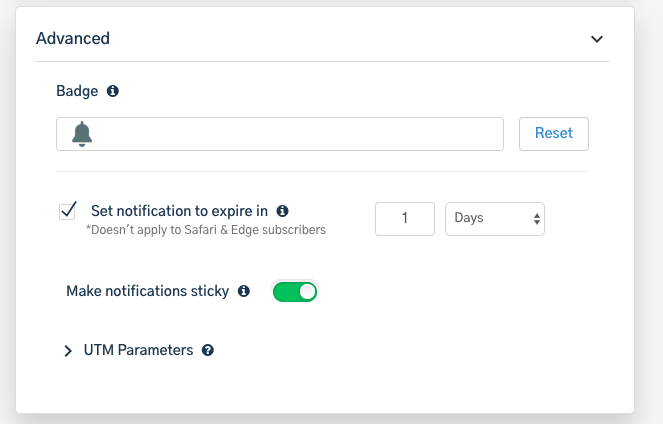
Advanced Features
-
Badge
Place a custom icon that helps highlight a notification. Works on Chrome 53+ and Opera 46+ on Android 6.0+ only. Recommended size 72x72 px. PNG file types only. -
Notification Expiry
By default, the notification expiry would be set for 1 day. However, this can be further reduced to hours and even minutes. This is extremely handy to ensure that a subscriber doesn’t get spammed when he/she is not connected to the internet for a specific duration. -
Sticky Notifications
When enabled, the notification would stay on screen until the user interacts with it. Works on Chrome only.
UTM Parameters
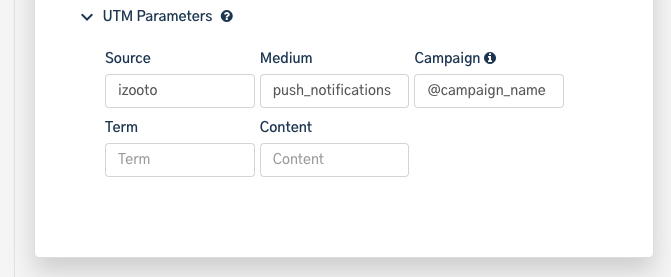
By default, the Source and Medium would have the default values of iZooto and browser_push respectively. The Campaign by default will pick the campaign name that you add at the start of the notification creation process. All parameters should be passed in English only without any special characters (including emojis).
Specifications
- If UTM parameters are disabled, no values shall be passed unless the landing URL itself has those values
- If UTM parameters are enabled but no changes are done, default values shall be passed
- If UTM parameters are enabled while the landing URL has a different set of UTMs, the latter would be passed
- If UTM parameters are enabled and the default values are edited, these would get passed in spite of the landing URL having a different set of UTMs
- Once the notification is ready, click on the ‘Send Test’ to see how the actual notification would look like (for Desktop Chrome only).
Audience Selection
The audience segment to whom you wish to push the campaign needs to be selected here. Choose the correct audience from the drop-down menu. In case you have custom audiences created, you'd be able to select them too from here.

Time Of Push
After selecting the audience, you can either push the campaign directly or schedule it for later.

A campaign can be scheduled later for a particular date and time, multiple date and time or set to recur every day, week or month.
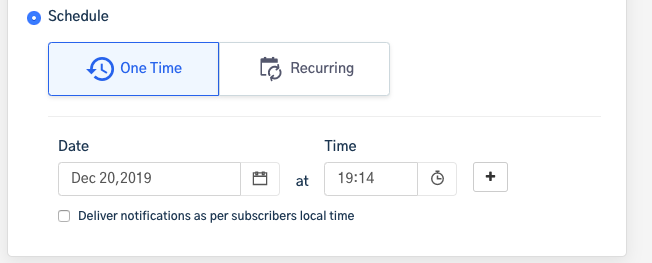
One Time
The campaign would get pushed just once on a particular date and time.
Multiple Dates
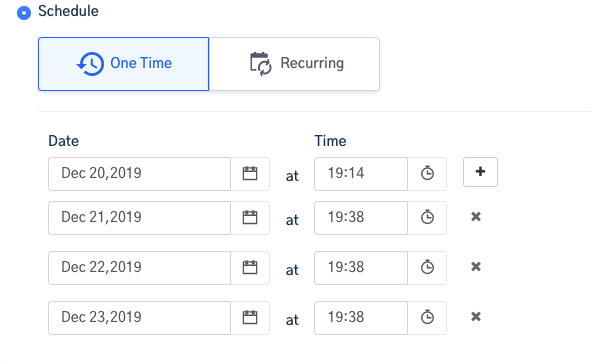
Inside the same window, you can click on the '+' icon next to the Time to add another date on which you want to push the campaign.
The campaign would get pushed more than once on the specified date and time mentioned.
Recurring
The campaign would get pushed at regular intervals either daily, weekly or monthly at the specified time. By default, the end time for these campaigns would be set to ‘Never End’.
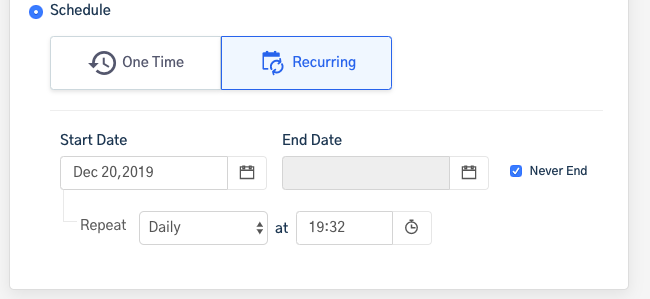
For weekly campaigns, the day of the week needs to be chosen.
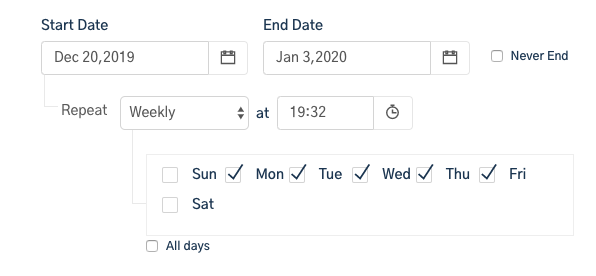
And for the monthly recurring campaigns, the specific dates on which the campaign should run needs to be selected.
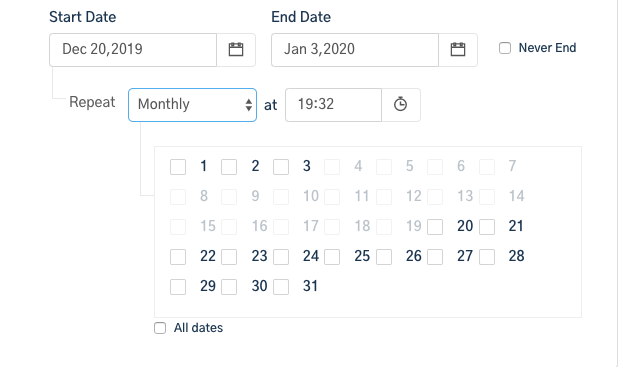
After the appropriate time is selected, click on the button ‘Schedule for Later’.
Updated almost 6 years ago
